Creating an Import Package
After you've created the export.zip file, you can import the objects by using the Import Package option under Solution Promotion feature at the target environment. A successful import completes the migration process, and you'll be able to access all the objects in your new environment.
 | You may want to configure the solution promotion properties described in the Solution Promotion Configuration section on the Microservice Settings - Webrunner page before you begin the import operation. |
|---|
Prerequisites
Before starting the import process, make sure that you have the following:
- Execute permission on Solution Import activity. To know more, refer to the documentCreating a Role.
- The export ZIP file ready.
- Optional: The retain.xml file configured to retain the existing activities at the target environment while importing the new objects. The objects can be retained at service and field level. You will find retain.xml in the <shared>/migration/template folder in the cluster where the environment is deployed. For more information, refer to Structure of Retain XML.
Steps to import the objects
You can import the objects in the target environment by following the steps given below.
-
Log in to the environment to which you want to import the objects.
-
In the left sidebar, click
 (Solution Promotion).
 -
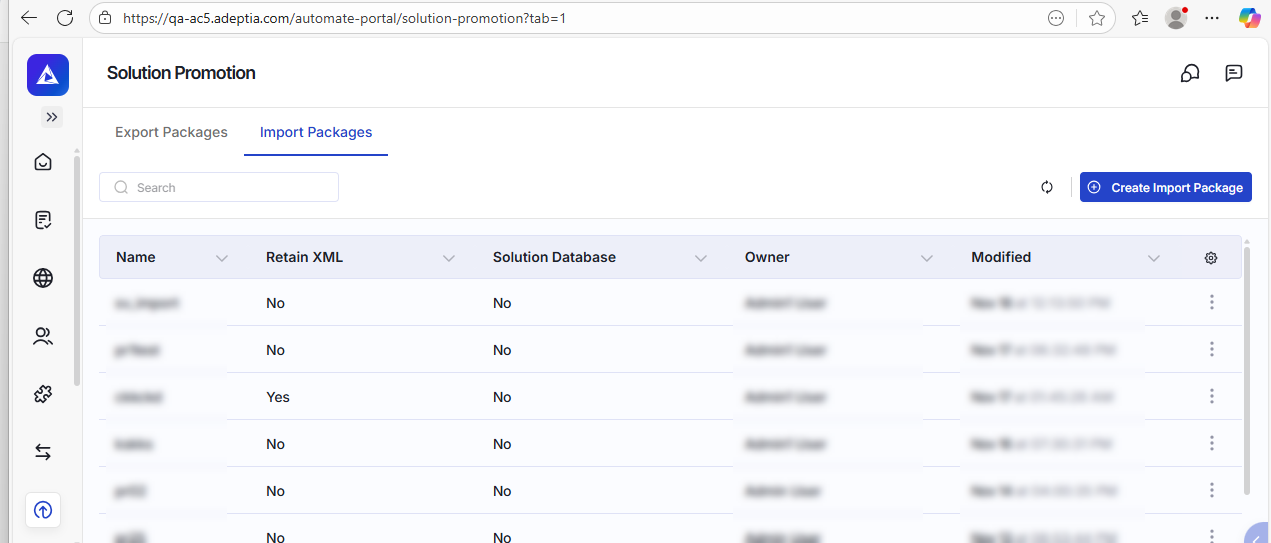
On the Solution Promotion page, select the Import Packages tab.
-
Click Create Import Package.
-
On the Create Import Package screen, do the following:
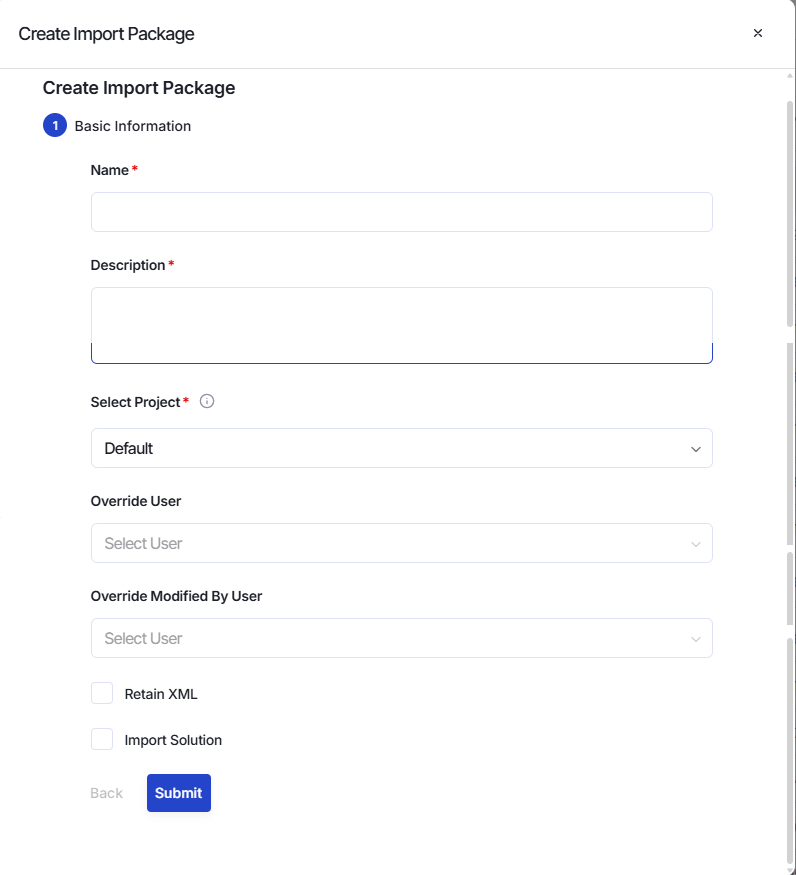
- Provide a name for the import package.
- Provide a description for the import package.
- In the Select Project field, select the project where you want to keep the import package.
- In the Override User field, select the user to whom you want to provide ownership of the activities.
- In the Override Modified By User field, select the user who will be reflected in the Modified By field of every activity after the deployment.
- Select the Retain XML checkbox if you want to retain the activities at the target environment, and then click Browse to select the required retain.xml file.
- Select the Import Solution checkbox if you want to import data to the solution database.
- If you have selected Import****Solution **** checkbox, continue following the next steps. Else, click Submit to complete creating the import package that gets listed under the Import Packages tab on the Solution Promotion page, and then follow steps 9 through 11 to import the objects.
-
Click Next.
-
In the Database Infosection, provide the following details of the solution database to which you want to import data.
Type Enter the type of database. For example MySQL, SQL, etc. Server Enter the hostname of the database server. Port Enter the port number of the database server. Name Enter the name of the database. Username Enter the username to access the database. Password Enter the password to access the database. -
Click Submit to complete creating the import package that gets listed under the Import Packagestab on the Solution Promotionpage.
-
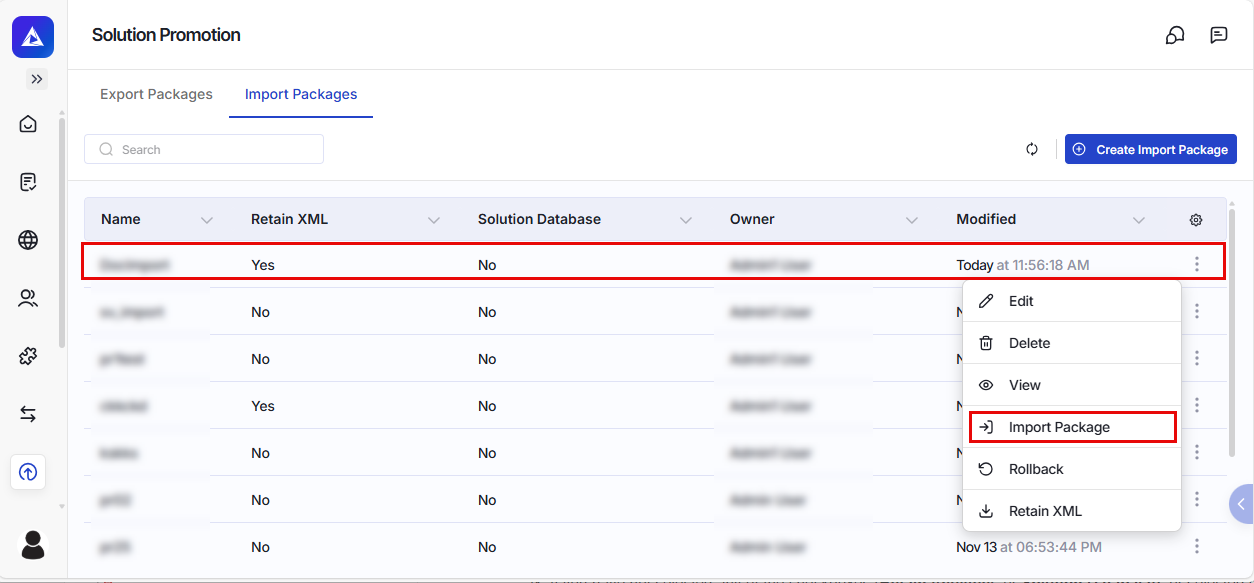
Click
 (More) against the package, and then click Import Package.
-
On the Import Package screen, click
 to browse and select the export ZIP file.
 -
Click Execute to execute the import package. This imports the objects to the target environment and also creates a corresponding Rollback ZIP that can be downloaded from Dashboard > Solution Promotion. To know more on details available in the Solution Promotion page in Dashboard, refer to this document.

Apart from using the Import Package option to execute the import package, you can also perform the following actions on the package from its (More) menu**:**
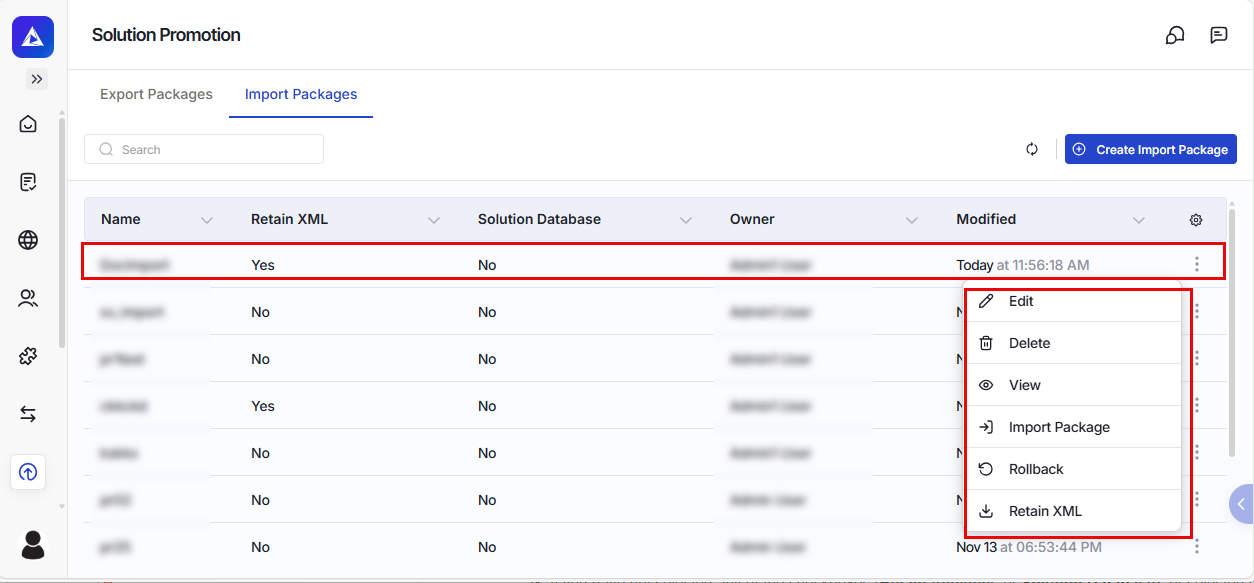
- Rollback the import operation
- Edit, delete, or view the import package
- Download the retain.xml file (if used while importing the objects)
Related pages
Dashboard
Creating a Role