Creating an Export Package
Adeptia provides a intuitive interface to create an export package using the Export Package option under the Solution Promotion feature. The export package contains the definition of the objects you want to migrate. Once created, you can use it to generate the export.zip file that contains the exported objects.
 | You may want to configure the solution promotion properties described in the Migration Configuration section on the Microservice Settings - Webrunner page before you begin the export operation. |
|---|
Prerequisite
- The user role with which you log in to the source environment must have the required permissions on the Solution Export entity. To know more, refer to the documentsCreating a Roleand Permission model.
Steps to create export ZIP file
You can create the export package and generate the export.zip by following the steps given below.
-
Log in to the application's environment from where you want to export the objects.
-
In the left sidebar, click
 (Solution Promotion).
 -
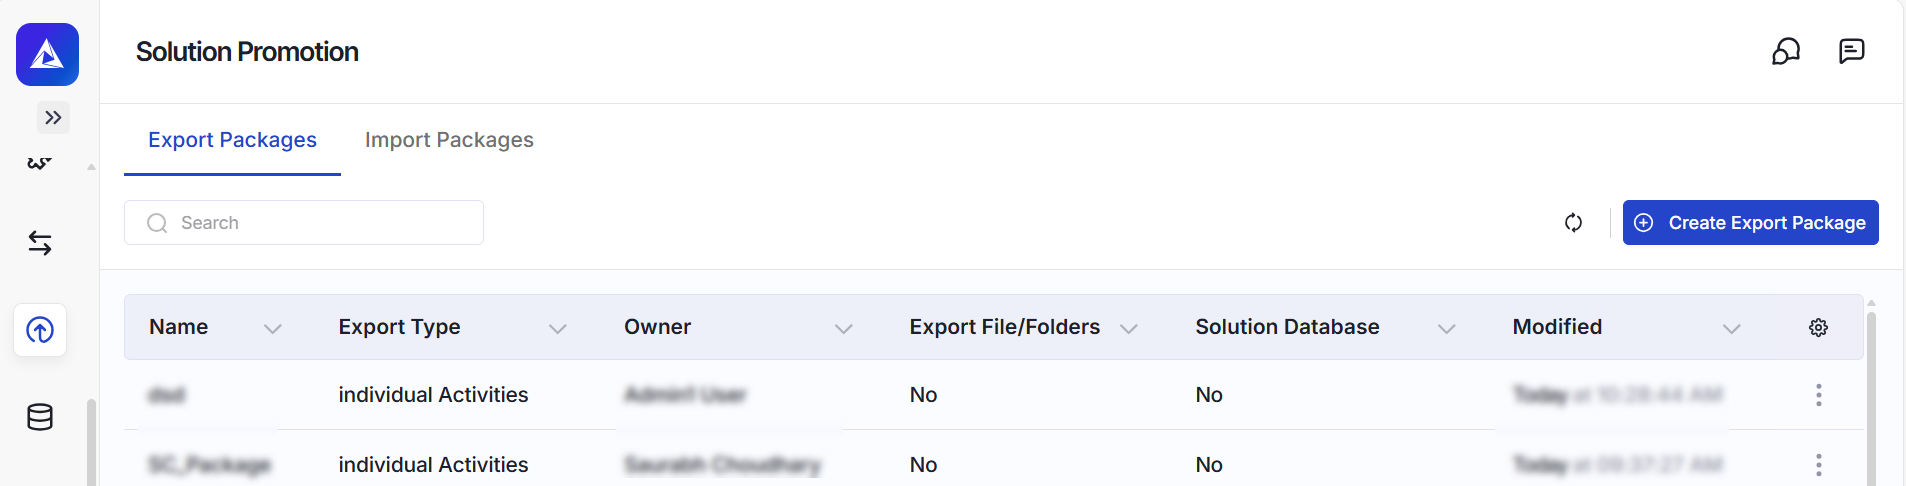
On the Solution Promotion page, select the Export Packages tab.
-
Click Create Export Package.
-
On the Create Export Package screen, do the following:
- Provide a name for the export package.
- Provide a description for the export package.
- Select the project where you want to keep the export package.
- Select the Export Files/Folders checkbox if you want to select and export the additional files/folders in the steps that follow.
- Select the Solution databasecheckbox if you want to export data from database tables in the steps that follow.
-
Click Next.
-
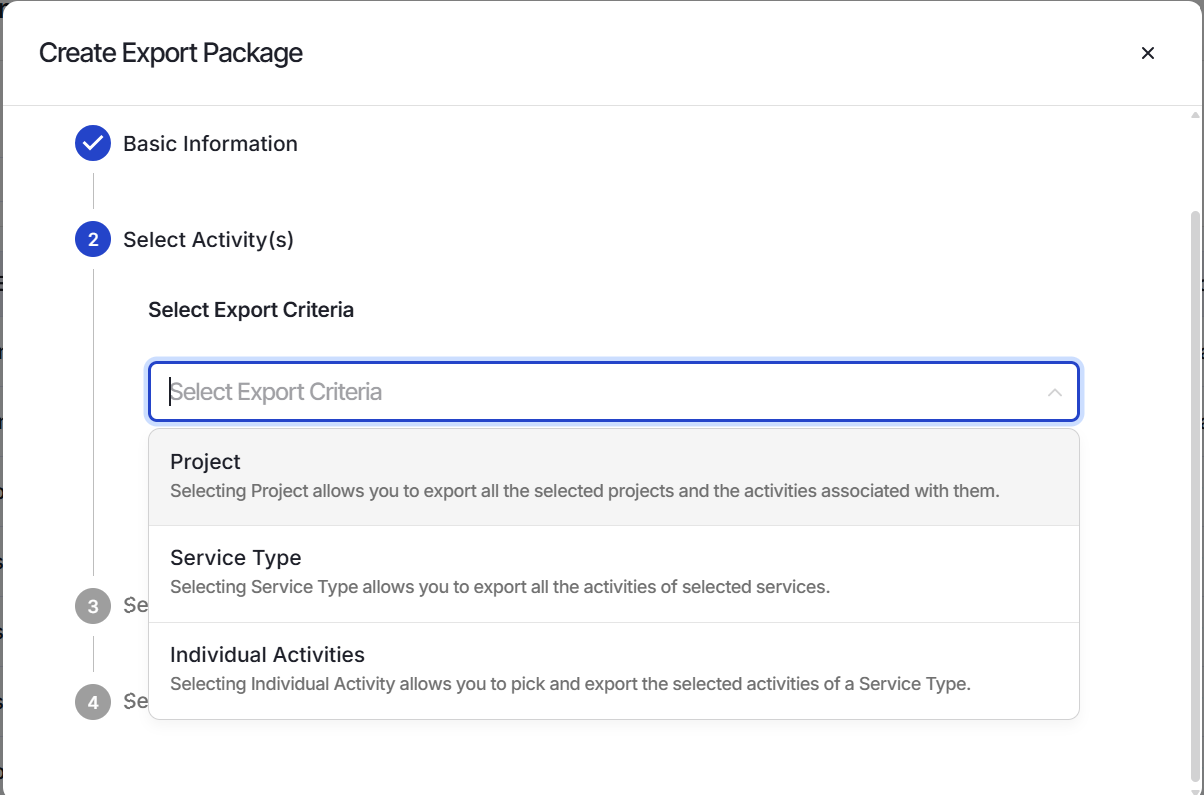
In the Select Export Criteria field, select the criteria based on which you would like to export the objects.
Project Allows you to export all the selected projects and the activities associated with them. Service Type Allows you to export all the activities of selected services. Individual Activities Allows you to pick and export activities of a selected Service Type. -
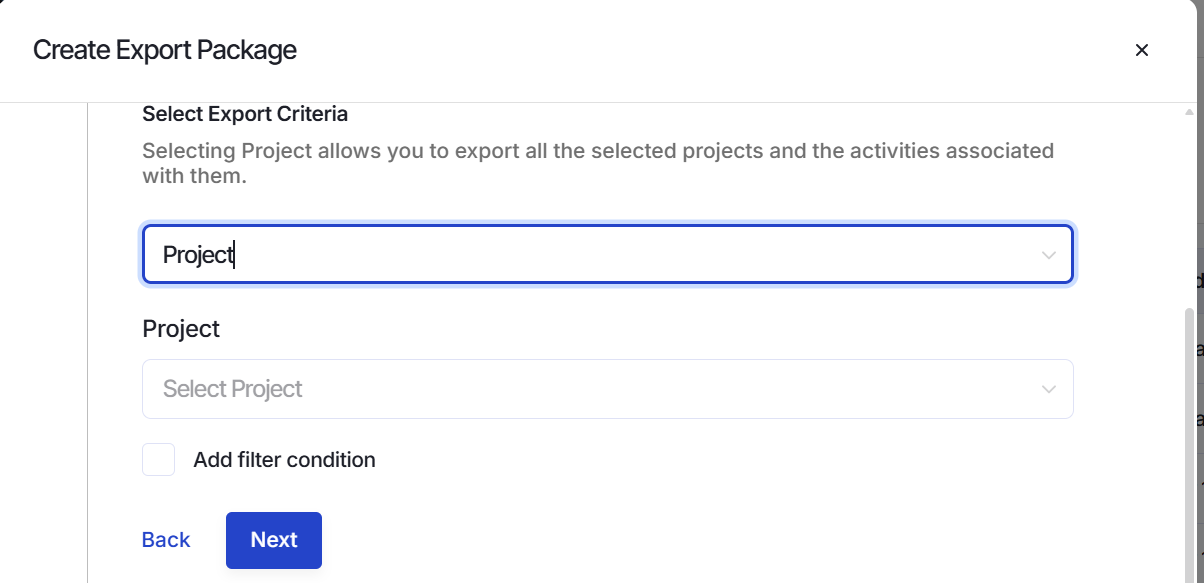
Optional: For Project and Service Type export criteria, select the Add Filter Conditioncheckbox to further filter the activities to be exported based on their last modified date.
-
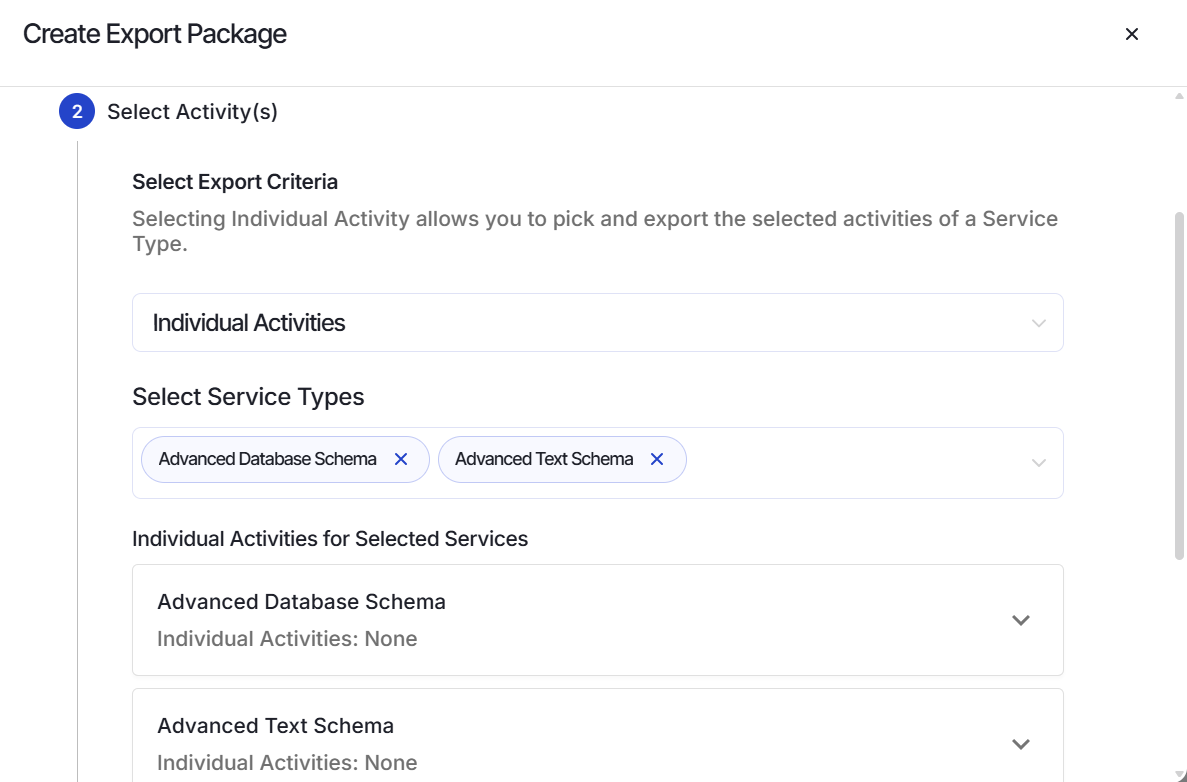
For Individual Activities export criteria, do the following:
-
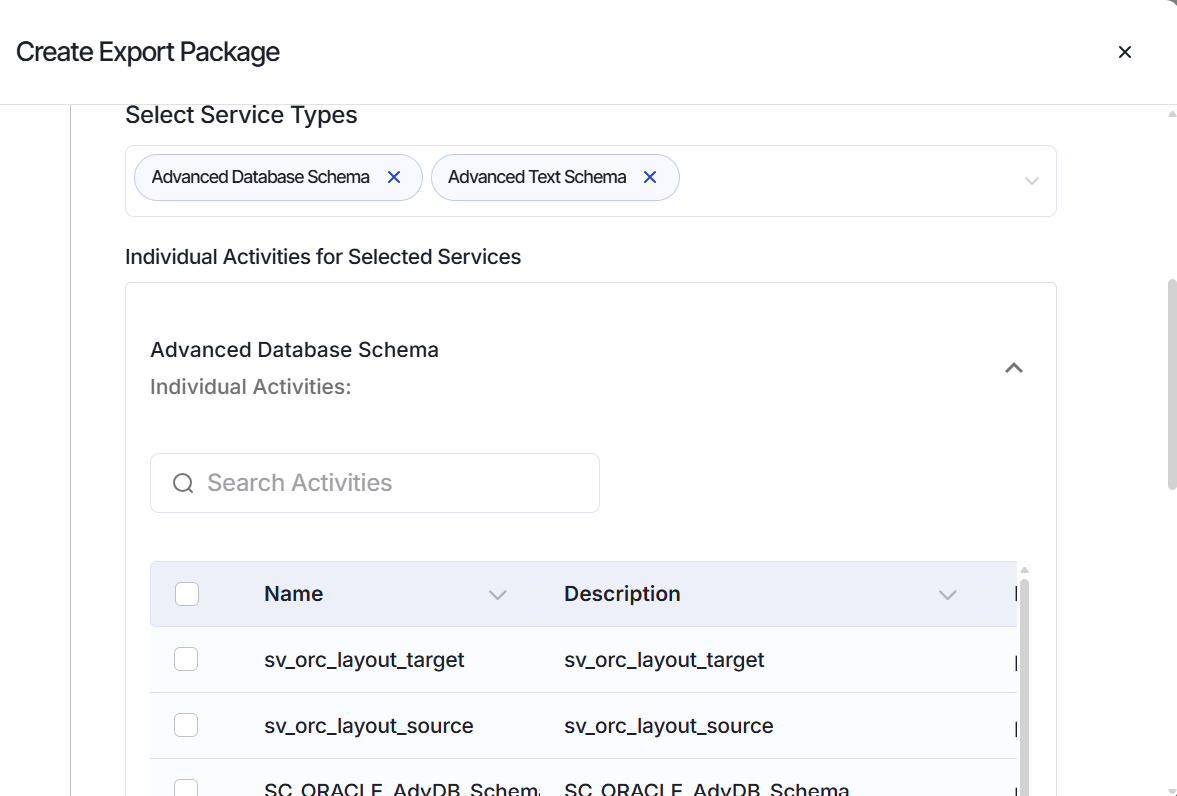
Select one or multiple service types in the Select Service Types field . The selected service types get listed under the Individual Activities for Selected Services section.
-
In the Individual Activities for Selected Services section, expand the selected service type to select the activities belonging to that Service Type.
To find a specific activity, type its name into the Search Activities search bar.
-
 10. Click Submit to complete creating the export package that gets listed under the Export Packages tab on the Solution Promotion page, and then follow step 13 to create the export ZIP file. Else, click Next to proceed -- If you have selected either of the checkboxes Export Files/Folders, Solution database, or both at step 3(d) and 3(e) above, you will need to complete the following additional steps for creating the export package.
11. If you have selected the checkbox Solution database, do the following. Else, skip to the next step.
10. Click Submit to complete creating the export package that gets listed under the Export Packages tab on the Solution Promotion page, and then follow step 13 to create the export ZIP file. Else, click Next to proceed -- If you have selected either of the checkboxes Export Files/Folders, Solution database, or both at step 3(d) and 3(e) above, you will need to complete the following additional steps for creating the export package.
11. If you have selected the checkbox Solution database, do the following. Else, skip to the next step.
-
In the Database Info section, provide the following details of the database containing the tables that you want to export.
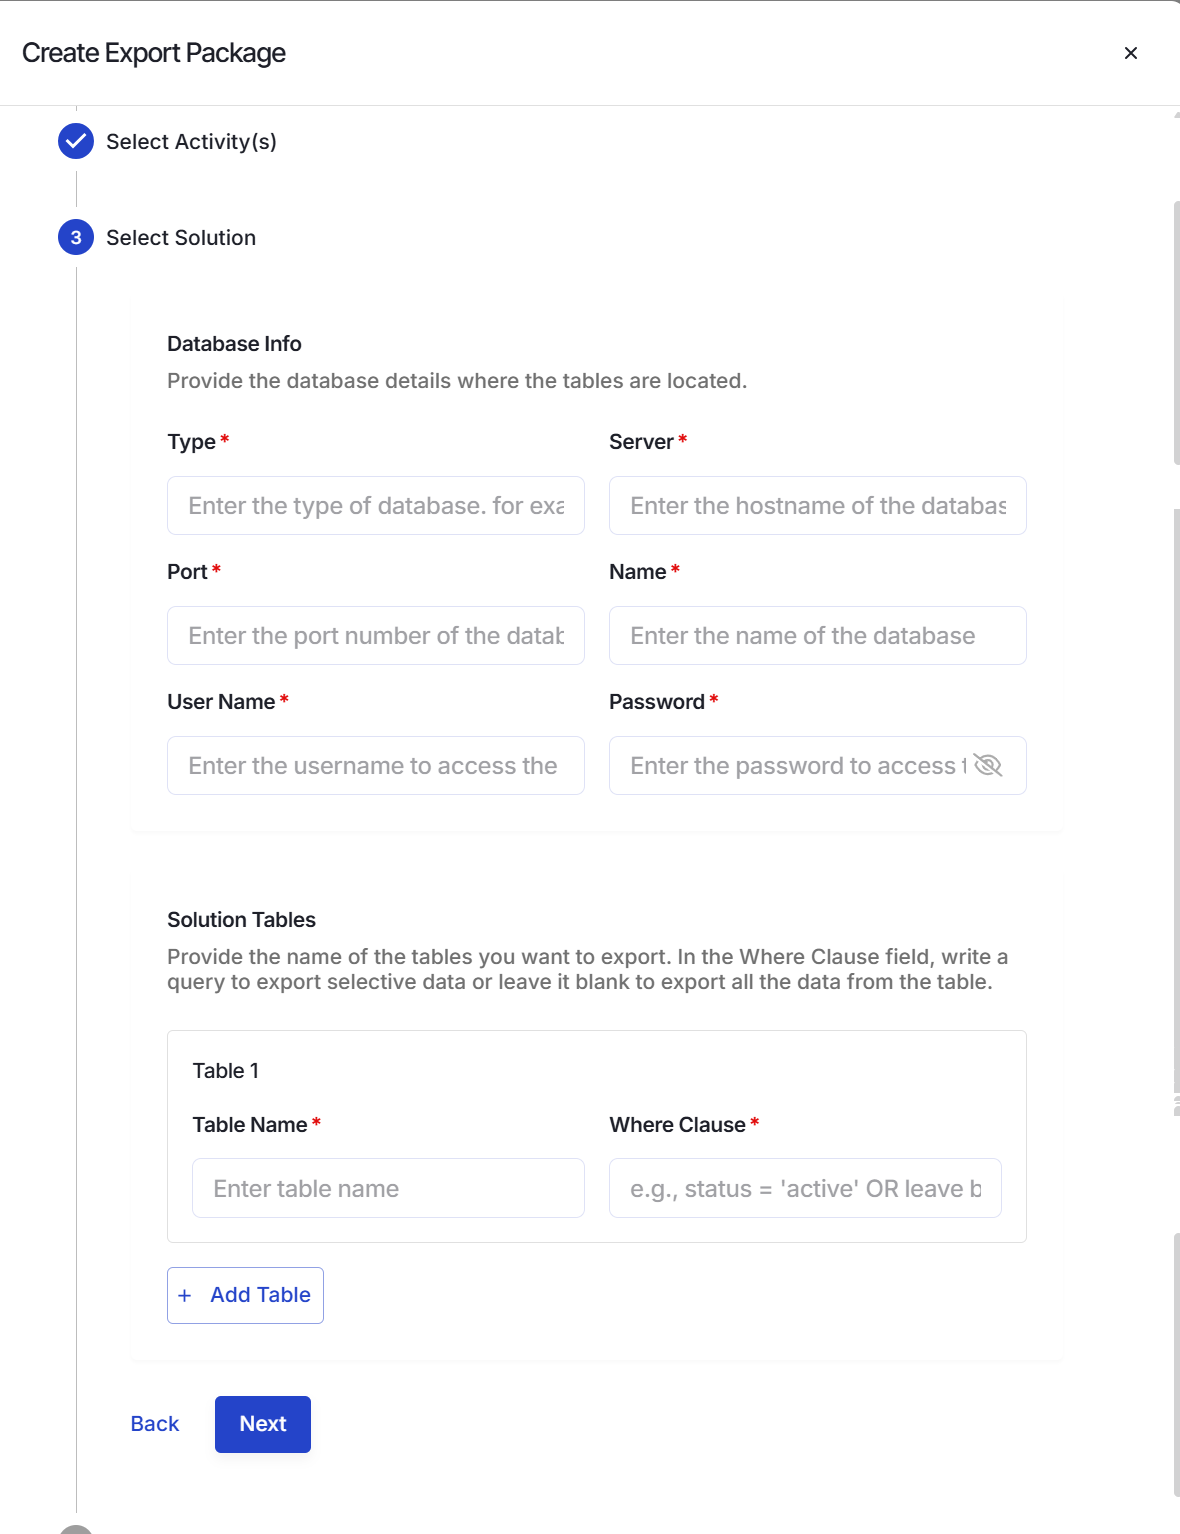
Type Enter the type of database. For example MySQL, SQL, etc. Server Enter the hostname of the database server. Port Enter the port number of the database server. Name Enter the name of the database. Username Enter the username to access the database. Password Enter the password to access the database. -
Optional: In the Solution Tables section, you can further apply the conditions for exporting database tables.
To export more DB tables, click  .
.Table Name Enter the name of the tables you want to export. Where Clause Write a conditional query to export selective data or leave it blank to export all the data from the table. -
If you have selected the checkbox Export Files/Folders, on the Select Files/Folders step, do the following. Else, skip to the next step.
-
Select Folder to export folders or sub folders within them, and provide the details as described in the following table.
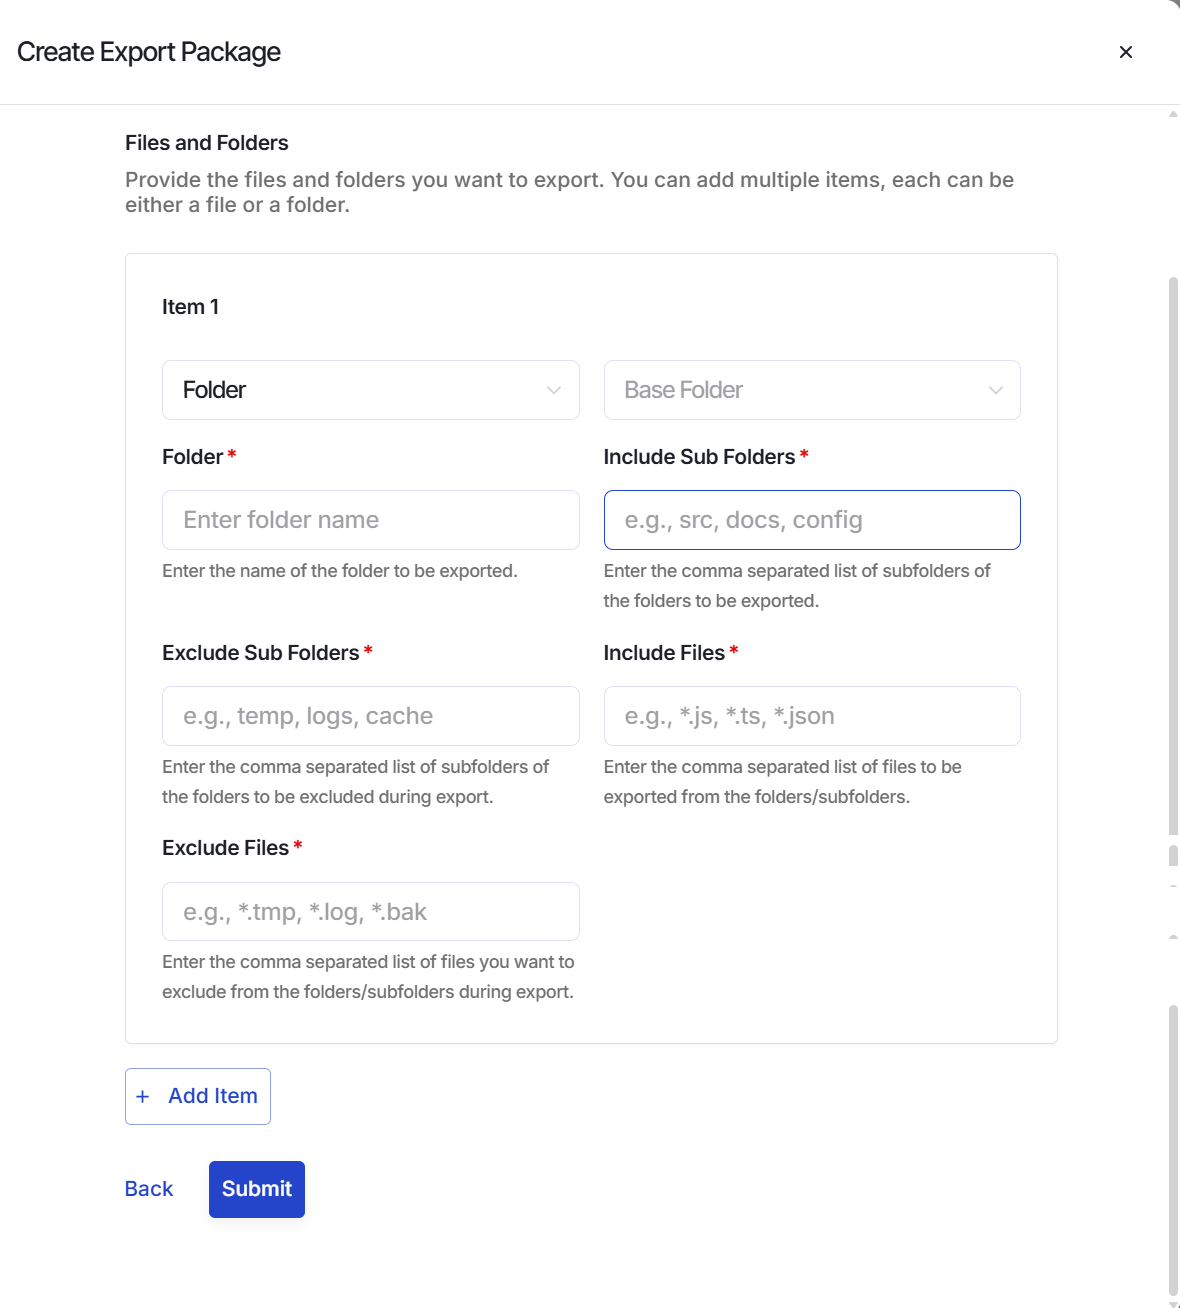
Base Folder Base folder is the mounted folder in the PVC. Folder Enter the name of the folder to be exported. Include Subfolder Enter the comma-separated list of subfolders of the folders you want to export. Exclude Subfolder Enter the comma-separated list of subfolders of the folders you want to exclude during export. Include Files Enter the comma-separated list of files you want to export from the folders/subfolders. Exclude Files Enter the comma-separated list of files you want to exclude from the folders/subfolders during export. -
Select File to export individual or multiple files directly, and provide the details as described in the following table.
Base Folder Base folder is the mounted folder in the PVC. File Enter the name of the file to be exported. -
Click
 to export more files or folders.
-
-
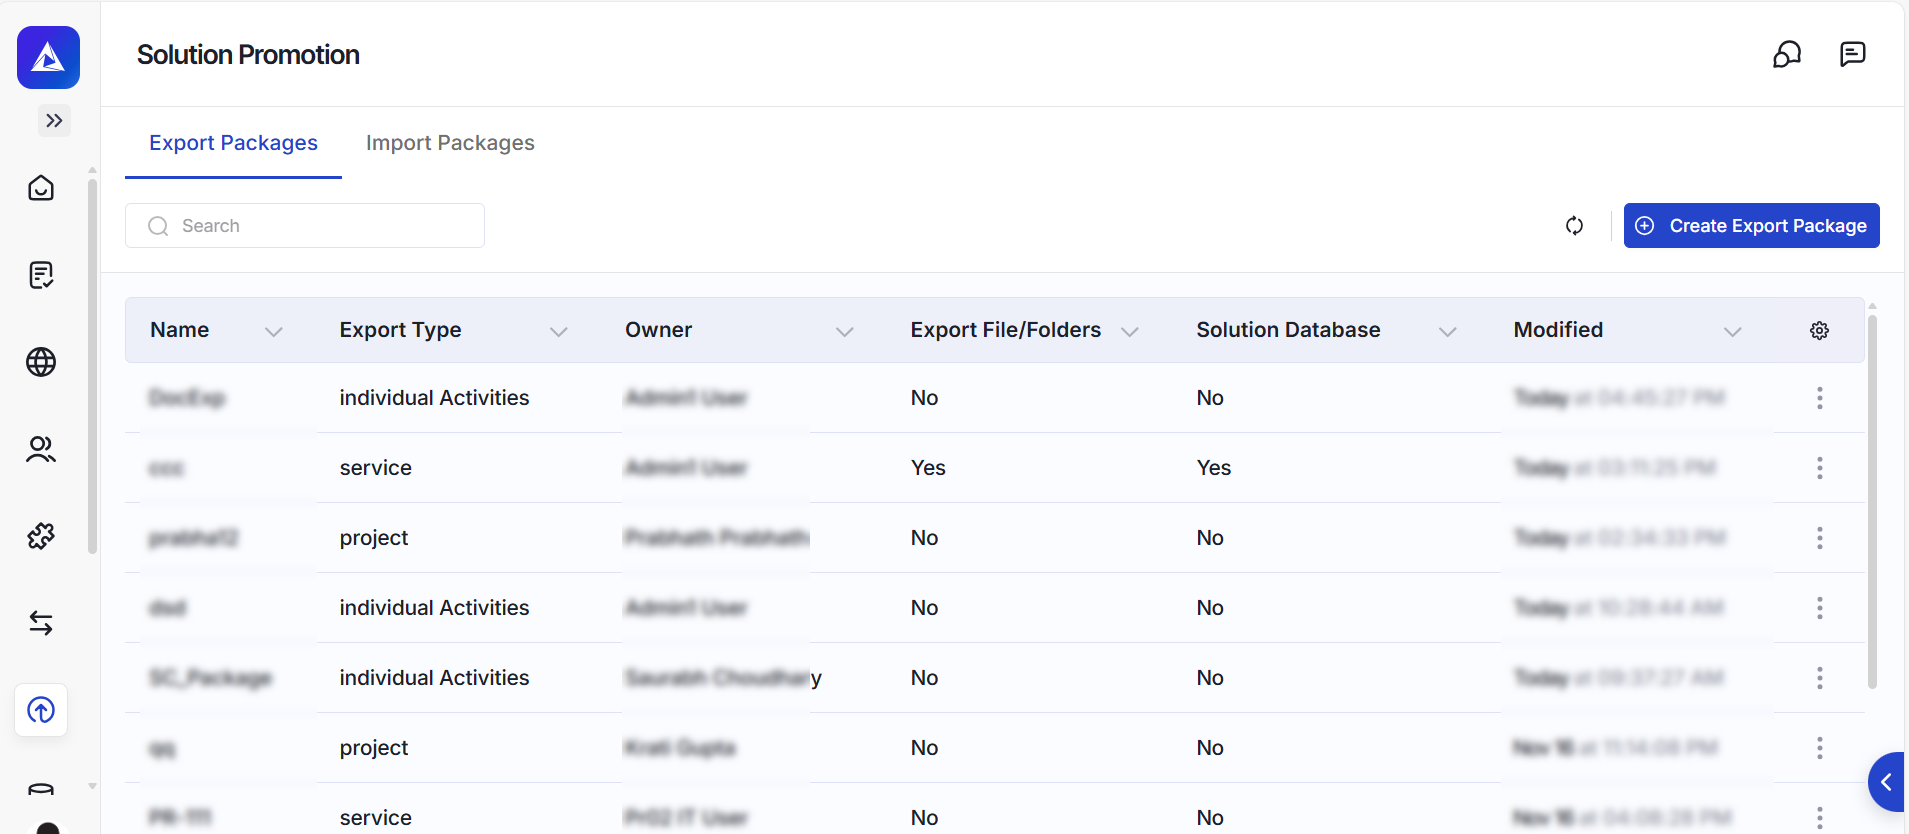
Click Submit. This creates the export package that gets listed under the Export Packages tab on the Solution Promotion page.
-
Click
 against the package, and then click Generate Package.
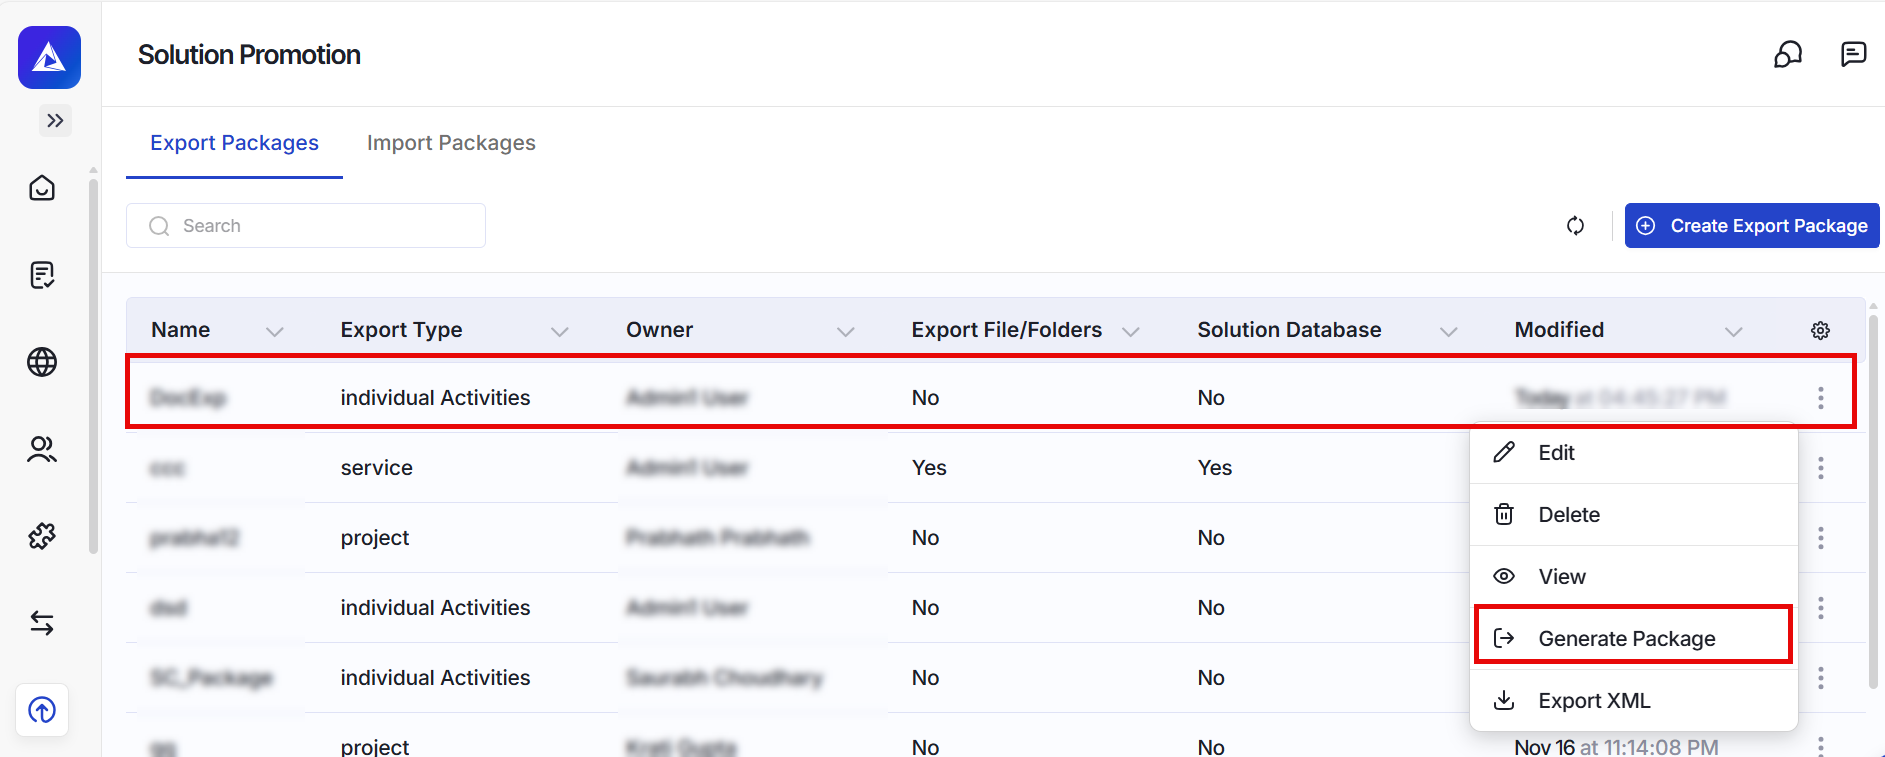
You can also perform the following actions on the package from its More menu**:**
• Download the Export XML file containing the references to the objects you want to export.
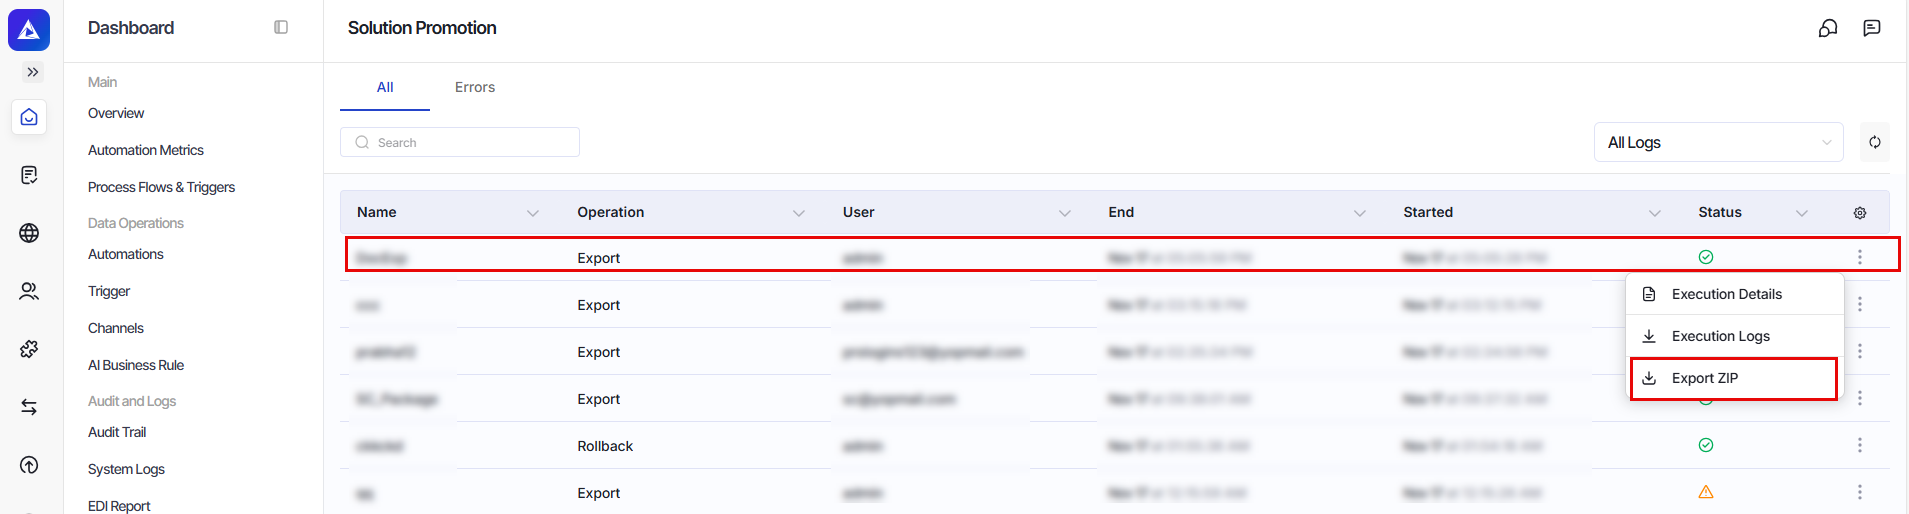
• Edit, delete, or view the export package.This creates the export.zip file – containing the objects to be migrated -- which can be used for importing the objects at the target environment. You can download this file by navigating as follows: Dashboard > Solution Promotion.
Related pages
Dashboard
Creating a Role
Permission model