Setting up the SQL DB
Setting up the Log and Backend databases on SQL DB comprises of the following actions:
- Connect to Azure SQL Server
- Verify the connection
- Create Log and Backend DB Schemas and assign privileges
- Best practices to follow
Connect to Azure SQL Server
-
Launch Microsoft SQL Server Management Studio (SSMS).
-
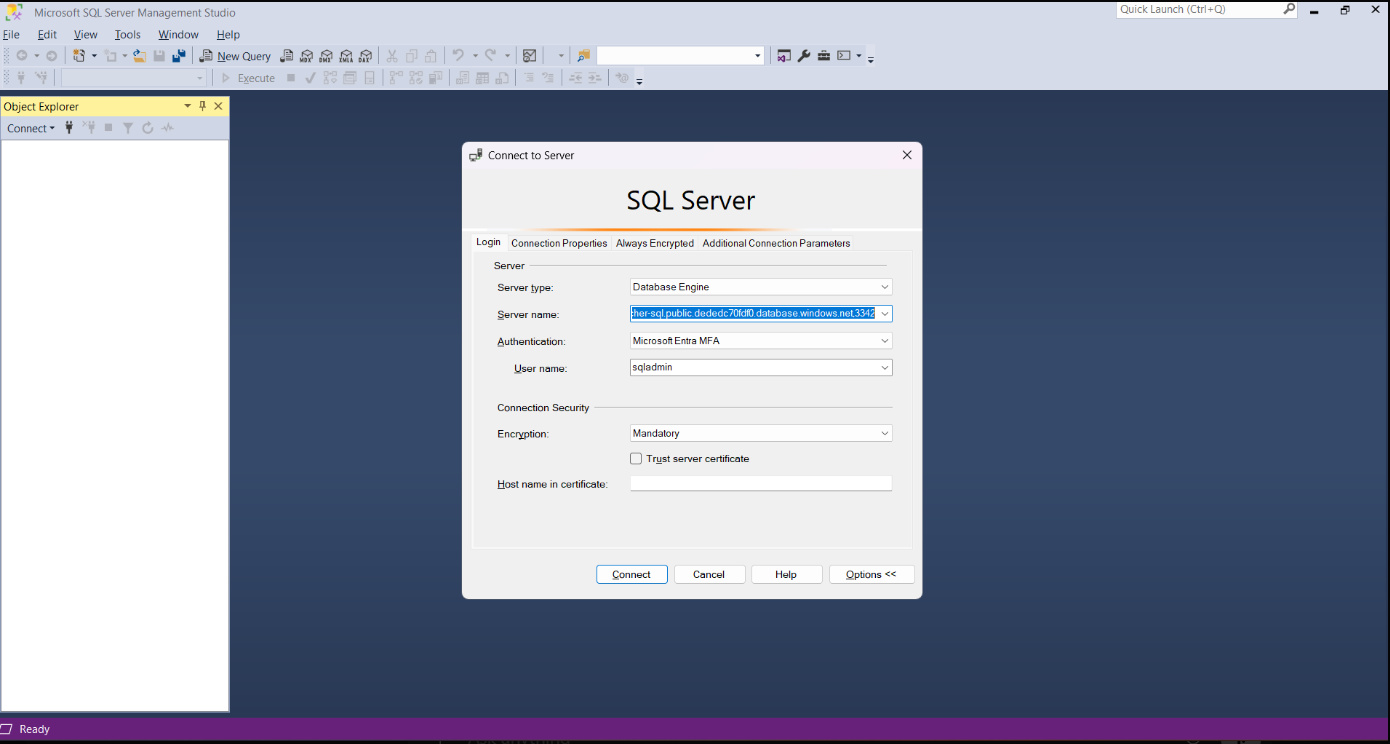
In the Object Explorer, click Connect → Database Engine.
-
The Connect to Server window opens.
-
Fill in the connection details:
- Server type:
Database Engine - Server name:
- Server type:
Code
<server-name>.database.windows.net,3342
(Example: her-sql.public.dededc70fdf0.database.windows.net,3342)
3. Authentication: Microsoft Entra MFA (or Azure AD authentication as per your setup)
4. User name: sqladmin (or your Azure SQL admin user)
5. Under Connection Security:
- Encryption:
Mandatory - Leave Trust server certificate unchecked (recommended)
- Click Connect.
- Complete the MFA login if prompted.
Verify the connection
-
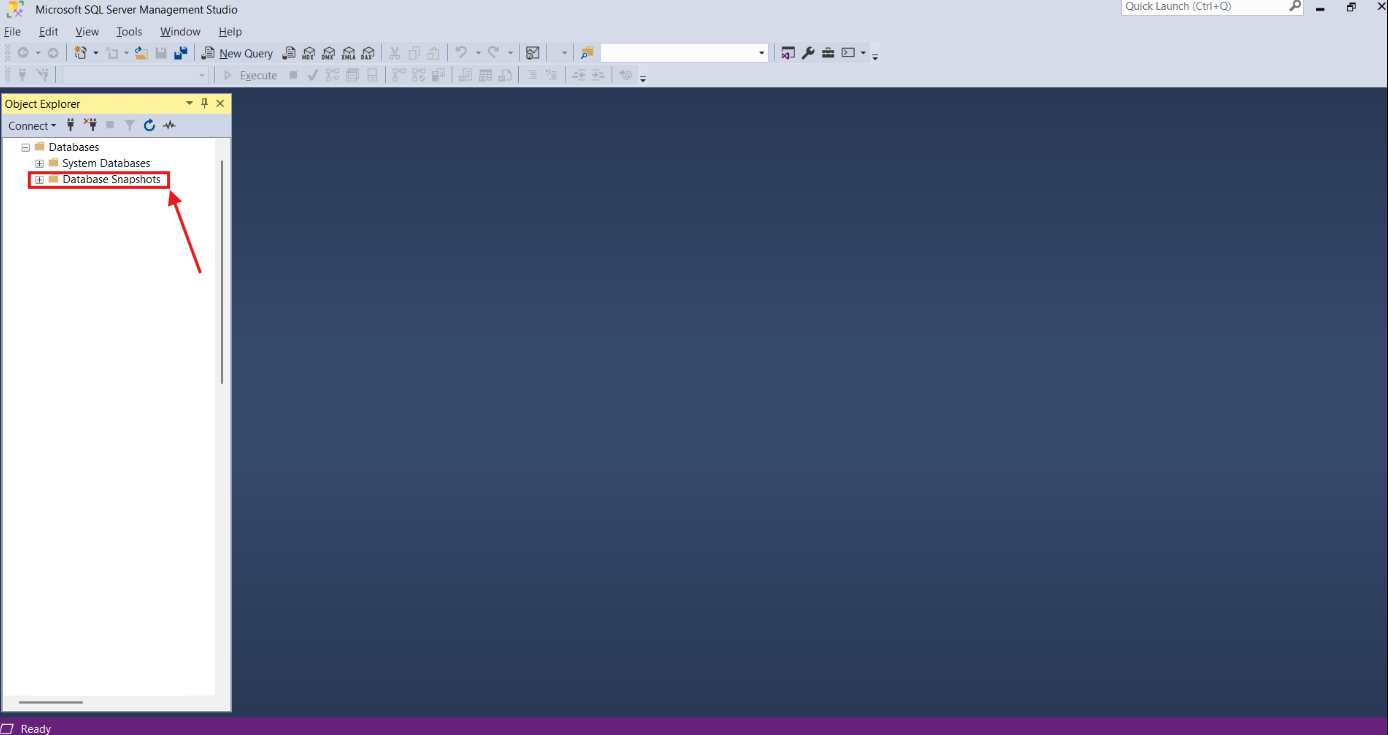
After successful login, the Object Explorer refreshes.
-
Expand the connected server node.
-
Expand Databases.
-
You should see:
- System DatabasesThis confirms that the connection to Azure SQL Server is successful.
- System DatabasesThis confirms that the connection to Azure SQL Server is successful.
Create Log and Backend DB Schemas and assign privileges
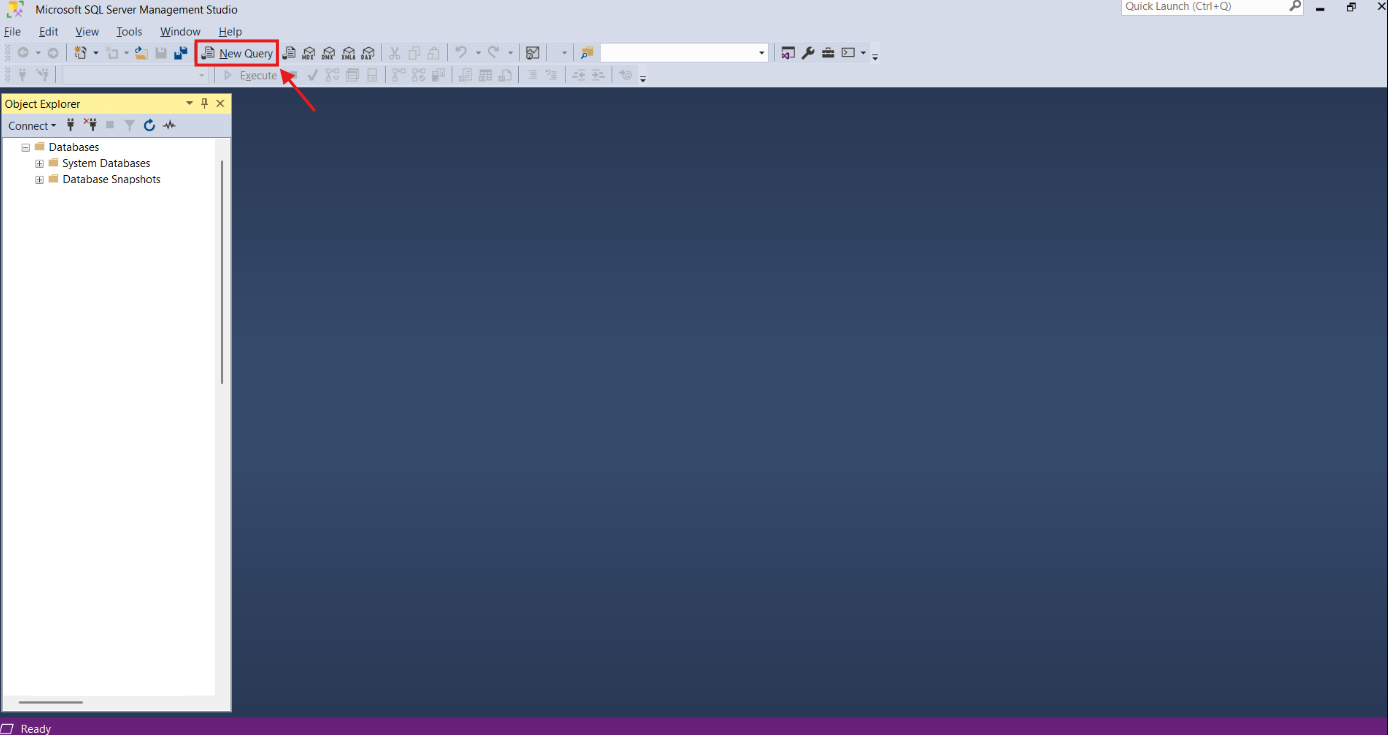
- In Object Explorer, right-click on the server or a specific database (e.g.,
master). - Click New Query.
- A new SQL editor window opens.
- Ensure the correct database is selected in the dropdown (top-left of query window), e.g.:
Code
master
-
The status bar at the bottom should show:
- Connected
- Server name
- Logged-in user
-
In the query editor, run the SQL commands as shown in the following example:
Code
create user rancherbackend identified by "Rancher@123";

ALTER USER rancherbackend quota unlimited on USERS;

GRANT CREATE SESSION TO rancherbackend;
GRANT CREATE TABLE TO rancherbackend;
GRANT CREATE ANY TABLE TO rancherbackend;
GRANT ALTER ANY TABLE TO rancherbackend;
GRANT DROP ANY TABLE TO rancherbackend;
GRANT DELETE ANY TABLE TO rancherbackend;
GRANT SELECT ANY TABLE TO rancherbackend;
GRANT UPDATE ANY TABLE TO rancherbackend;
GRANT INSERT ANY TABLE TO rancherbackend;
GRANT CREATE ANY INDEX TO rancherbackend;
GRANT ALTER ANY INDEX TO rancherbackend;
GRANT DROP ANY INDEX TO rancherbackend;
GRANT CREATE PROCEDURE TO rancherbackend;
GRANT CREATE ANY PROCEDURE TO rancherbackend;
GRANT ALTER ANY PROCEDURE TO rancherbackend;
GRANT DROP ANY PROCEDURE TO rancherbackend;
GRANT EXECUTE ANY PROCEDURE TO rancherbackend;
GRANT CREATE VIEW TO rancherbackend;
GRANT CREATE ANY VIEW TO rancherbackend;
In the SQL commands above: rancherbackend is the Backend DB username Rancher@123 is the Backend DB password Backend DB Schema name is derived from the Backend DB username, which is rancherbackend. 7. Click Execute or press F5. 8. Repeat the steps 6 and 7 for log database. 9. Check the Messages tab for success or errors. 10. If successful, the changes are applied to the Azure SQL Database.
Best practices to follow
-
Always verify:
- Correct server name and port
- Correct authentication method
- Correct target database
-
Use least-privilege permissions when granting access.
-
For Azure SQL, prefer Azure AD users where possible instead of SQL logins.