Creating AKS Cluster
This document discusses the steps for creating an AKS cluster
Steps to create the Cluster
-
Go to https://portal.azure.com/ and log in with your Azure credentials.
-
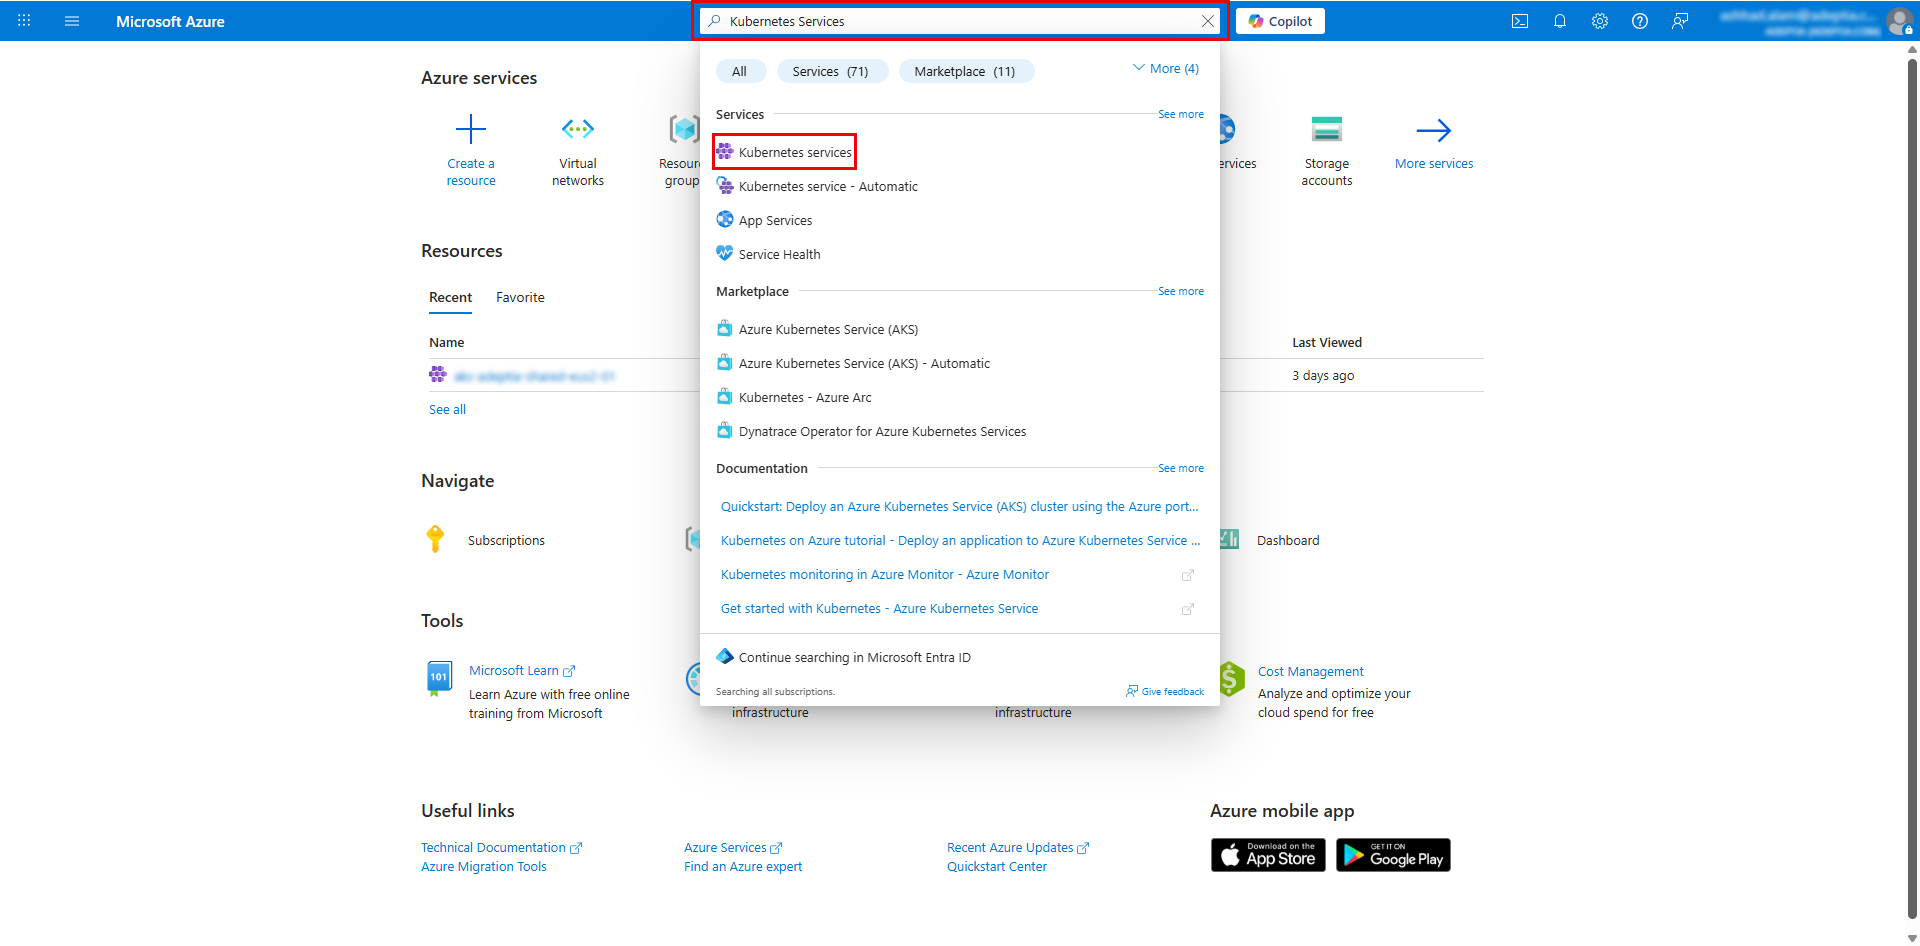
In the portal search bar, search for Kubernetes services and select Kubernetes services.
-
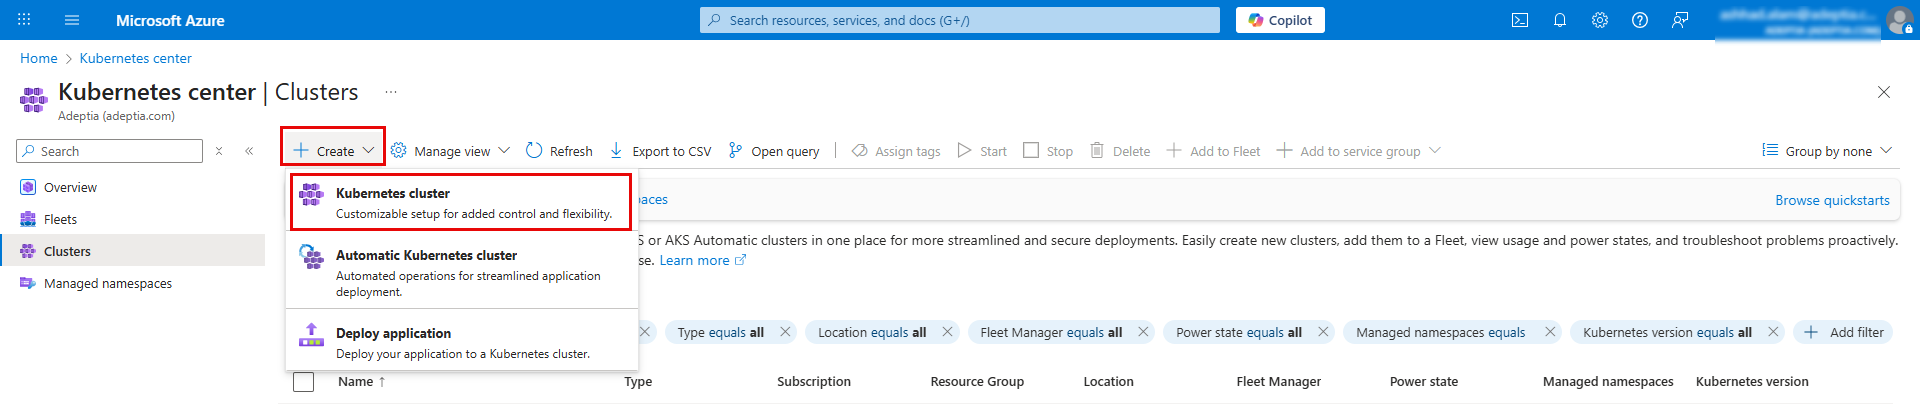
Click Create > Kubernetes clusterto open the Create Kubernetes cluster screen.
-
On the Create Kubernetes cluster screen, in the Basics tab, enter the following details:
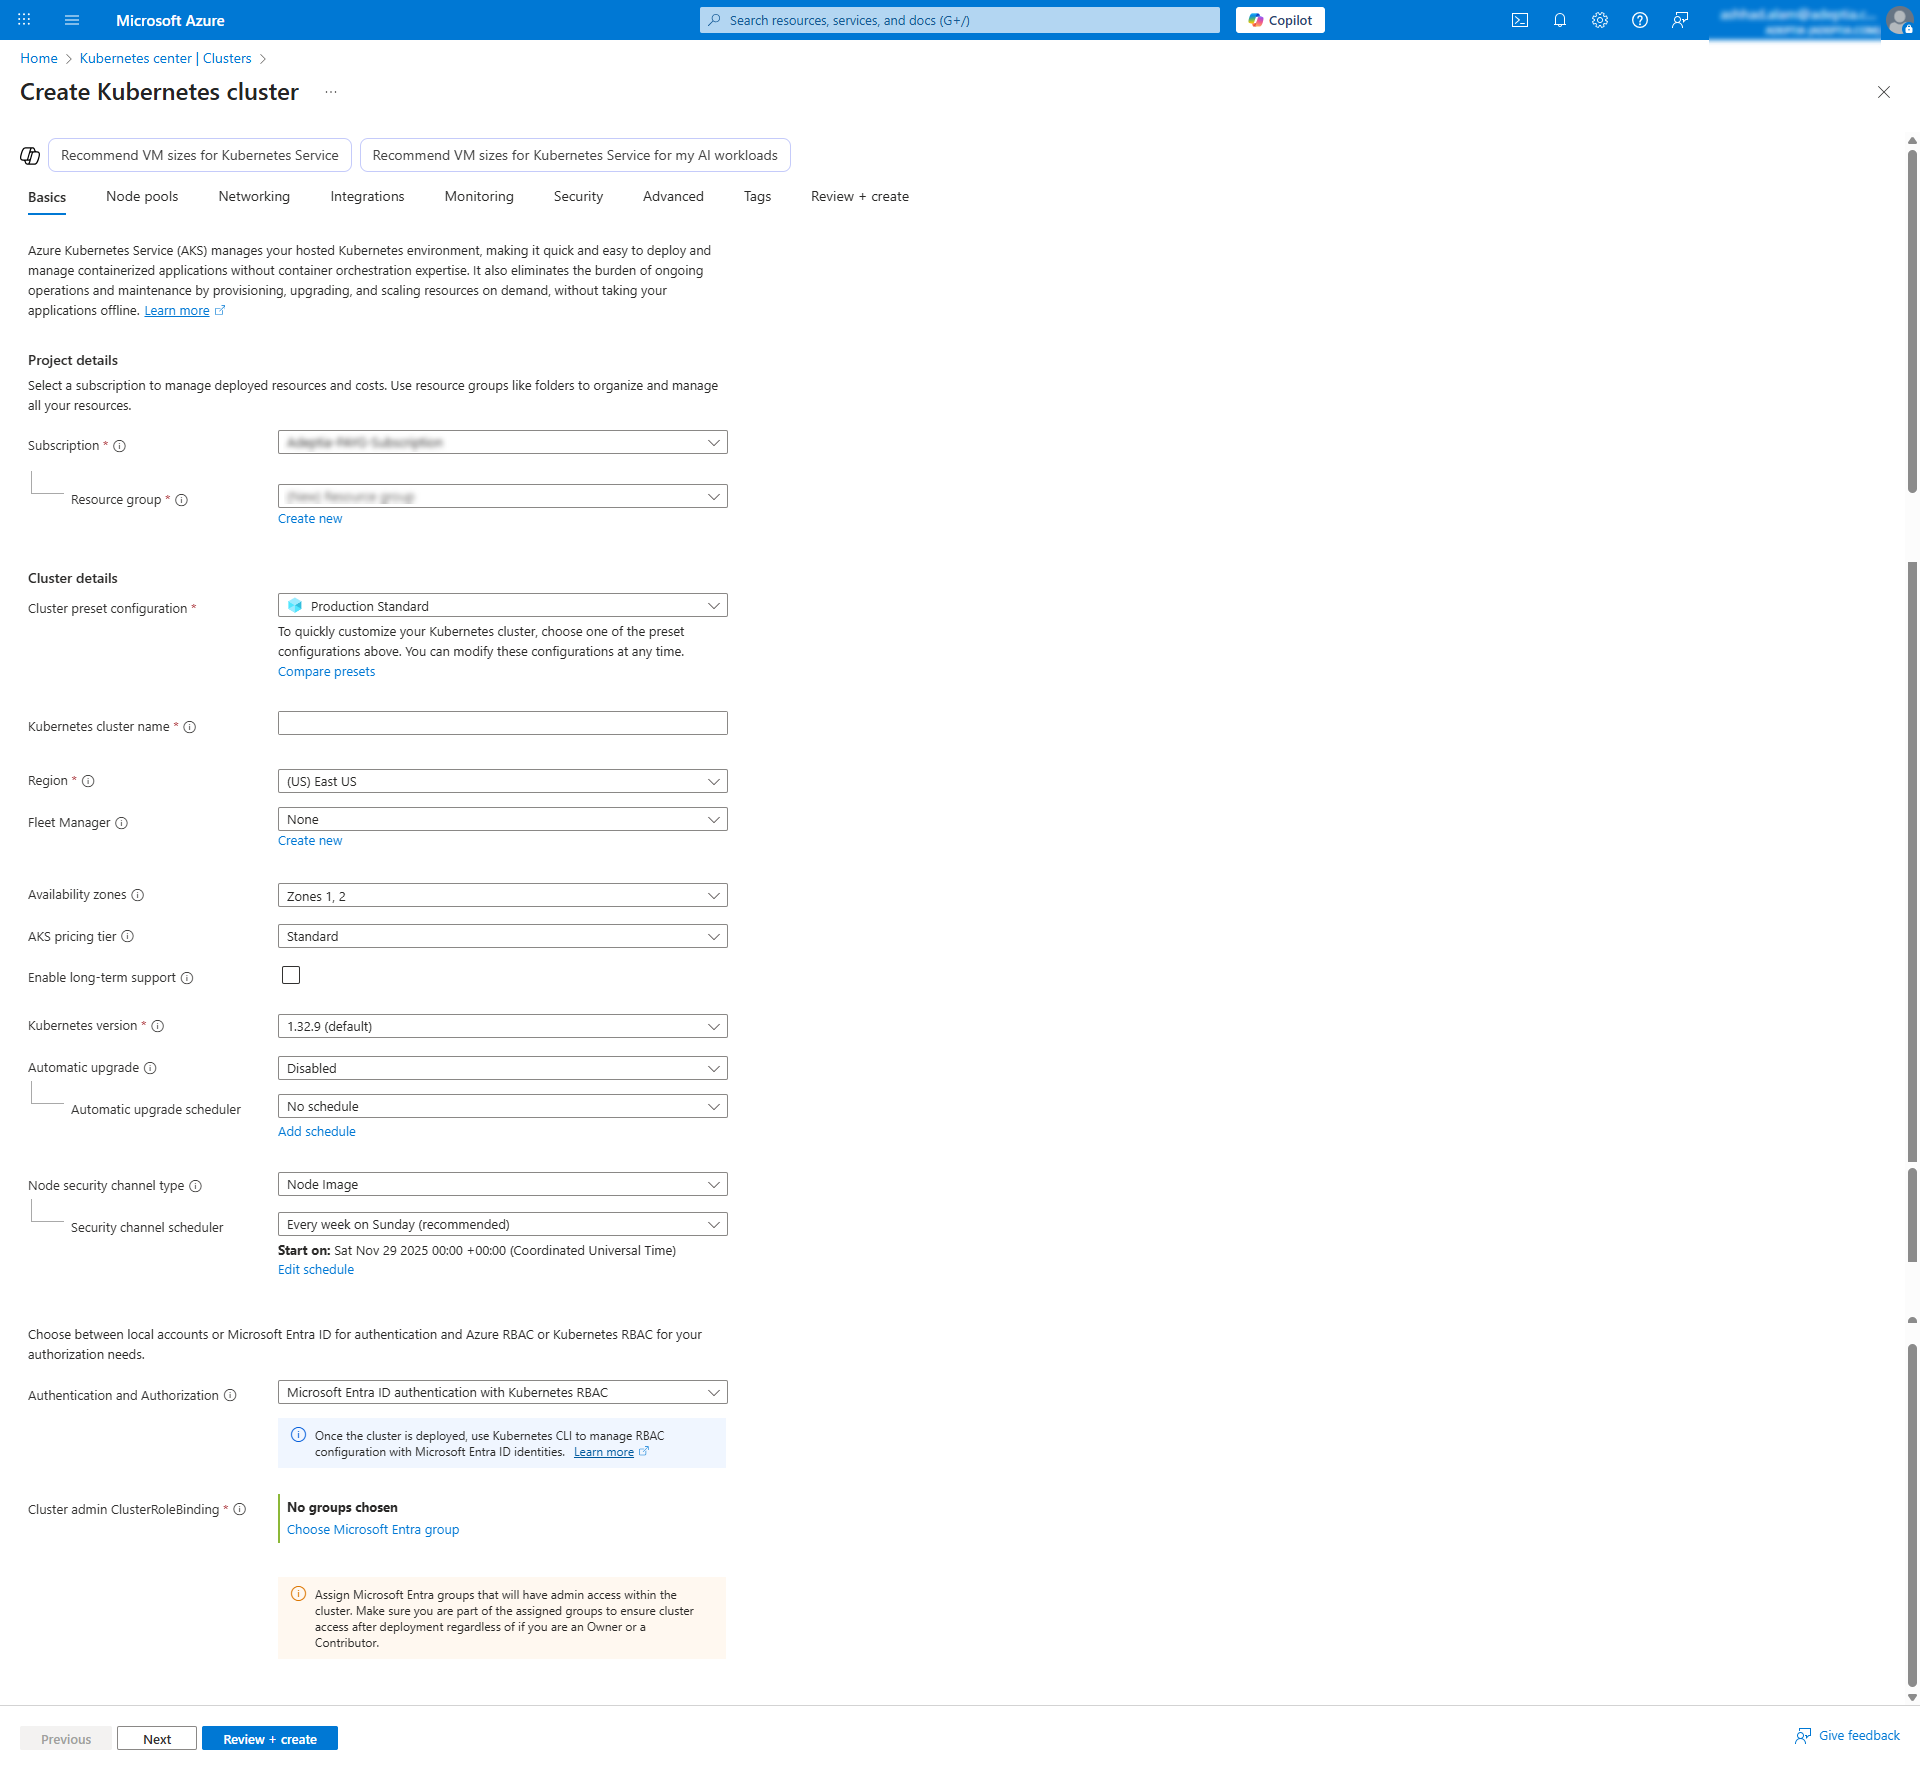
Field Value Subscription Name of the Azure subscription Resource group Name of the resource group you created to host the AKS cluster Cluster preset configuration Production Standard Kubernetes cluster name A name for the Kubernetes cluster you want to create Region Same as VNet Fleet Manager None Availability zones Select Zone 1 and Zone 2 AKS pricing tier Standard Enable long-term support No Kubernetes version Latest stable version Automatic upgrade Disabled Authentication and Authorization Microsoft Entra ID authentication with Kubernetes RBAC Cluster Admin Binding Select customer Entra ID security group -
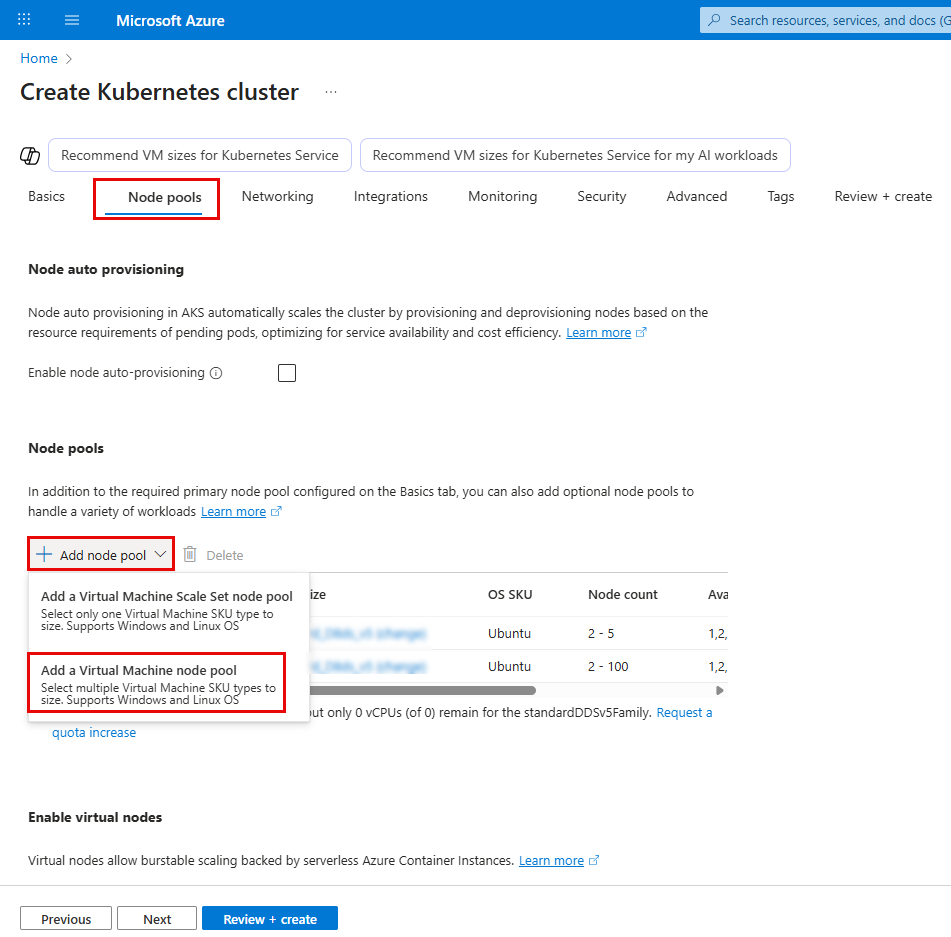
Select the Node pools tab, and then click Add node pool > Add a Virtual Machine node pool to open Add a node pool screen.
-
On the Add a node pool screen, in the Basics tab, provide the following details:
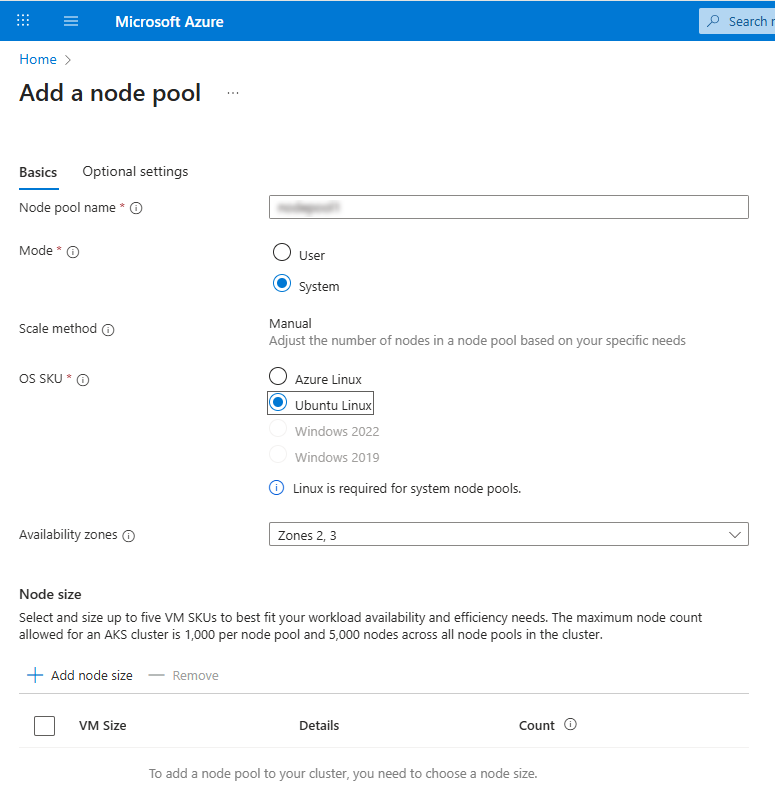
Field Value Node pool name A name you want to provide for the node pool Mode System OS SKU Ubuntu Linux Availability zones Select Node 2 and Node 3 Enable Azure spot instances Keep it unchecked Node size Standard D8as v6 Scale method Autoscale -
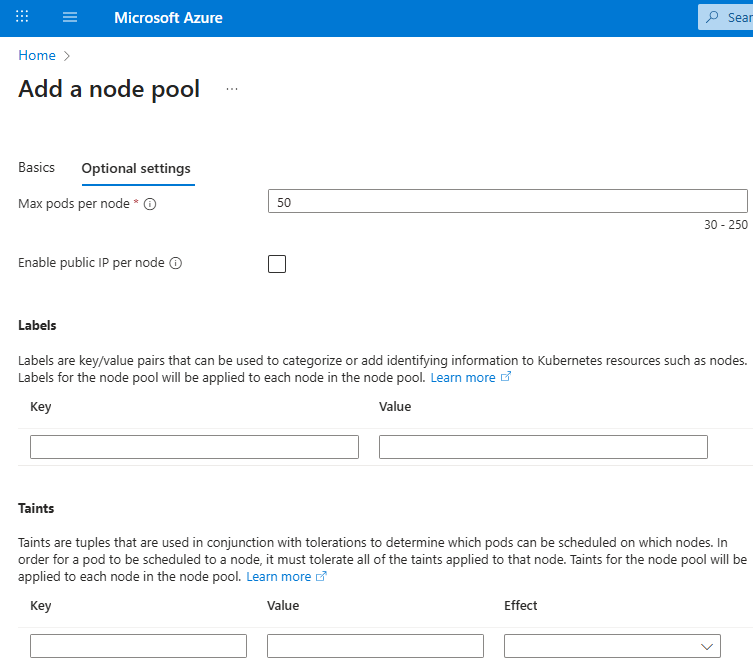
In the Optional settings tab, set the value for the field M ax pods per node to 50.
-
Keep the other settings as they are ensuring that there is no taints or labels applied.
-
Click Add at the bottom to go back to the Node pools tab on the Create Kubernetes cluster screen.
-
-
On the Create Kubernetes cluster screen, select the Networking tab, and do the following configurations:
-
Access Settings:
- Private Cluster: Disabled
- Authorized IP ranges: Enabled (Whitelist the IP range) to allow the incoming traffic to the cluster.
-
Container Networking:
- Network Configuration: Azure CNI Overlay
-
Bring Your Own VNet:
- Enable BYO VNet
-
Virtual Network Selection:
- VNet: ad-int-cus-demo-vnet-010
- Subnet: aks-subnet
-
IP Address Settings
Setting Value Kubernetes service address range 10.0.0.0/16 Kubernetes DNS service IP 10.0.0.10 DNS name prefix Auto-generated -
Network Policy
- None
-
Load Balancer Settings
Setting Value Load Balancer SKU Standard Outbound Type Load Balancer
-
-
Select rthe Integrations tab and do the following configurations:
-
(Optional) Azure Container RegistryContainer Registry:
- None
-
Istio Service MeshEnable Istio:
- Unchecked
-
(Recommended for production) Azure PolicyAzure Policy:
- Enabled
-
-
Select Monitoring tab and do the following configurations:
-
Enable Container Logs:
- Checked
-
Disable all other monitoring options:
- Managed Prometheus
- Grafana
- Alerts
-
-
Select the Tagstab and do the following configurations:
Key Value environment demo / prod customer customer-name managedBy Adeptia -
Select the R eview + Create tab to review the configurations.
-
Click Create at the bottom to complete the creation of the AKS Cluster.
AKS cluster deployment typically takes 15–25 minutes.
After the cluster is created, create a jump host (if required) and install the required dependencies on it or on your local Windows machine.