Deploy the application
You can install Adeptia Automate microservices using Helm Charts. A Helm Chart is a collection of files and templates that describe Kubernetes resources governing the deployment of microservices.
-
Ensure that you have met the prerequisites for installing the application.
-
Connect to the Jump Box using Remote Desktop Protocol (RDP). It is required only when you use Jump Box for application deployment
-
Create a Namespace in the cluster.

You can use the default (named as default) or an existing Namespace, if you do not want to create a new one. Follow the steps given below to create a Namespace in the cluster wherein you want to deploy the application.
- Run the following command to create a Namespace, for example, adeptia-automate-ns in the Kubernetes cluster.
Code
kubectl create namespace <Namespace wherein you want to deploy the application>
- Run the following command to verify if you have access to the created Namespace.
Code
kubectl get pods -n <Namespace>
-
Apply Role and RoleBinding.
This section explains how to update and apply the Kubernetes RBAC configuration required for the user who will manage the Adeptia Automate deployment.
Adeptia provides a Roles package that includes the following two YAML files that define the necessary permissions. After customizing these files, you need to apply them to the target namespace.
YAML file name Description role-deployment-user.yaml This file defines a Kubernetes Role named adeptia-user, which contains the permissions needed to perform application deployment-related operations. Update the namespace in this file to the namespace where you intend to deploy Adeptia Automate. rolebinding-deployment-user.yaml This file defines a RoleBinding named adeptia-user, which links the Role to the specific user who will carry out the deployment tasks. Update both the namespace and the username (email address of the user who will manage the Adeptia Automate deployment) in this file. Applying these YAML files ensures that the designated user has the appropriate RBAC permissions within the target namespace.
-
Download the Roles package.
- In the Jump Box or your local machine, create a directory, for example, DownloadedRoles.
-
Code
mkdir <Directory name>
- Navigate to the directory.
Code
cd <Name of the directory you created in the previous step>
- Download the package in the directory you created. Windows:
Code
Invoke-WebRequest -Uri "https://adeptia.github.io/adeptia-automate-roles-package/charts/roles-5.2.tgz" -OutFile "roles-5.2.tgz"
Linux:
Code
wget https://adeptia.github.io/adeptia-automate-roles-package/charts/roles-5.2.tgz
-
Extract the package.
- Run the following command to extract the package in the directory: Windows:
Code
tar -xzvf roles-5.2.tgz
Linux:
Code
sudo tar -xf roles-5.2.tgz
- Go to the directory adeptia_roles.
- Open the role-deployment-user.yaml file (located inside adeptia_roles directory). Linux: Run the following command and then press thei (insert) key on the keyboard:
Code
sodu vi role-deployment-user.yaml
- In the role-deployment-user.yaml file, provide the namespace where you intend to deploy Adeptia Automate.
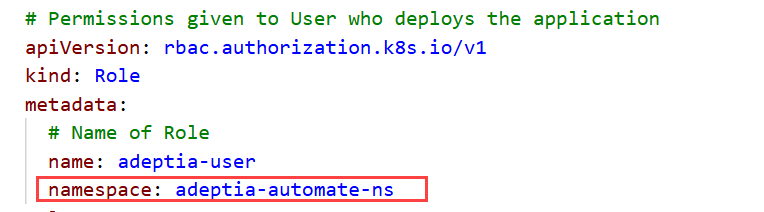
- Save and close the file. Linux: Press Esc (Escape) key on the keyboard to exit from edit mode, type :wq, and then press Enterto save and close the file.
- Open the rolebinding-deployment-user.yaml file (located inside adeptia_roles directory). Linux: Run the following command and then press thei (insert) key on the keyboard:
Code
sudo vi rolebinding-deployment-user.yaml
- In the rolebinding-deployment-user.yaml ****file, provide the following details:
- In the namespace parameter, enter the namespace.
- In the name parameter, enter the email address of the user who will deploy the application.
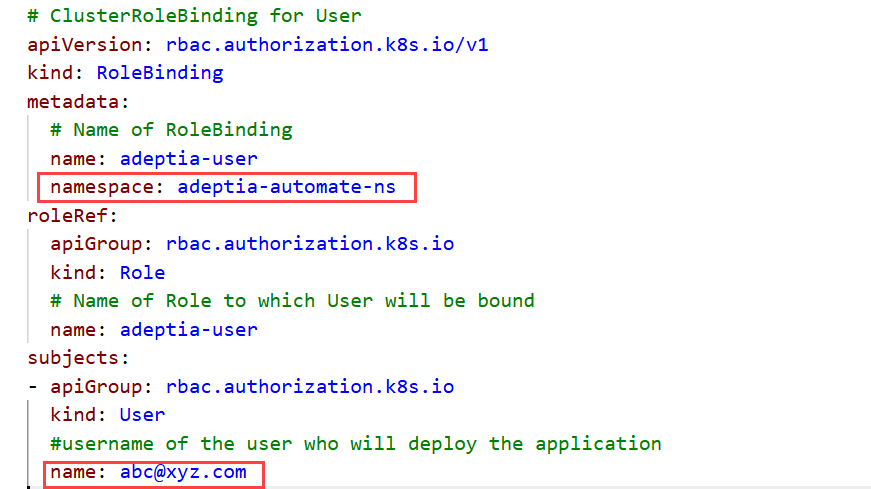
- Save and close the file. Linux: Press Esc (Escape) key on the keyboard to exit from edit mode, type :wq, and then press Enterto save and close the file.
- Go to the previous directory roles.

Code
cd ..
-
Apply Role and RoleBinding.
-
Download the Adeptia Automate package.
Ensure that you are logged in as the user to whom you assigned the deployment permissions in the previous step. - Navigate to your user directory as shown in the example below:

- Create a directory, for example DownloadedApplication.
- Navigate to your user directory as shown in the example below:
Code
mkdir <Directory name>
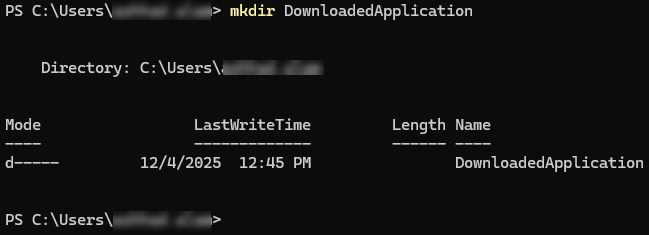 3. Navigate to the directory you created in the previous step.
Code
cd <Path of the directory>
 4. Download the package in the directory.
Windows:
4. Download the package in the directory.
Windows:
Code
Invoke-WebRequest -Uri "https://adeptia.github.io/adeptia-automate-helm-package/charts/adeptia-connect-5.2.tgz" -OutFile "adeptia-connect-5.2.tgz"
Linux:
Code
wget https://adeptia.github.io/adeptia-automate-helm-package/charts/adeptia-connect-5.2.tgz
-
Extract the package.
- Run the following command to extract the package in the directory: Windows:
Code
tar -xzvf adeptia-connect-5.2.tgz
Linux:
Code
sudo tar -xf adeptia-connect-5.2.tgz
-
Configure the values.yaml file located at the adeptia-connect directory in the extracted package.
- Navigate to the adeptia-connectdirectory.
Code
cd adeptia-connect
- Open the values.yaml file. Linux: Run the following command and then press the i (insert) key on the keyboard:
Code
sudo vi values.yaml
-
Configure the variables discussed in the section Configuring the values.yaml parameters.
-
If you want to deploy the application on Azure Red Hat OpenShift (ARO), update values.yaml with the additional required configuration discussed on this page.
-
If you want to deploy the application on Amazon EKS, update values.yaml with the additional required configuration discussed on this page.
-
Save and close the file. Linux: Press Esc (Escape) key on the keyboard to exit from edit mode, type :wq, and then press Enterto save and close the file.
-
Deploy the application.
If you are using MySQL as the backend and logging database, ensure that it is running version 8.4 before deploying the application. - Go to the directory, for example, DownloadedApplication, where you extracted the Adeptia Automate package.
Code
cd ..
 | The command cd .. takes you back from adeptia-connect(current directory) to the previous directory (The directory, for example, DownloadedApplication, where you extracted the package). |
|---|
- Add repo.
Code
helm repo add <Repo name> https://adeptia.github.io/adeptia-automate-helm-package/charts/
-
Deploy the application.
|
 |
|
• Use a specific version number, for example 5.2.0, in the --version argument, else the latest version of Adeptia Automate will be installed.
• In case of redeployment of the application, you can include --set global.config.redeploy=true in the install command. This skips the execution of databasemigration, migration, cleanup, and static jobs, making the redeployment quicker. Given below is example of install command for redeployment.
Code
helm install <Release name> <Repo name>/adeptia-connect --version <The version you want to redeploy, for example, 5.2.0> --set global.config.redeploy=true -f <Path of the values.yaml file> -n <Namespace>
|
| --- | --- |
Code
helm install <Release name> <Repo name>/adeptia-connect --version <Application version> -f "<Path of the values.yaml>" -n <Namespace>
Replace <Application version> in the command with the version of the application you want to deploy, for example, 5.2.0.
After the successful installation of the application, you will see the following message:
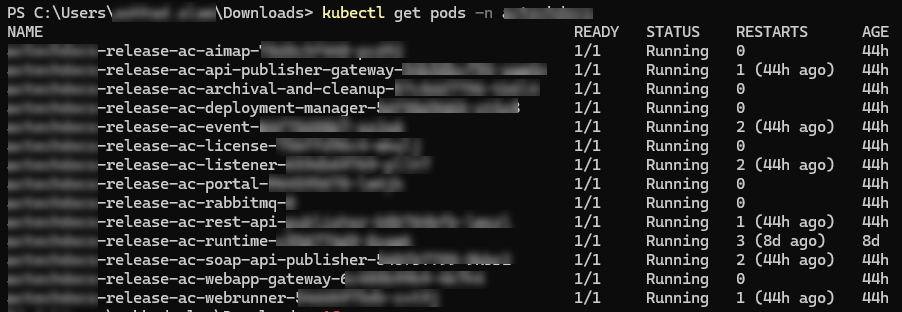
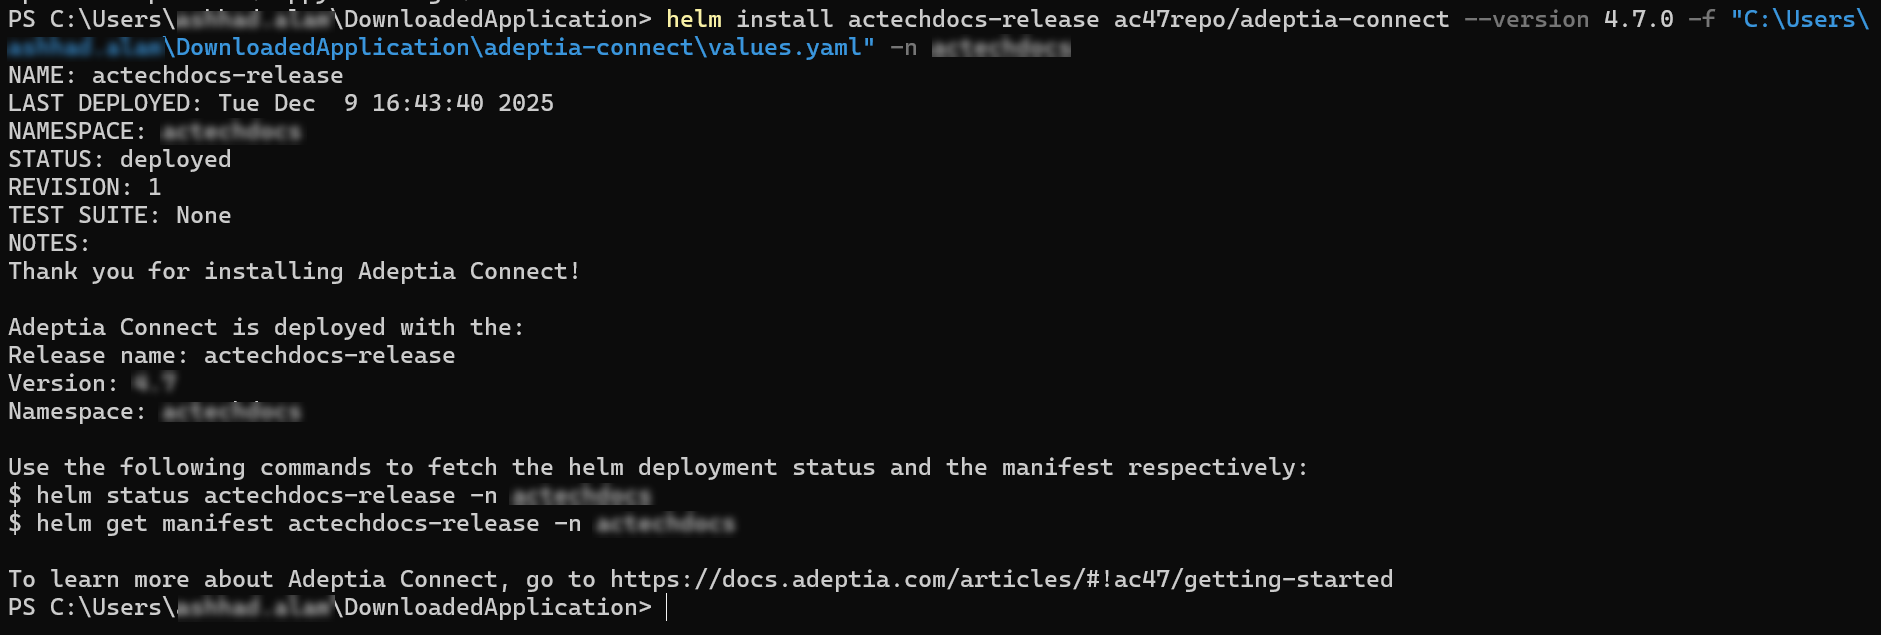 11. **Verify the application deployment.**Run the following command to see if all the microservices' pods are up and running as shown in the following screenshot.
Code
kubectl get pods -n <Namespace>
 12. Log in to the application.
13. Configure the mail server parameters.
12. Log in to the application.
13. Configure the mail server parameters.
After deploying the application, you must configure the Mail Server Parameters so users can receive invitation emails to set up their accounts. Without this post-deployment configuration, invited users will not get the account-setup email. 14. Configure traffic routing. 15. (Optional): Deploy Adeptia Automate MCP and Observe.
| Observe is the monitoring and visibility hub for Adeptia Automate. From a single interface, you can track the health of your integrations in real time, review execution history, and generate AI-powered dashboards. Observe is powered by the MCP Server, which acts as the backend that connects Adeptia Automate with the AI layer. Both Observe and MCP Server are packaged together in the adeptia-automate-mcp Helm chart. They are not deployed as part of the standard Adeptia Automate installation. You can deploy them separately as an independent Helm release after the main application is running. |
|---|