Setting up EFK for ARO cluster
This document discusses setting up EFK for an ARO cluster.
Prerequisites
-
cluster-adminon OpenShift -
ocandhelm(for Helm install) CLI -
A namespace to install Elasticsearch and Kibana
-
Storage class:
managed-csiinstalled and configured while installing ElasticSearch using the Helm chart
Steps to set up EFK
Step 1 — Install the OpenShift Logging Operator
-
Navigate to OperatorHub in your OpenShift Web Console.
-
Search for Red Hat OpenShift Logging and click Install.
Installation Settings:
-
Installation Mode: Cluster-wide
-
Installed Namespace:
openshift-logging(default namespace for this operator) -
Approval Strategy: Automatic (or as per policy)
-
-
Wait until the operator status shows Succeeded.
Step 2 — Configure Cluster-Wide Roles for the ClusterLogForward
The ClusterLogForwarder (CLF) requires cluster-wide access to ship logs to Elasticsearch.
To grant this, you need to apply specific cluster roles and bindings. Follow the steps below:
-
Go to the following ArtifactHUB page for roles:**
https://artifacthub.io/packages/helm/adeptia-connect-roles/roles/4.8.0
** -
Click INSTALL as shown in the following screenshot.**
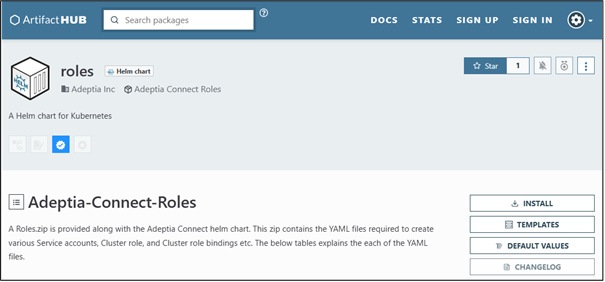 **
** -
On the roles screen, download the roles package by clicking this link option.
-
Unzip the downloaded package.
-
In the extracted package, go to the roles folder.
-
Open the values.yaml file.
-
In the openshiftLogging section, set the following properties:
Property Description Value enabled Setting it to true deploys RBAC for ClusterLogForwardertrue or false namespace The namespace in which you will deploy elastic stack Name of the namespace -
Save the file.
-
Run the command in the following format to deploy the roles package.
 | These permissions are critical for the CLF service account to successfully ship logs to Elasticsearch |
Step 3 — Install the EFK Helm Chart for OpenShift
Once the roles are successfully applied, follow the steps below to install the EFK Helm chart.
-
Download and extract the EFK package.
-
Open the efk-stack/values.yaml file
-
Update the following parameters to adapt the Helm deployment for OpenShift.
Parameter | Action | Reason |
|---|---|---|
fluentd.enabled | Set to | OpenShift will be using its own collector (via the Logging Operator) instead of Fluentd. |
openshift.enabled | Set to | Enables OpenShift-specific logic in the Helm chart. |
podSecurityContext.fsGroup, podSecurityContext.runAsUser, securityContext.runAsUser | Remove the default values (1000) and keep it blank | OpenShift enforces Security Context Constraints (SCC); these fields must not override defaults. |
privileged | Set to | OpenShift disallows privileged pods by default. |
storageClassName | Set to | Ensures compatible persistent storage for Elasticsearch. |
4. Install the package by running the following command:
Post-Installation behavior
Once deployed:
-
The Helm chart sets up:
-
Elasticsearch
-
Kibana
-
ClusterLogForwarder (CLF) for OpenShift
-
-
The CLF:
-
Collects logs from all Adeptia Connect microservices.
-
Forwards logs to ElasticSearch, creating separate indices per microservice.
-
-
The Helm chart also configures:
-
A service account for the CLF (with roles created in Step 2).
-
Secrets storing Elasticsearch credentials.
-
Step 4: Verify CLF-Created Indices in Kibana
After the EFK stack is successfully installed, verify that the ClusterLogForwarder (CLF) is forwarding logs correctly to Elasticsearch and that the indices are visible in Kibana.
-
Open the Kibana URL in your browser and login.
-
In the Kibana menu, navigate to:
☰ → Stack Management → Index Management -
Under the Indices tab, you will see all indices currently stored in Elasticsearch.