Creating an Inbound EDI Transactions
You can create an Inbound EDI Transaction by using a prebuilt EDI Template bundled with Connect. Use this template to create an EDI Inbound Transaction.
Before you start creating, ensure that you have created an EDI Partner and Data Dictionary.
To create an Inbound EDI Transaction:
-
Click Transactions > T****emplates.
-
On the Templates screen, search EDI Inbound in the Search bar.
-
Click Use This for the EDI Inbound Template to create an EDI Transaction.
-
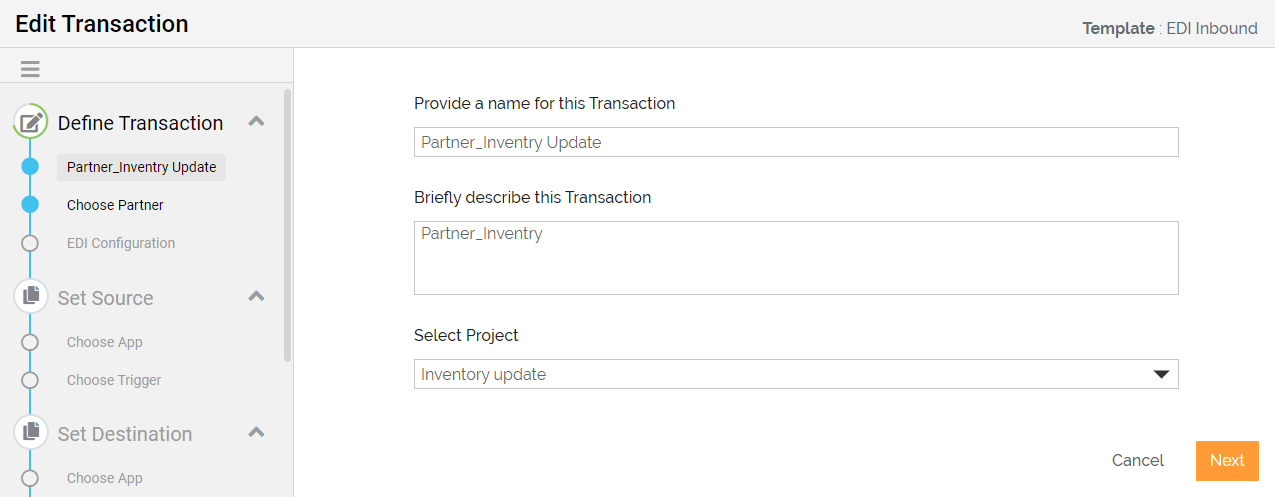
Connect automatically populates the name and description for the Transaction, you can edit the name and description, if necessary.
-
In the Select Project field, select a project with which you want to associate the transaction.

The Select Project field is available only when you log in as a user with the Company Only role type. -
Click Continue to define the Network and Partner.
-
Select the Network and Partner for which you are creating the Transaction. Only EDI Partners will be listed in the drop-down list.
To select multiple Networks from the drop-down list, click on the networks one by one. 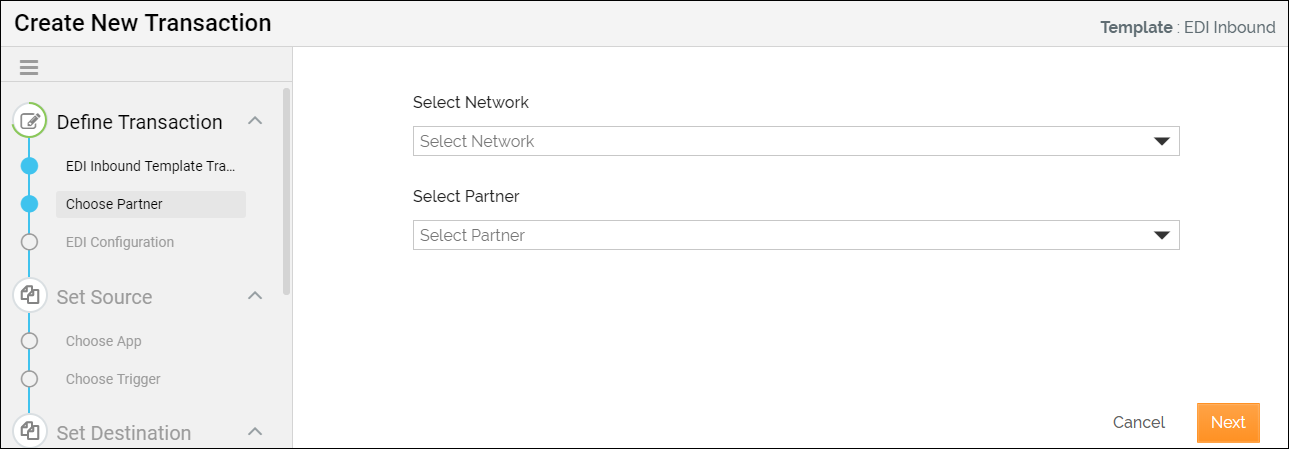
-
Click Next to define the EDI Configuration.
-
On the EDI Configuration window, do the following:
-
Select the EDI standard from the EDI Standard drop-down list. The available options are X12, HIPAA, and EDIFACT.
-
Select the version from the EDI Standard Version drop-down list. This list will have all the EDI versions you have created in the Data Dictionary. You will find 004010, 005010, and EDIFACT_D96A as a default EDI version.
-
Provide the assigned code in the Association Assigned Code text box.
-
On the basis of the selected EDI version, the list of transaction set codes is populated in the Transaction Set Code drop-down list. Select the code from the drop-down list.
-
Select the indicator from the Test/Production Indicator drop-down list. The available options are T-Test and P-Production.
-
In the Generate Acknowledgement field, select either of the following options to generate acknowledgment for the inbound messages sent.
Option
Description
No - Do not generate acknowledgments Select this option if you don't want to generate an acknowledgment for the inbound messages sent. Yes - No error detail Select this option to generate an acknowledgment for an inbound message sent without error details. Yes - With error detail Select this option to generate an acknowledgment for an inbound message sent with error details. - If you want to send a customized acknowledgment then select either Yes - No error detail or Yes - With error detail option from the Generate Acknowledgement.
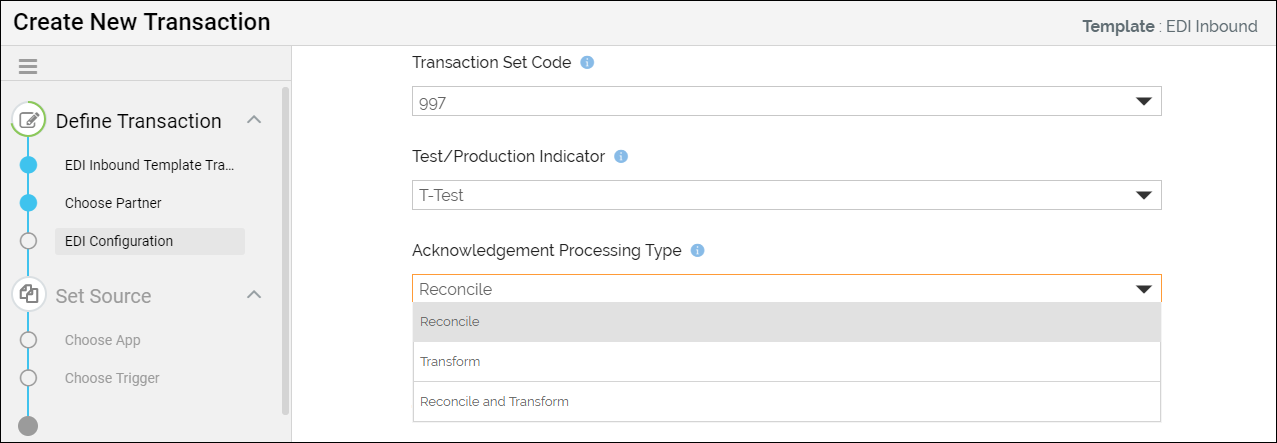
- In case of EDI X12 format, when you choose 997 as a transaction set code, you will have the option to select from the following processing acknowledgment:
- Reconcile
- Transform
- Reconcile and Transform
Option
Description
Reconcile Sends acknowledgment for receiving the acknowledgment of an outbound message sent. Transform Transforms 997 EDI Transaction Set Code to another EDI Transaction Set Code. Reconcile and Transform Sends acknowledgment for receiving the acknowledgment of an outbound message sent and transform 997 EDI Transaction Set Code to another EDI Transaction Set Code. - In case of HIPAA Data Format, if you choose EDI Standard Version as 005010X231A1 with 999 as the transaction code, you will have the same options as defined in step (¡¡).
-
Select the Skip Compliance Check check box to skip the compliance check for this document.
-
In the Data encryption at rest field, select either of the following options.
Option
Description
Use Global Policy Select 'Use Global Policy' to use Global Property value for the Template. Yes Select 'Yes' to enable EAR for Template. It will not use Global Property value. No Select 'No' to disable EAR for Template. It will not use Global Property value. -
Expand Translation Properties and Select the number of translation(s) you want to create from a single EDI source. You can select the maximum number of translation(s) for a single EDI source up to 3.

-
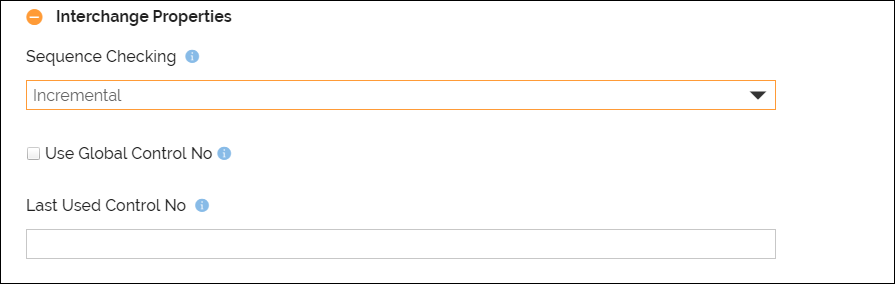
Expand Interchange Properties and select the type of sequence checking from the Sequence Checking drop-down list.

These are the available options:
Sequence Checking Type
Description
None
No Sequence checking is done on the control number.
Duplicate
Duplicate means an inbound document contains duplicate control numbers. If you select this option then control numbers of inbound messages should not be duplicated. In case the control number is duplicated then the inbound message is not processed and an error message is generated in the EDI Interchange inbound log.
Incremental
Incremental means control numbers should be in the incremental order. If you select this option then control numbers of inbound messages should be in the incremental order. In case the control number of any message is not in the incremental order then the inbound message is processed but a warning message is generated in the EDI Interchange Inbound Log.
Chronological
Chronological means the control number should be greater than the previous control number. If you select this option then control numbers of inbound messages should be in chronological order. In case the control number of any message is not in chronological order then the message is processed but a warning message is generated in the EDI Interchange Inbound Log.
- For Incremental and Chronological sequence checking, provide the values in the Use Global Control No check box and Last Used Control No text box. Select Use Global Control No check box to use the control number defined while adding a Partner else provide the last used control number in the text box. The value in the Last Used Control No text box is populated automatically.
- For Incremental and Chronological sequence checking, provide the values in the Use Global Control No check box and Last Used Control No text box. Select Use Global Control No check box to use the control number defined while adding a Partner else provide the last used control number in the text box. The value in the Last Used Control No text box is populated automatically.
-
Expand Group properties.
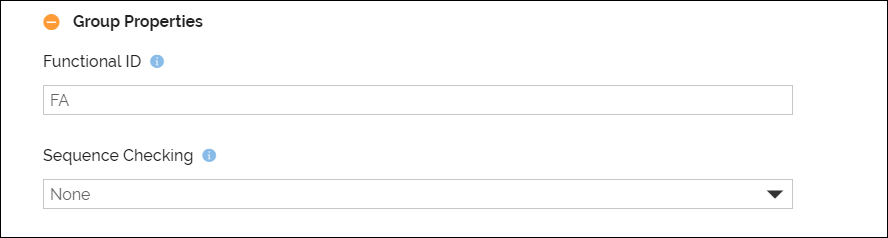
- Functional ID is automatically populated based on the Transaction Set Code that you have selected.
- Define the Sequence Checking and control numbers in a similar way as defined in the Interchange Properties.
-
Expand Document Properties and define the values as defined in the Interchange properties.

-
Expand Advanced Properties.**
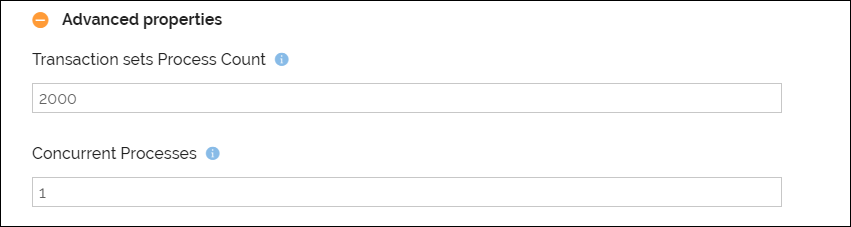 **
**- Define a value in setting the number of transaction sets that a B2BI process flow can process at a time within a group in the Transaction sets Process Count. The default value is 2000.
- Type a value in setting up the number of concurrent child processes that can run at a time in the Concurrent Processes. The default value is 1.
-
-
Click Next to go to the Transaction Settings step.
-
On the Transaction Settings screen, do the following:
-
Enter the details as described in the following table.

Field Name Description Contact User
Email id(s) listed here will receive a notification email whenever the Transaction is executed successfully or if there is an error during execution. Multiple email ids are separated by comma.
If Adeptia Connect is running on multiple environments and you want to receive the environment name in the emails, then you need to specify the environment name in the relevant property (Account > Settings > Server Nodes Settings > Systems > Personalization).
When to notify the contact user thru email? Always: Send an email whenever a Transaction executes.
On Error: Send an email if an error occurred during the execution of the Transaction.
Do Not Notify: Select this option if you do not want to receive an email notification for Transaction execution.
Email Notification Format This field is visible only when you have selected the Always or On Error option to send the notification to the user.
Select the email notification format that you want to use for notification emails sent to the user for successful and failed Transaction.Default: If you select Default, the system will use the default email notification format.
Customized Notification Format: If you select this option, a Custom Error Notification Format field appears. In this field, you can select an existing custom email notification format or create a new one, and use it for email notifications.
b. Expand Advanced Settings to set the Repository File Retention**.** The available options are DONT DELETE, DELETE, DELETE ON SUCCESS, and DELETE ON SUCCESS EXCEPT SOURCE DATA. To learn more about these options, refer to this page.
.png?version=2&modificationDate=1685968926362&cacheVersion=1&api=v2&width=723&height=196)

If you hide the Transaction Settings page using Select the steps which you want to hide at the time of Transaction creation option from the Settings screen while creating a Template, the default value will be set for the Repository File Retention field for this Transaction.
-
-
Click Next to define the Source application account.
-
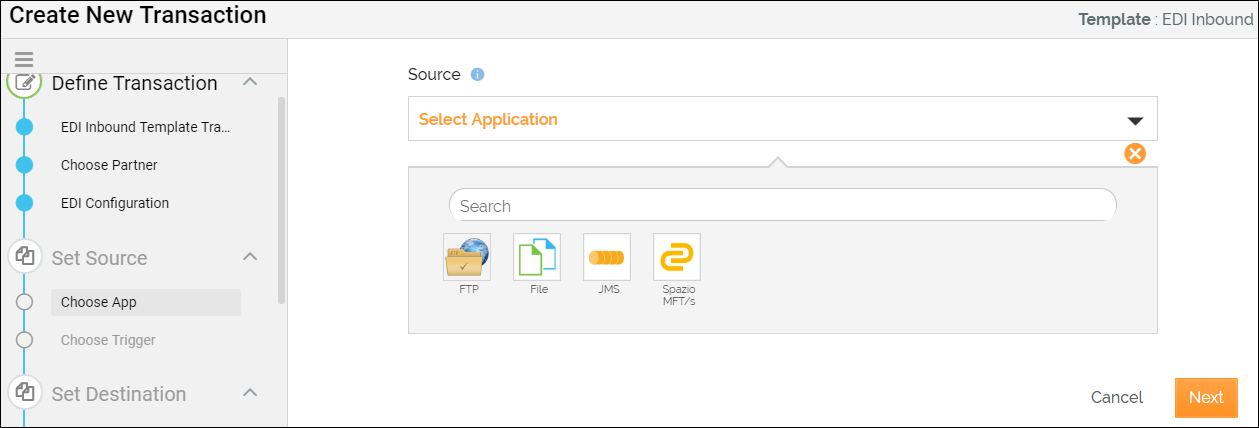
Select the source application. The supported applications are FTP, File, JMS, and Spazio MFT/s.
-
Depending on the chosen Source application in the Template you are using, you need to select the account. You can either use an existing account or create a new one. Click [+] to add a new account. For information on how to add a new account, refer to Supported applications.
For FTP, you need to select the event, FTP Account, and configuration details. For more information, click here.
For File, you need to define the File Event. For more information, click here.
For JMS, you need to define the JMS Event. For more information, click here.
For Spazio MFT/s, you need to define the Spazio MFT Listener. For more information, click here.
-
On the Select File Location screen, provide the information described in the table below.
Field Name
Description
Folder Location Folder location from where to pick files. Process all the existing records/files To process all the existing files from the specified location. Send mail notification for no data on trigger Selecting this option will send the mail notification whenever there is no data found on
trigger.Send mail notification for error on trigger Selecting this option will send the mail notification whenever there is an error on trigger. Delete file on success Delete the file once it is processed. File type File format to process the files. Multiple file formats are separated by a comma. Use *.*
to process all file formats.File exclude Type the file format to exclude the file type while the Transaction is running. Multiple file
formats are separated by a comma. For example, if you want to exclude text files from
the FTP location, type .txt in the field.Trigger Type You can set trigger through POLLING and CRON EXPRESSION.
POLLING: The time interval during which the Transaction triggers. By default,
Transaction triggers after every 10 minutes. Select No polling option to trigger Transaction
manually.
CRON EXPRESSION: Define the specific time schedule for the Transaction to trigger.
For more information on how to define Cron Expression, click here.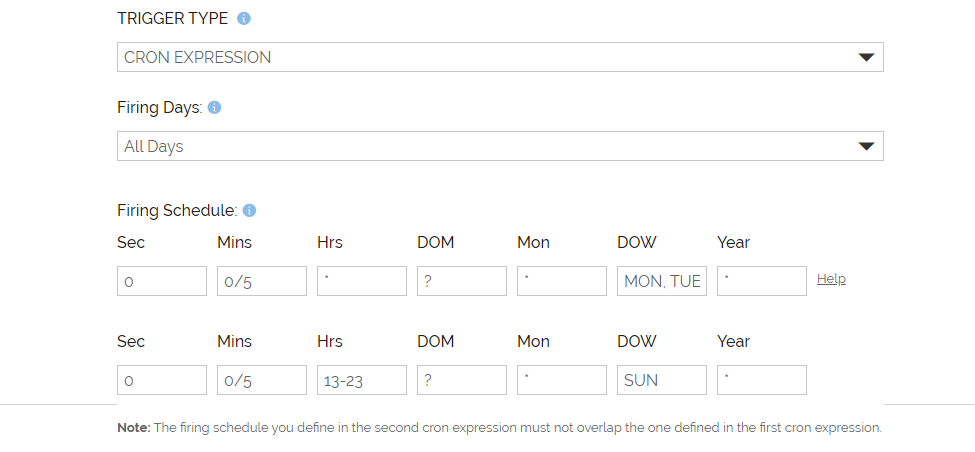
- It is mandatory to define the first cron expression if you have selected cron as a Trigger type. For example, if you have set an FTP Event to run every 5 minutes from Monday to Sunday, you can set the cron expression as "0 0/5 * ? * MON, TUE, WED, THU, FRI, SAT * ".
- You may make use of the second cron expression to define another condition or address a condition supplementary to the first one. For example, if you have set an FTP Event to run every 5 minutes from Monday to Sunday, but do not want the same event to run from 12 AM to 12 PM on Sundays, the second cron expression can be defined as "0 0/5 13-23? * SUN * ".
- The firing schedule you define in the second cron expression must not overlap the one defined in the first cron expression.
File Stable Time Provide the waiting time (for the file to become stable) after which the trigger happens. For example, if you choose 30 Seconds in the stable time then the system will wait for 30 seconds for the file to go stable before it triggers the transaction.
This option is applicable for On File Created and On File Modified Trigger Type. The trigger will wait for the specified time for the file to become stable.

-
Click Next to encrypt data. This screen appears only if the Template you are using is created using FTP and file-based applications.
-
Click Next to take the backup of the source file as an archive file at runtime.
-
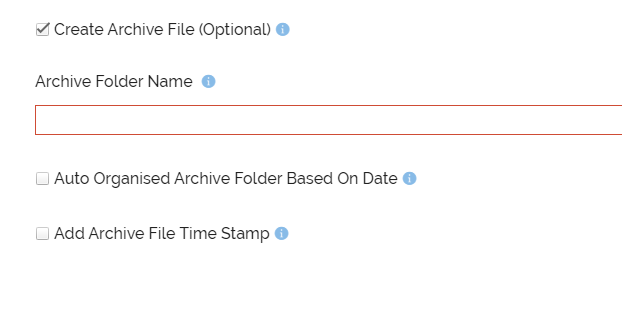
At the Create Archive File step, select the Create Archive File (Optional) checkbox. This option will create an archive of the source file in the Archive folder for future access.
-
Type the folder name to archive the data in the Archive Folder Name. The Transaction will create an archive of the generated output files in the specified folder and location.
You need to set the archival folder path in the abpm.solution.b2b.archive.basepath property (Administer > Update System Properties > Solution Properties > EDI Solution Properties > Default B2B Archiving Policy). You may also use a context variable to provide a value for the Archive Folder Name field in the following manner: In the Archive Folder Name field, enter the path (where you want to keep the archive folder) followed by $$PARTNER_NAME$$ as shown in the following example.  where $$PARTNER_NAME$$ is a predefined Context Variable that holds the name of the partner who runs the Transaction, and the archive folder is created with this partner's name.
 -
Click the Auto Organised Archive Folder Based On Date checkbox to create folders in the format YYYY/MM/DD to the folder specified in the Archive Folder Name.
-
Click the Add Archive File Time Stamp checkbox to add a time stamp to the archive files.
-
On clicking the check box, the Time Stamp Format field appears. Select the date and time format from the drop-down lists.

-
-
Select the Is Source File encrypted? check box if the source file is in the encrypted format. The below fields appear. Provide the details in the corresponding fields.
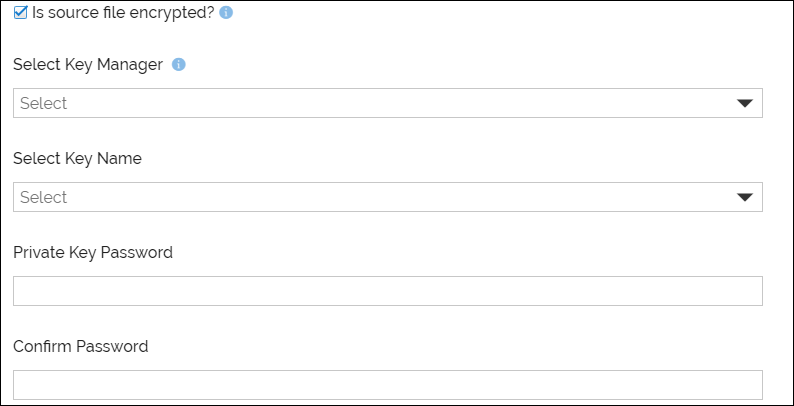
Key Name The default value is the default. Key Manager Select the Key Manager from the list. To create a Key Manager, visit Account > Security Settings. To create a Key Manager, click here. Private Key Password Password of the key. Confirm Password Confirm the password of the key. Field Name
Description
-
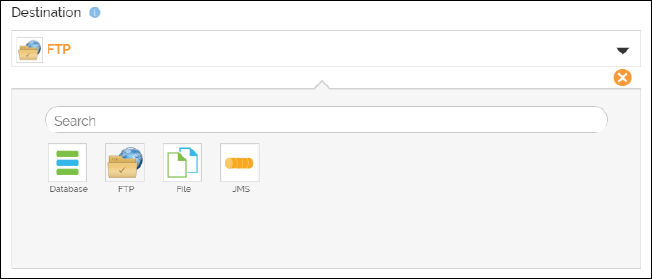
Click Next to define the Destination application account. Select the supported destination applications which are Database, FTP, File, and JMS.
-
Click Next. The next screen differs depending upon the chosen Destination application.
For the Database, you need to define the Database Target. For more information, click here.
For FTP, you need to select the action, FTP Account, and configuration details. For more information, click here.
For File, you need to define the LAN Target. For more information, click here.
For JMS, you need to define the JMS Target. For more information, click here.
-
Click Next to define the file generation policy details. This screen appears only for FTP and File destination applications.
-
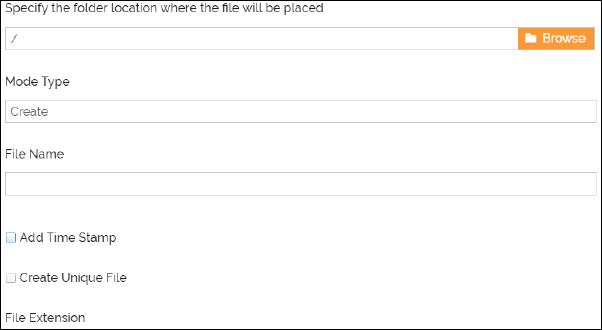
Provide the details in the corresponding fields.
-
Browse to and select the file.
-
The value in the Mode Type is populated automatically.
-
Type the name of the destination file in the File Name text box to define the pattern of the destination file name. In case, you want the destination file name to be the same as the source file name, type $$baseInputFileName$$ as a value in the File Name text box. File Name can contain a date-time stamp followed by % in the format: File_Name%%dd-mm-yy_hhmmssSS%%. For example, test_output%%01-01-2016_15-15-23%%.
-
Select the Add Time Stamp check box to add the time stamp in the file. Select the date and time format from the Time Stamp Format drop-down list. This appends the selected date and time stamp in the name of the newly created file.
-
Select the Create Unique File check box to have a unique name in each destination file created. When this option is selected, a unique number is appended to the file name.
-
Type the extension of the file in the File Extension text box.
-
-
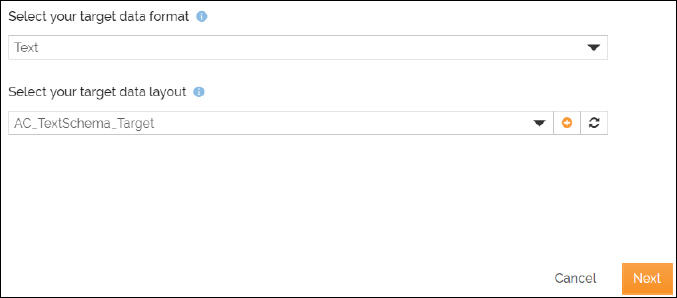
Click Next to select the target data format. This screen appears only for FTP and File destination applications.
-
Select the target data format and data layout for the Destination application. The target data format is the format in which you want the destination file, for example, text, excel. Target data layout is the layout of the destination file. You can either use the existing layout or create a new layout. To create a new layout, click [+].
-
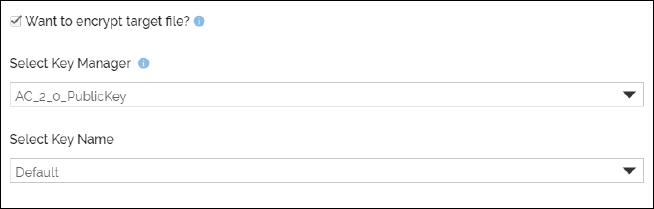
Click Next to define the encryption. This screen appears only for FTP and File destination applications.
-
Select Want to encrypt target file? checkbox if you want to encrypt the destination file. On selecting the check box, new fields appear. Provide the details in the corresponding fields and click Next.
-
Define the Mapping between the fields of the selected source and the destination application.
-
Click Save & Exit to save the Transaction.
This creates an Inbound Transaction and is listed in the Transactions screen.