Using Extract Data (File Upload) Template
To convert unstructured data into structured data from a File Source, you need to create a Transaction using the pre-defined Template.
 |
|
 | It is recommended that all the activities belonging to the AI Project are not edited. |
Prerequisites
Before using the Template ensure that:
- You have successfully created a security policy for WS Consumers with OAuth authentication and associated it with the following REST Consumers:
-
Unstructured_Extractfields_API
-
**CallUnstructuredAPI
**
If you are an on-premise customer, please contact your Adeptia application admin or support@adeptia.com for assistance with this prerequisite. Refer to this page to learn more about creating a security policy with OAuth authentication.
-
- You have specified the URL of the Web Service to be invoked in the REST Consumer activity, UnstructuredFieldSelection. To do so, enter the Endpoint URL of the REST Provider activity, Unstructured_FileSlection_WSP, in the URL field of the REST Consumer.
Using Extract Data (File Upload) Template
Follow the steps given below to create a Transaction
-
Click Transactions > T****emplates.
-
On the Templates screen, navigate to the Extract Data (File Upload) Template and click
 .
. -
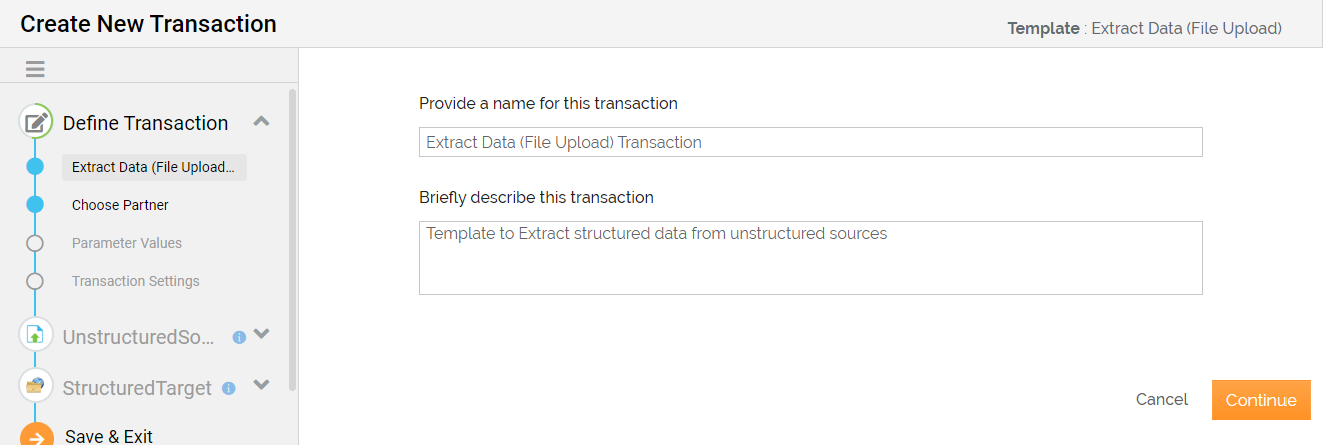
Provide the name and description of the Transaction. The name and description of the Transaction are generated automatically based on the selected Template. You can edit the Transaction name and description that can be up to 48 and 300 characters long.
-
Click Continue.
-
In the Select Partner field, select a partner for whom you are creating the transaction.
-
Click Next.
-
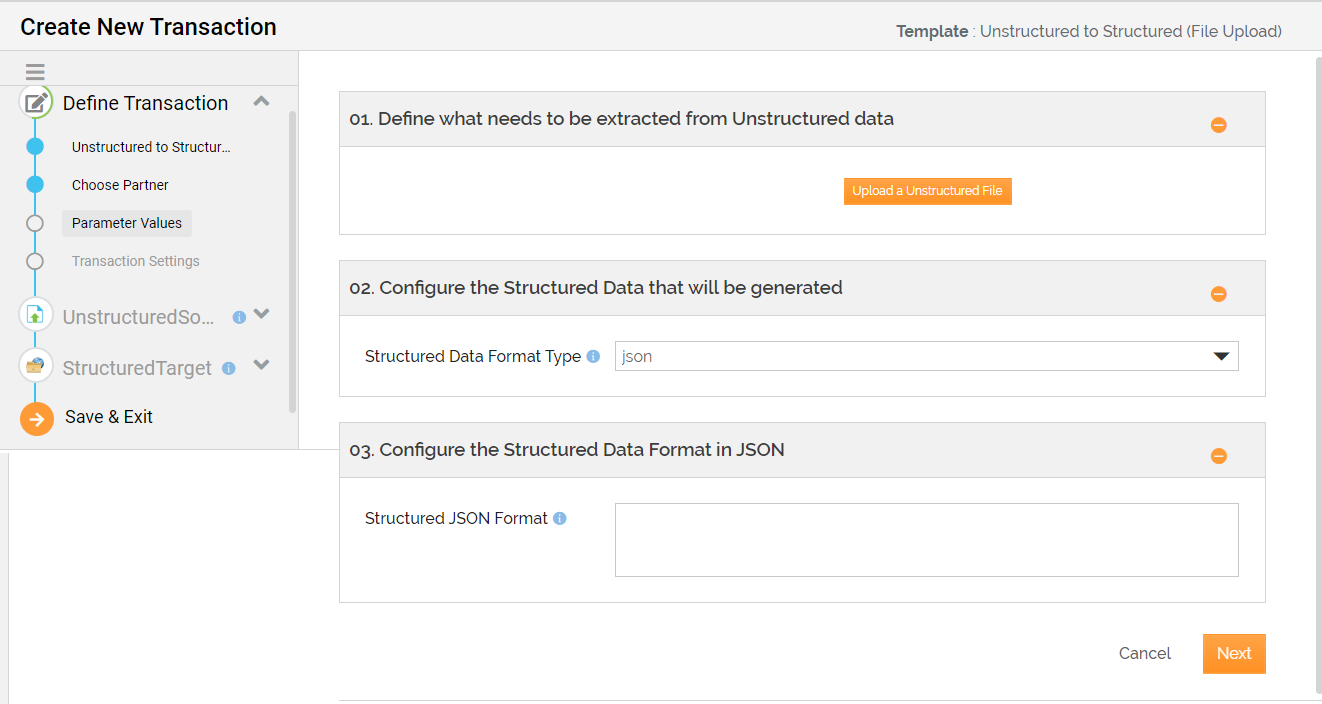
On the Parameter Values screen, enter the following details:
-
Click
 to upload an unstructured data file to be processed.
On uploading the file, the Unstructured Data Fields displays. -
If you want to extract selected fields from the unstructured document, do the following:
- In the Unstructured Data Fields, select the fields from the dropdown that need to be extracted into the target file.

- In the Unstructured Data Fields, select the fields from the dropdown that need to be extracted into the target file.
-
In the Structured Data Format Type field, select from the dropdown the format of the structured data.

- The supported structured data format types include JSON and CSV.
- By default, the JSON data format type is selected.
-
If you have selected JSON as the Structured Data Format Type, do the following to specify the output format in JSON that you would like to receive.

-
In the Structured JSON Format field, enter the names that you want to provide to the fields in the Target files in JSON structure.
For example, you have three files containing employee data, namely File A, File B, and File C. And each file contains distinct field names: Emp ID in File A, employee Id in File B, and EMP ID in File C. If you want the Target files to have a standard name for these fields as "Employee ID". Then you may define "Employee ID" as the field name in a valid JSON format in the Structured JSON Format field. Consequently, the generated Output files will have the field name Employee ID for these fields.The JSON Format for defining this field is illustrated in the example screenshot.

-
-
Click Next.
-
-
On the Transaction Settings screen, do the following:
-
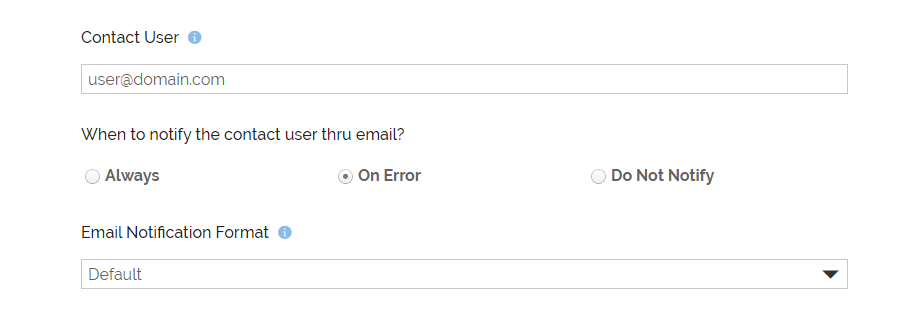
Enter the details as described in the following table.
Field Name Description Contact User
Email id(s) listed here will receive a notification email whenever the Transaction is executed successfully or if there is an error during execution. Multiple email ids are separated by comma.
If Adeptia Connect is running on multiple environments and you want to receive the environment name in the emails, then you need to specify the environment name in the relevant property (Account > Settings > Expand Application Settings > Common > Expand Personalization).
When to notify the contact user thru email? Always: Send an email whenever a Transaction executes.
On Error: Send an email if an error occurred during the execution of the Transaction.
Do Not Notify: Select this option if you do not want to receive an email notification for Transaction execution.
Email Notification Format This field is visible only when you have selected the Always or On Error option to send the notification to the user.
Select the email notification format that you want to use for notification emails sent to the user for successful and failed Transaction.
Default: If you select Default, the system will use the default email notification format.
Customized Notification Format: If you select this option, a Custom Error Notification Format field appears. In this field, you can select an existing custom email notification format or create a new one, and use it for email notifications. -
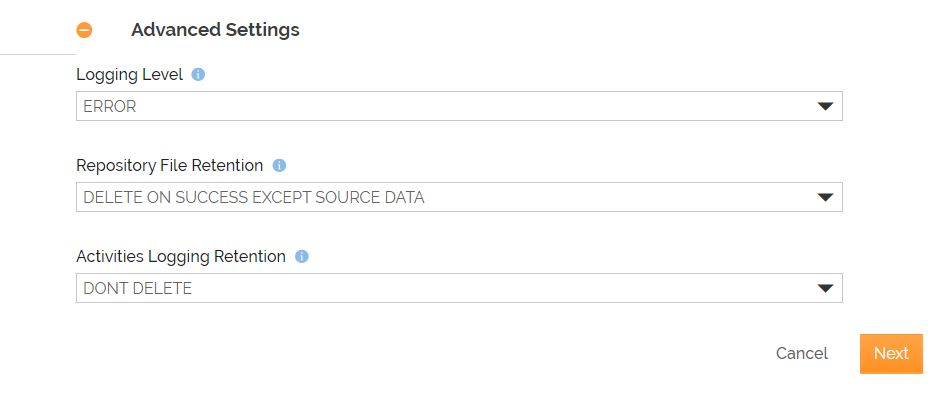
Expand Advanced Settings to set the Logging Level, Repository File Retention, and Activity Logging Retention. The available options for the fields are as follows:
-
Logging Level- INFO, DEBUG, and ERROR
-
Repository File Retention- DONT DELETE, DELETE, DELETE ON SUCCESS, and DELETE ON SUCCESS EXCEPT SOURCE DATA
-
Activity Logging Retention- DONT DELETE, DELETE ON SUCCESS, and NO LOGGING. To learn more about these options, refer to this page.
-
-
Click Next.
-
-
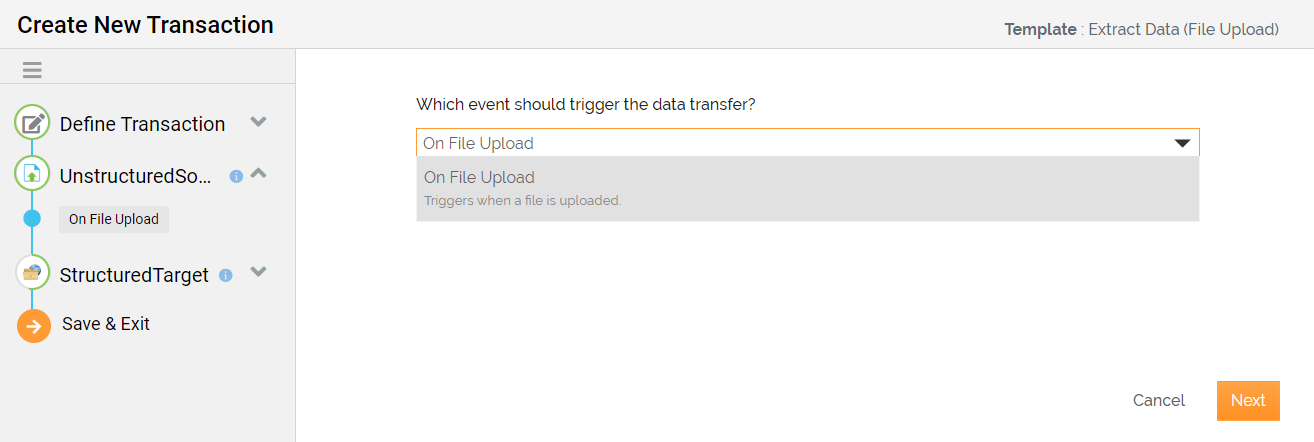
On the On File Upload screen, select the File Upload trigger for data transfer.
-
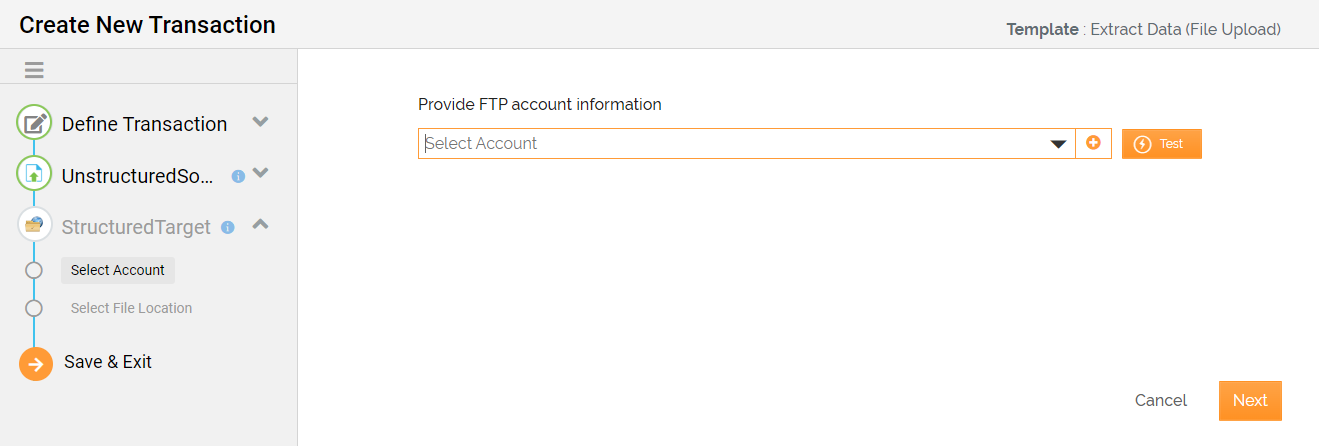
Select the FTP account information for the Destination file. You can either use an existing account or create a new one. Click
 to add a new account. For information on how to add a new account, refer to Supported applications.
-
Click Next.
-
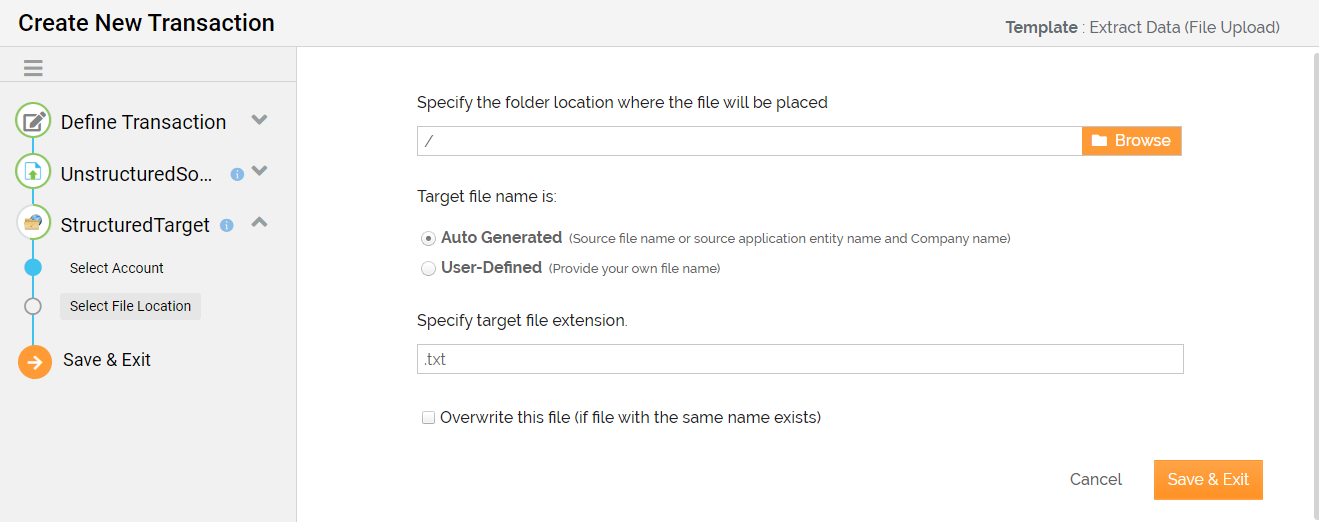
On the Select File Location screen, do the following:
-
Provide the folder location from where to pick files.
-
Select Auto Generated if you want the Target file name to be the same as the Source file name or source application entity name and Company name. Else, select User-Defined to provide your own file name.
-
Specify the file extension of the Target file in the Target file extension field.

This field appears only when the Target file name is Auto Generated.
-
Select the Overwrite this file checkbox if you want to overwrite a file with the same name.
-
-
Click Save & Exit to save the Transaction. This creates a Transaction.