Defining an EDI Inbound Template
The first step while creating a Template is to provide Template definition. The definition includes details, such as name, description, and other information about the Template.
Ensure that you have created an EDI Partner and Data Dictionary.
 | Only a Company administrator and an IT User can create a Template. However, it is recommended that only an IT User creates a Template. |
To provide the definition of a Template:
-
Click Configure > T****emplates > Create Template.
-
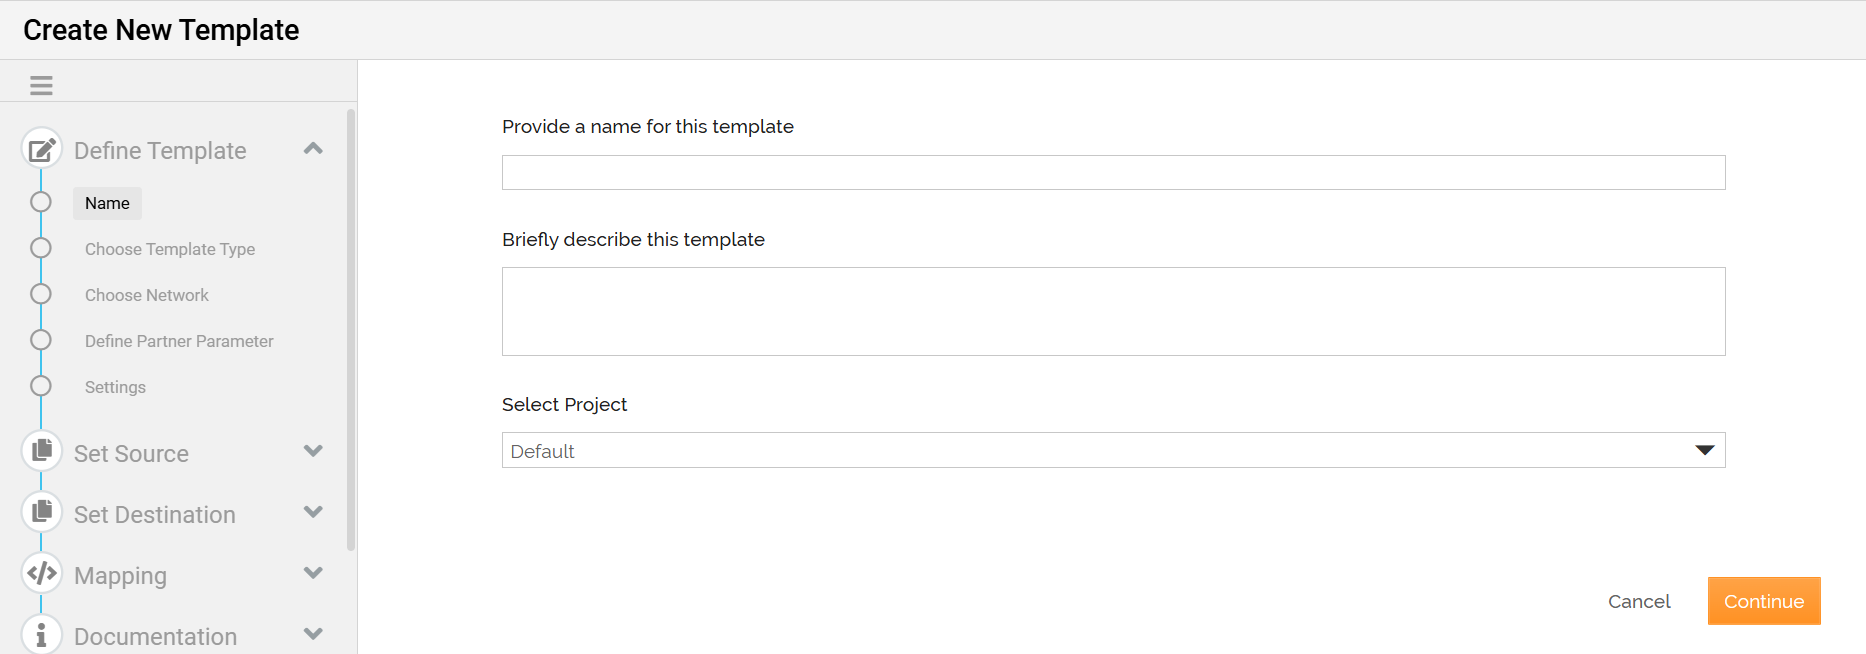
On the Create New Template screen, provide the name and description of the Template. The name should be a unique name and can be up to 48 characters long. The description of the Template can be up to 300 characters long.
-
Select the project from the Select Project drop-down list.
By default, the Select Project drop-down box displays the default project of the logged-in user as the selected project. -
Provide a display name for the Template.
-
Click Continue.
-
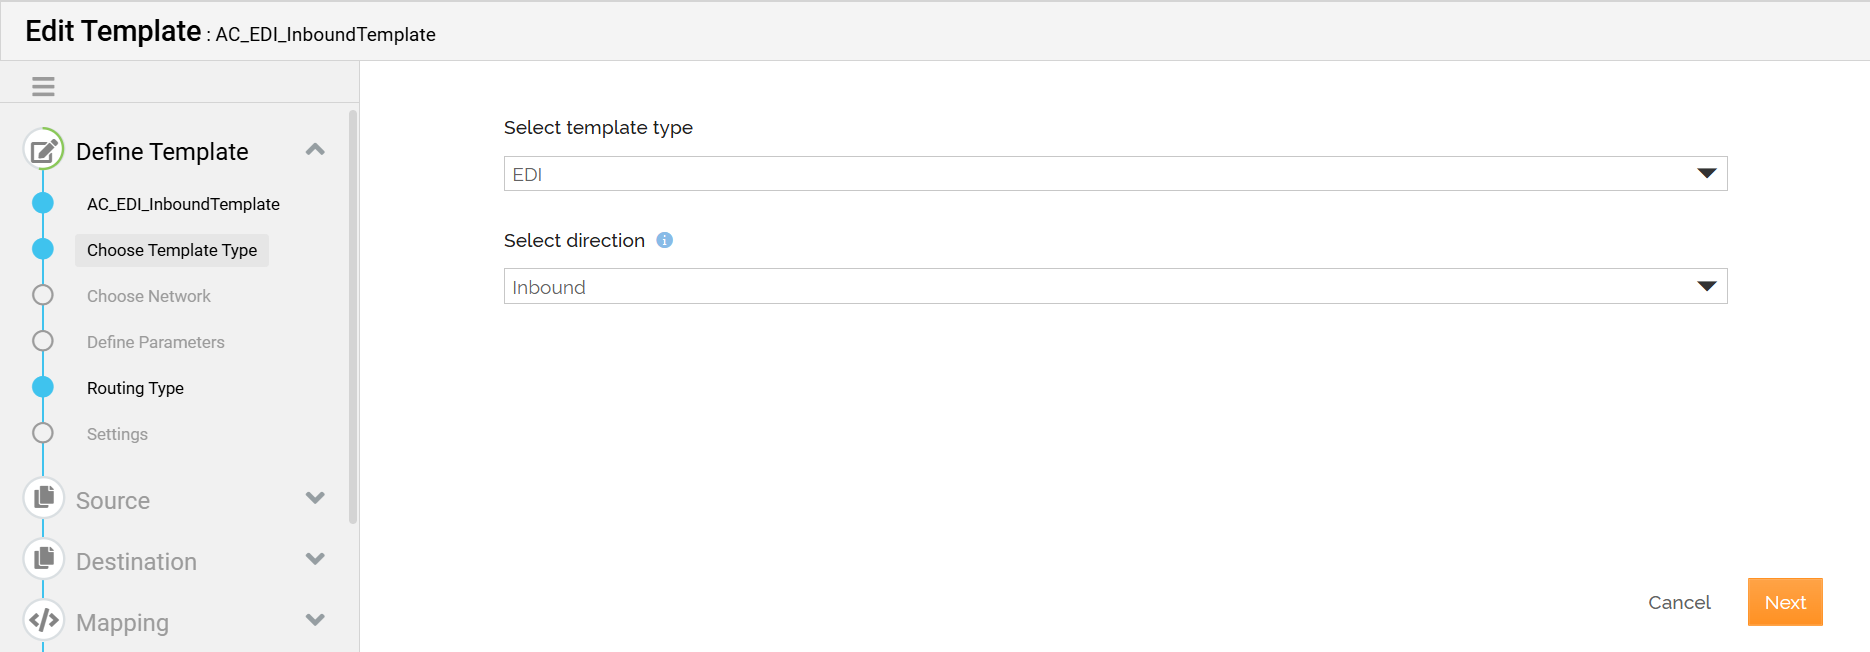
Select EDI from the template type, Inbound from the direction, and click Next.
-
Select the Network for which you are creating the Template. To select multiple Networks from the drop-down list, click on the networks one by one. Only the Partners of the selected Network(s) will be able to access this Template.
-b1f23f3404fd9cd29566e35ac63dc4cf.png)
-
Select the checkbox Allow Import Partner(s) which allows you to select a Web Form to import Partners while configuring the Transaction.
-faa1f7e069a8479c743632ab4dc7e20a.png)
-
Click Next to define EDI settings.
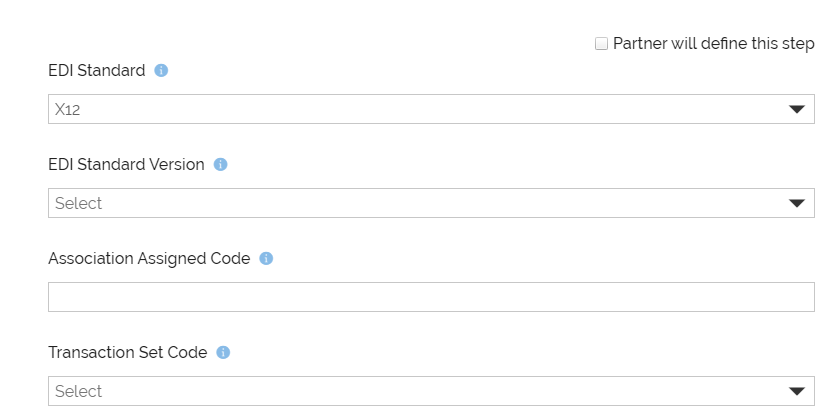
Clear the Partner will define this step check box to define this step else allow your Partner to define this step. The Partner will define this step while creating a Transaction using this Template. -
Select the EDI standard from the EDI Standard drop-down list. The available options are X12, HIPAA, and EDIFACT.
-
Select the version from the EDI Standard Version drop-down list. This list will have all the EDI versions you have created in the Data Dictionary. You will find 004010 and 005010 as a default EDI version.
-
Provide the assigned code in the Association Assigned Code text box.
-
On the basis of the selected EDI version, the list of transaction set codes is populated in the Transaction Set Code drop-down list. Select the code from the drop-down list.
-
Select the indicator from the Test/Production Indicator drop-down list. The available options are T-Test and P-Production.
-
Select the option from the Generate Acknowledgement drop-down list to generate acknowledgment for the inbound messages sent. Following are the available options:
Option Name
Description
No - Do not generate acknowledgments Select this option if you don't want to generate the acknowledgment for the inbound messages sent. Yes - No error detail Select this option to generate the acknowledgment for an inbound message sent without error details. Yes - With error detail Select this option to generate the acknowledgment for an inbound message sent with error details. To send an acknowledgment for the inbound messages received, you need to create an EDI Outbound Transaction either using a pre-built EDI Outbound Template or creating a new EDI Outbound Template. While creating an EDI Outbound Transaction, the following fields must have the same values provided while creating an EDI Inbound Template.
After you have selected the values in the above fields, select 997 in the Transaction Set Code. Provide the details in the other fields.
-
Partner Name
-
EDI Standard Version
-
Association Assigned Code
-
Test/Production Indicator
-
-
Select the Compliance Check check box to execute a compliance check on the document.
-
Select Data encryption at rest from the Data encryption at rest drop-down list.
-
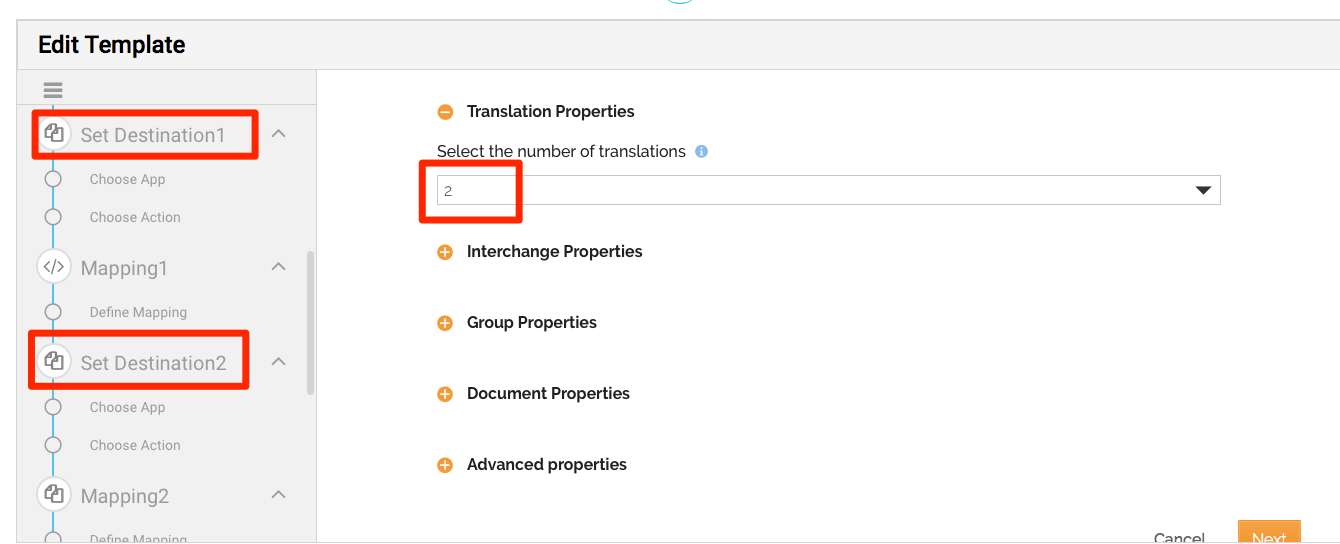
Expand Translation Properties if you want to set multiple target and mapping from a single source. A Translation is a combination of mapping and target. You will have to set up same number of Destinations (apps and mappings) for the number of translations you select. You can select a minimum of 1 and a maximum of 3 translations. For example, if you choose 2 Translations, then while setting up the template you will have to set 2 Destinations (mapping and apps) in 2 different steps.
However, you can select only 1 Translation Property if you have chosen a 997 or 999 Transaction Set Code with Acknowledgment Processing Type set to Reconcile.
-
Expand Interchange Properties.
-
Select the type of sequence checking from the Sequence Checking drop-down list. The following are the available options:
Option Name
Description
None
No sequence checking is done on the control number.
Duplicate
Duplicate means an inbound document contains duplicate control numbers. If you select this option then control numbers of inbound messages should not be duplicated. In case, the control number is duplicated then the inbound message is not processed and an error message is generated in the EDI Interchange inbound log.
Incremental
Incremental means control numbers should be in the incremental order. If you select this option then control numbers of inbound messages should be in the incremental order. In case, the control number of any message is not in the incremental order then the inbound message is processed but a warning message is generated in the EDI Interchange Inbound Log.
Chronological
Chronological means the control number should be greater than the previous control number. If you select this option then control numbers of inbound messages should be in chronological order. In case, the control number of any message is not in chronological order then the message is processed but a warning message is generated in the EDI Interchange Inbound Log.
For Incremental and Chronological sequence checking, provide the values in the Use Global Control No check box and Last Used Control No text box. Select Use Global Control No check box to use the control number defined while adding a Partner else provide the last used control number in the text box. The value of the Last Used Control No text box is populated automatically.
-
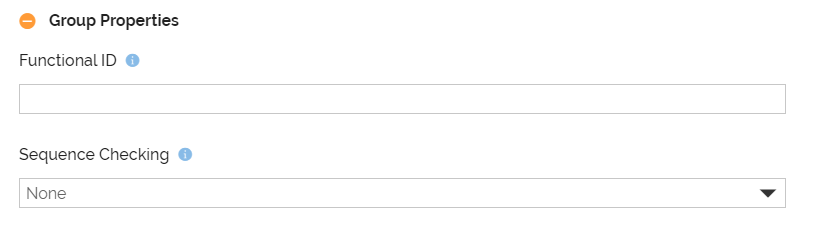
Expand Group Properties.
- Functional ID is populated automatically based on the Transaction Set Code you have selected.
- Define the sequence checking and control numbers in a similar way as defined in the Interchange Properties*.*
-
Expand Document Properties. Define the sequence checking and control numbers in a similar way as defined in the Interchange Properties*.*
-
Expand Advanced Properties.

-
Set the number of transaction sets to process at a time within a group in the Transaction sets Process Count text box, default is 2000.
-
Set the number of concurrent processes that can run at a time in the Concurrent Processes text box, the default is 1.
-
-
-
Click Next to go to the Template Settings step.
-
On the Settings screen, do the following:
-
Enter the details as described in the following table.
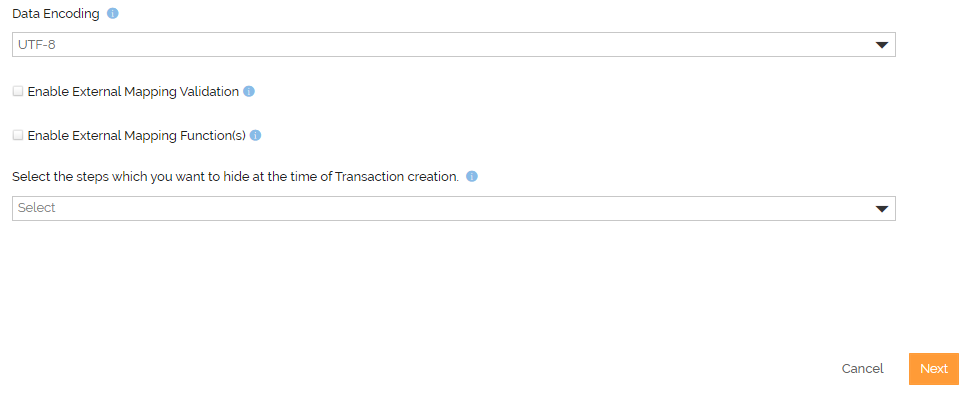
Field Name Description Data Encoding Character-set encoding for your source data. The available options
are UTF-8, UTF-16, UTF-32, and ISO-8859-1.
You can also add and use a valid custom Data Encoding.
Enable External Mapping Validation You can use this function to validate the REST API in the Mapping.
Follow the steps to enable the External Mapping Validation:Select the Enable External Mapping Validation check
box to configure the REST account for external mapping
validation.Select the Rest Account from the drop-down list of Provide
REST Consumer information field. You can also create a
new REST Account by clicking .
.Select the Do Not Persist Mapping In Case Validation
Failed checkbox if you want to restrict saving mapping
until the external mapping validation succeeds.When this checkbox is selected, the external mapping validation will be triggered every time the system/user tries to save the mapping.
Click here to get more details on using Validation Option in Mapping.
Enable External Mapping Function(s) You can use this function to apply the external map function in the
mapping through REST API. Follow the steps to enable the External
Mapping Function:Select the Enable External Mapping Function(s)
checkbox to select the REST account.Select the Rest Account from the dropdown list of
Provide REST Consumer information field. You can also
create a new REST Account by clicking.
Click here to get more details on using Available Functions in Mapping.
Select the steps which you want to hide at the time of Transaction creation Select the step that you want to hide while creating a Transaction by
using this Template. You can hide the Definition page.If you choose to hide the Definition Page:
The template definition will be treated as the definition for the
transaction.The transaction name will be a combination of the template
name and the partner name.By default, the value for repository file retention will be set to DELETE ON SUCCESS EXCEPT SOURCE DATA for a Transaction you create using this Template.
-
Expand Advanced Settings to set the Logging Level and Activity Logging Retention. The available options for the fields are as follows:
-
Logging Level- INFO, DEBUG, and ERROR
-
Activity Logging Retention- DONT DELETE, DELETE ON SUCCESS, and NO LOGGING. To learn more about these options, refer to this page.

-
-
-
Click Next to select the Source application.