Defining a Custom Partner to Partner Exchange Template
 | Only a Company administrator and an IT User can create a Template. However, it is recommended that only an IT User creates a Template. |
To create a Partner to Partner Exchange Template:
-
Click Configure > T****emplates > Create Template.
-
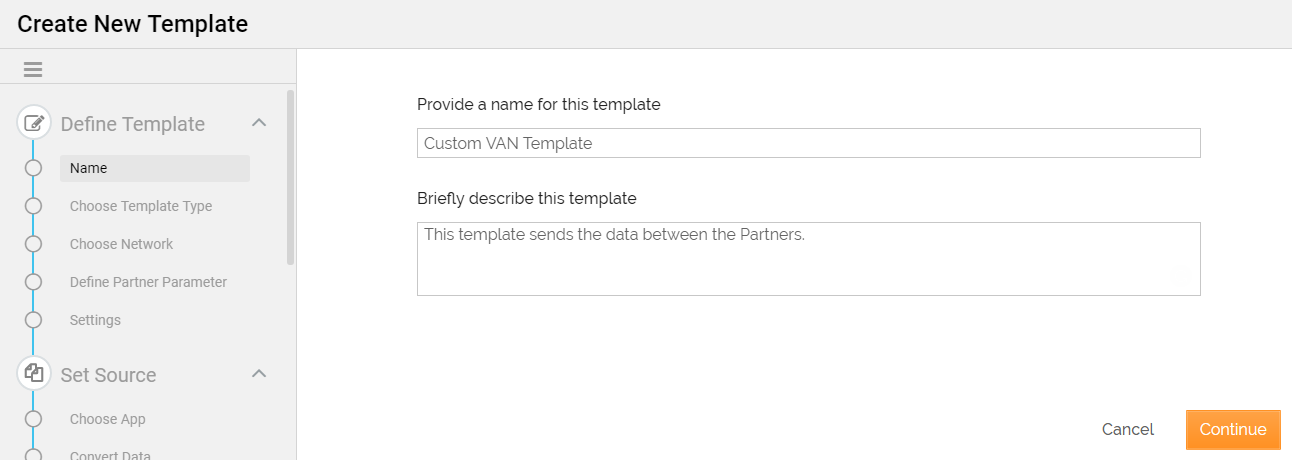
On the Create New Template screen, provide the name and description of the Template. The name should be a unique name and can be up to 48 characters long. The description of the Template can be up to 300 characters long.
-
Select the Project from the Select Project drop-down list.
By default, the Select Project drop-down box displays the default project of the logged-in user as the selected project. -
Provide a display name for the Template.
-
Click Continue.
-
Select Custom from the template type and Partner to Partner Exchange from the direction.
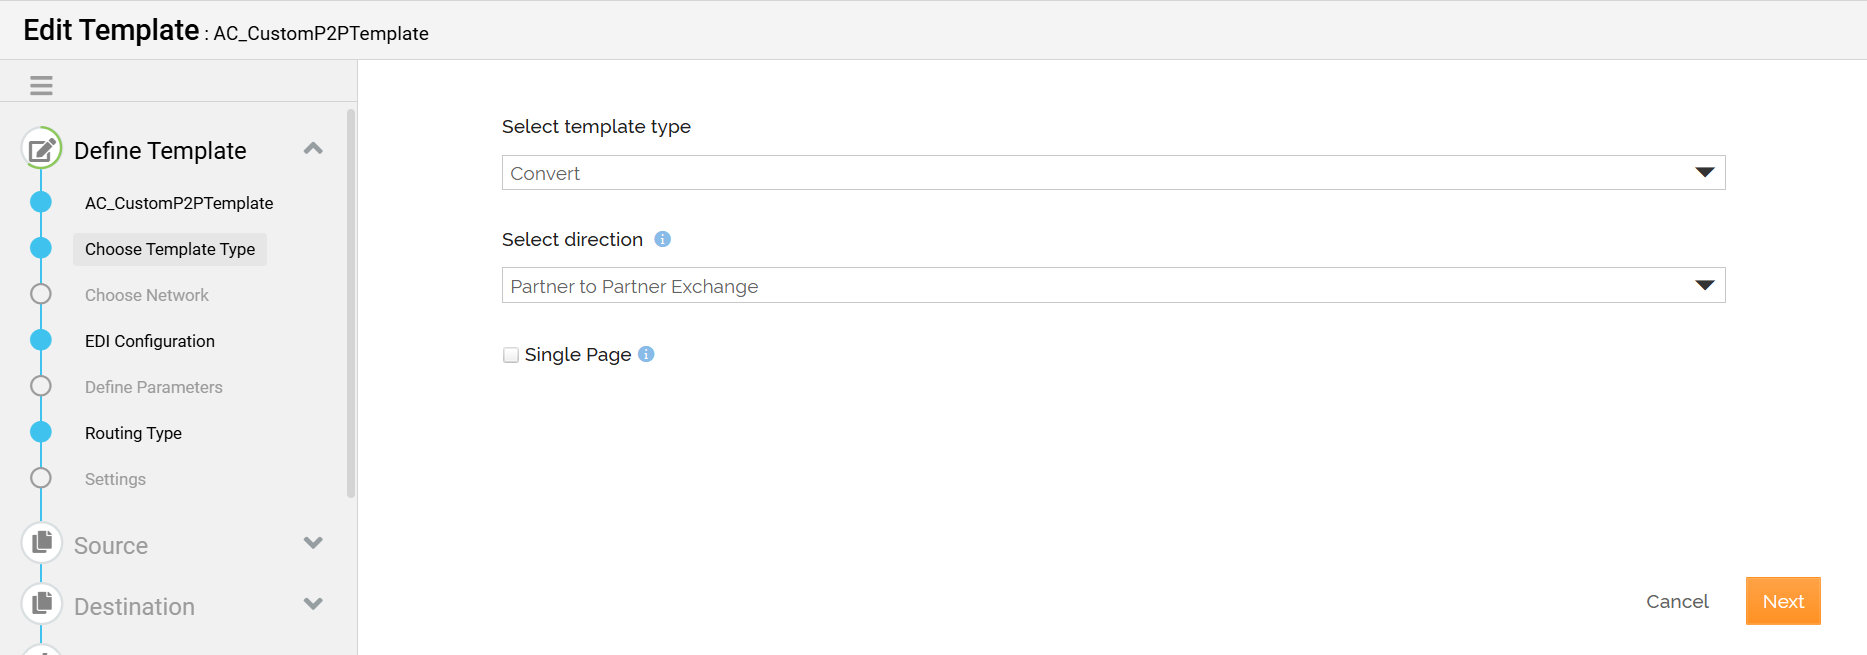
Select the Single Page checkbox if you want to create a Partner to Partner Exchange Transaction on a single page. You can not change its value once a Transaction has been created using this Template.
-
Click Next to select the process flow.
-
Select the process flow from the drop-down list. This will list all the process flows published as a template.
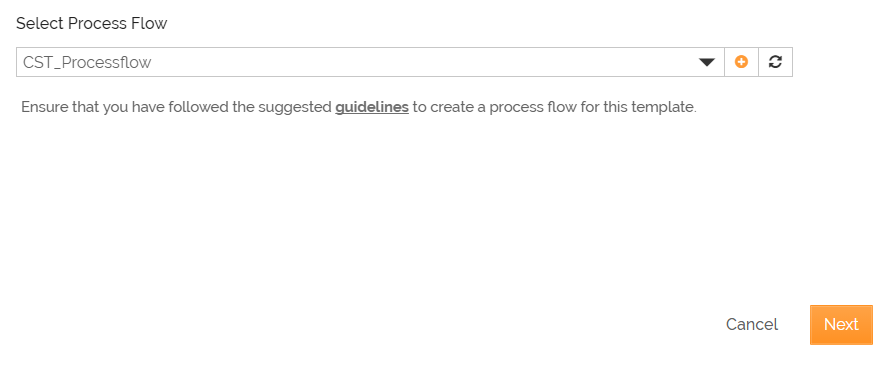 You can either select from an existing published Process Flows or create a new one by clicking
  .
. If you are creating a new Process Flow, you must know the guidelines for defining the Process Flow in the Custom Template. Click here to view the guidelines.
- On the Create Process Flow window,
- Provide a unique process flow name and description
- Select the project from the drop-down list of Projects and click Done.
- Now, create a Process Flow as per your requirements.
- On the Create Process Flow window,
-
Click Next to select the activities.
You may get an alert message if there is a change in the selected process flow. Click Sync to view the updated list of activities. -
The screen will display all the activities used in the Process Flow.
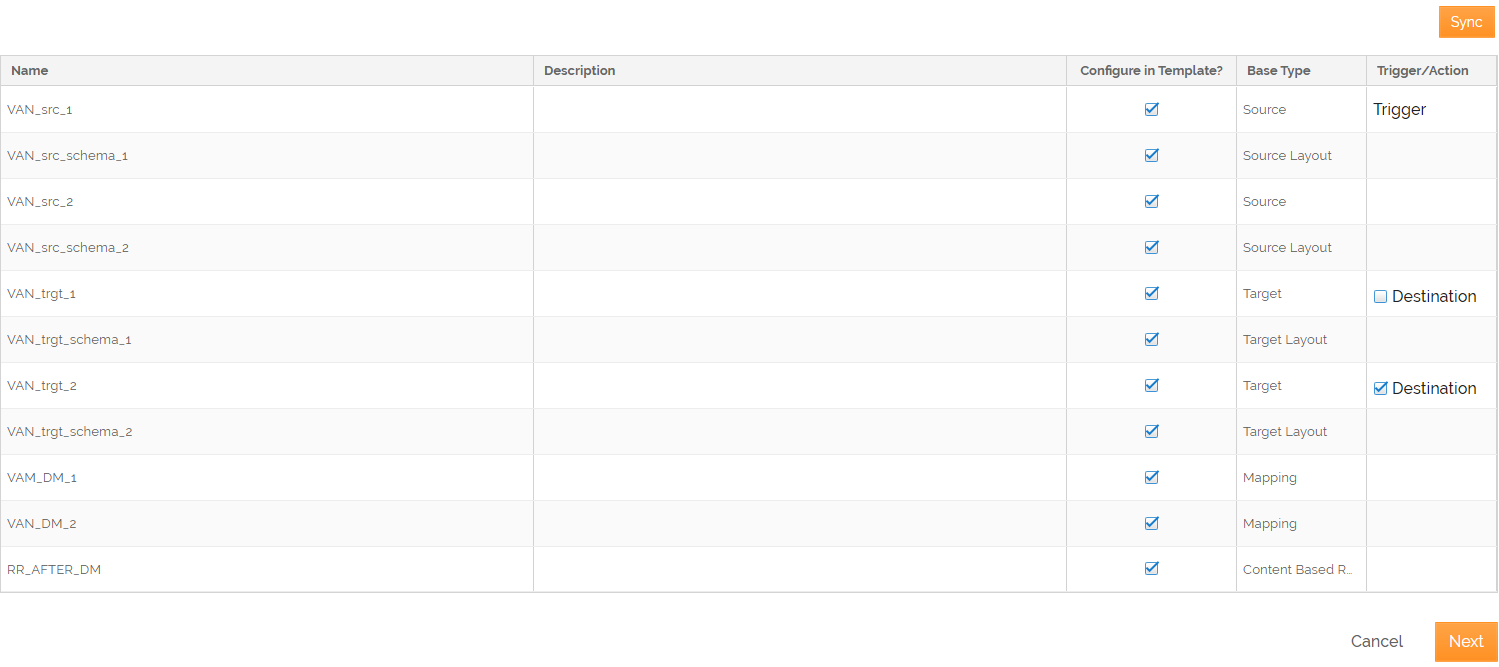
Name Description Name List of services used in the process flow. You can update and give an appropriate and meaningful name to these services in this template.
The names you provide here will reflect as the steps in the template.Description Description of the services used in the process flow. It helps you understand what exactly the service does and it appears as a tooltip for that service. Configure in template? Selecting or deselecting these checkboxes determines whether you would be able to configure or override the services predefined in the process flow or not. If you clear the check box against a service, that service won't reflect as a step in the template.

Nevertheless. you will not be able to apply this rule for Trigger, selected Destination, and Routing (if it is Content based routing). Base Type Type of activity - source, layout, mapping, and so on. Trigger/Action Shows the Source which will act as a trigger in case there are multiple sources. In case of multiple destinations, select the destination by clicking the Destination check box in the Trigger/Action column. -
Click Next to define the parameters.
-acab65ea9bb492c937796528e25e08e5.png)
-
Click Add Parameter to add either Template or Transaction Parameters. These are the parameters whose value you want to get while creating a Template or Transaction.
Template Parameters: Company Users will define the value of these parameters while creating a Template.
Transaction Parameters: Business Users or IT Users will define the value of these parameters while creating a Transaction using this Template.
-48041b3722c802be004f5a7945ffef10.png)
Fields Description Group A unique name to identify a group. Name Name of the parameter. Display Name Display name for the Parameter. This display name will be visible instead of the Parameter's actual name on the Parameter Values page. Tooltip Message that you want to show as a tooltip for the Parameter. Parameter Type Type of the input parameter to be received from the Partner. Mandatory The parameter may be mandatory or optional. By default, the parameters are mandatory. Default Value Default value of the parameter. Depending on the Parameter Type you have selected, you may have to define some additional fields/options or settings while defining a parameter. Refer to the Templates and Transactions Parameters page for more information on fields and their possible values.
-
Click Next to define the values of the Template parameters. This screen appears only if you have provided Template Parameters in the previous step.
-
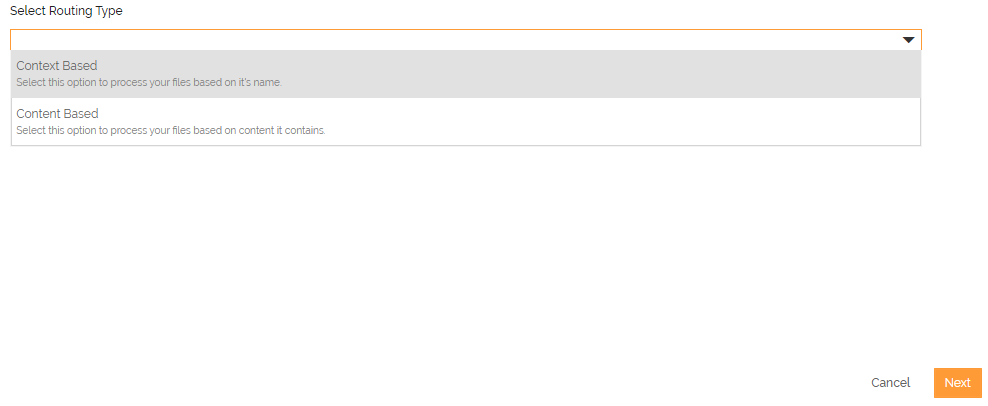
Click Next to select the routing.
-
The routing option is selected by default depending on the selected Process Flow. If the Process Flow contains Content Based routing activity then by default Content Based routing option is selected otherwise Context Based routing option.
-
Click Next to configure template settings.
-
On the Settings screen, do the following:
-
Enter the details as described in the following table.
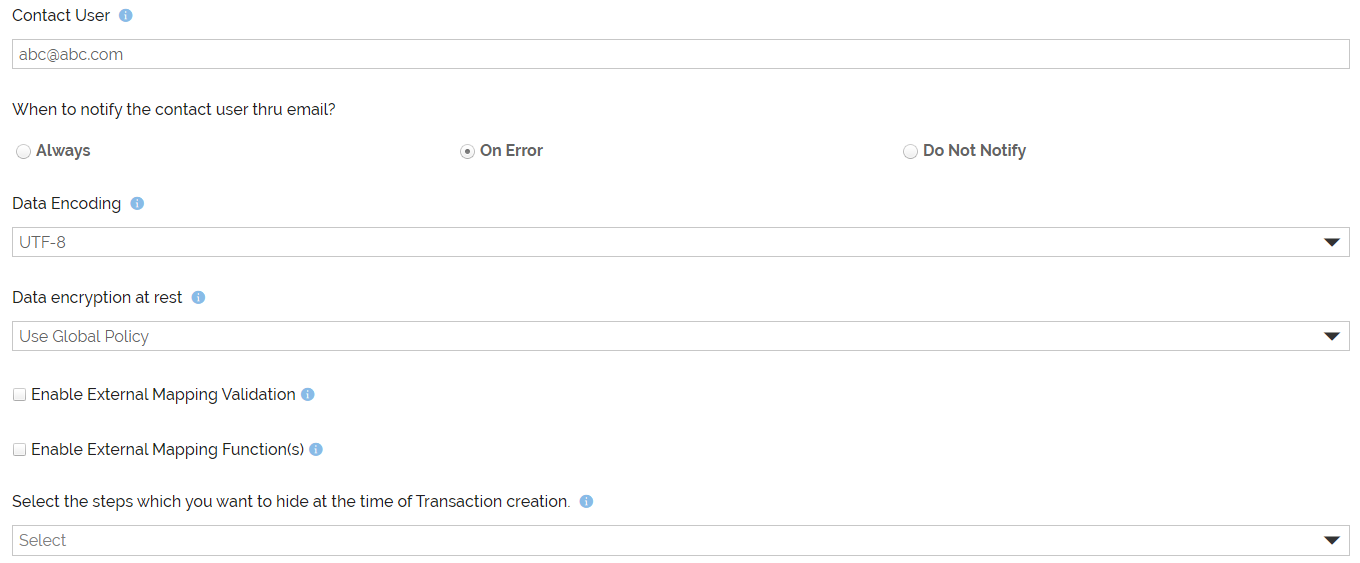
Field Name Description Contact User
Email id(s) listed here will receive a notification email whenever the Transaction
is executed successfully or if there is an error during execution. Multiple email
ids are separated by a comma.If Adeptia Connect is running on multiple environments and you want to receive
environment name in the emails, then you need to specify the environment name
in the relevant property (Account > Settings > Expand Application Settings >
Common > Expand Personalization).When to notify the contact? Always: Send an email whenever the execution of the transaction associated
with this template is successful.On Error: Send an email if an error occurred during the execution of the transaction
associated with this template.Do Not Notify: Select this option if you do not want to receive an email notification
after the execution of the transaction associated with this template.Email Notification Format This field is visible only when you have selected the Always or On Error option to send
the notification to the user.
You can choose the Email Notification Format to use in the email notification to be
sent to the user on successful and failed Transaction. There are two possible values
for this: Default and Customized Notification Format. By default, the value of this
field is set to Default.
If you select the Customized Notification Format, you need to provide the following
details:Select the custom success email notification format from the Custom Success
Notification Format field. You can also create a new email notification format
by clicking .
.
The existing email notification format can also be copied and edited by clicking
the and
and  icons respectively. Use refresh
  icon to refresh the list.
This field is visible only when you have selected the Always option to send the notification to the user. Select the custom error email notification format from the Custom Error
Notification Format field. You can also create a new email notification format
by clicking.
The existing email notification format can also be copied and edited by clicking
the and icons respectively. Use refresh icon to refresh the list.This field is visible only when you have selected the On Error or Always option to send the notification to the user.
Data Encoding Character-set encoding for your source data. The available options are UTF-8, UTF-16,
UTF-32, and ISO-8859-1.You can also add and use a valid custom Data Encoding.
Data encryption at rest Select the particular option from the drop-down list of Data encryption at rest. You can enable,
or disable, and use global Property value to configure EAR for Template.
Use Global Policy: Select 'Use Global Policy' to use Global Property value for Template.
Yes: Select 'Yes' to enable EAR for Template. It will not use Global Property value.
No: Select 'No' to disable EAR for Template. It will not use Global Property value.Enable External Mapping Validation You can use this function to validate the REST API in mapping. Follow the steps to enable
the External Mapping Validation:Select the Enable External Mapping Validation checkbox to configure the
REST account for external mapping validation.Select the Rest Account from the drop-down list of the Provide REST Consumer
information field. You can also create a new REST Account by clicking .
.Select the Do Not Persist Mapping In Case Validation Failed checkbox if
you want to restrict saving mapping until the external mapping validation
succeeds.When this checkbox is selected, the external mapping validation will be triggered every time the system/user tries to save the mapping.
Click here to get more details on using Validation Option in Mapping.
Enable External Mapping Function(s) You can use this function to apply the external map function in the mapping through REST
API. Follow the steps to enable the External Mapping Function:Select the Enable External Mapping Function(s) checkbox to select the
REST account.Select the Rest Account from the dropdown list of the Provide REST Consumer
information field. You can also create a new REST Account by clicking.
Click here to get more details on using Available Functions in Mapping.
Select the steps which you want to hide at the time of Transaction creation Select the step that you want to hide while creating a Transaction by using this Template.
You can hide either the Definition page or the Settings page.If you choose to hide the Definition Page:
The template definition will be treated as the definition for the transaction.
The transaction name will be a combination of the template name and the partner
name.
If you choose to hide the Settings Page:
The settings done on the Template Settings page will be treated as the settings for
the transactionBy default, the following values will be set for logging level, repository file retention, and activities logging retention for a Transaction you create using this Template:
- When the Routing Type is set to None:
- Logging Level: ERROR
- Repository File Retention: DELETE ON SUCCESS EXCEPT SOURCE DATA
- Activities Logging Retention: DONT DELETE
- When Routing Type is set to Content or Context Based:
- Repository File Retention: DELETE ON SUCCESS EXCEPT SOURCE DATA
Once the External Mapping Function is enabled, then you can choose Available Functions from the Destination elements of mapping to apply the custom function as a mapping expression.
Once External Mapping Validation is enabled, then icon is visible on the toolbar of the mapper to validate the REST API.
 -
Expand Advanced Settings to set the Logging Level and Activity Logging Retention. The available options for the fields are as follows:
-
Logging Level- INFO, DEBUG, and ERROR
-
Activity Logging Retention- DONT DELETE, DELETE ON SUCCESS, and NO LOGGING. To learn more about these options, refer to this page.

-
-