Filtering an Element and its Attributes at Destination
You can filter elements or attributes from appearing in the destination XML or to simplify you view while creating your mapping. There are following ways to filter data:
-
Using IFF Condition
-
Using Apply Filter
-
Using Show Required Fields Only
The Apply Filter method is recommended as it is easy to use and can be done individually on multiple nodes, directly from the Web Mapper applet.
Using Apply Filter
Steps to filter using Apply Filter
-
Ensure that the source and destination layout are loaded and all their elements are listed under their respective nodes.
-
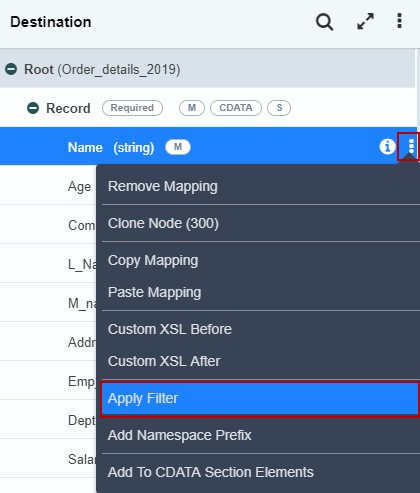
Select the destination element that you want to filter, click more icon and then select Apply Filter option.
-
This selection will filter the selected element from the target output XML data.
- You can apply this filtering option on the element or attribute levels.
- Once the filter is applied on the destination element, the letters (FL) are displayed next to each filtered destination element. This signifies that the filter has been applied for the destination element.
Using Show Required Fields Only
You can use the Show Required Fields Only option to filter and simplify the Layout view for Destination by displaying only the mandatory fields within it. To do so,
-
Ensure that the source and destination layout are loaded and all their elements are listed under their respective nodes.
-
Click More against the root element of the Destination Layout.
-
Select Show Required Fields Only.
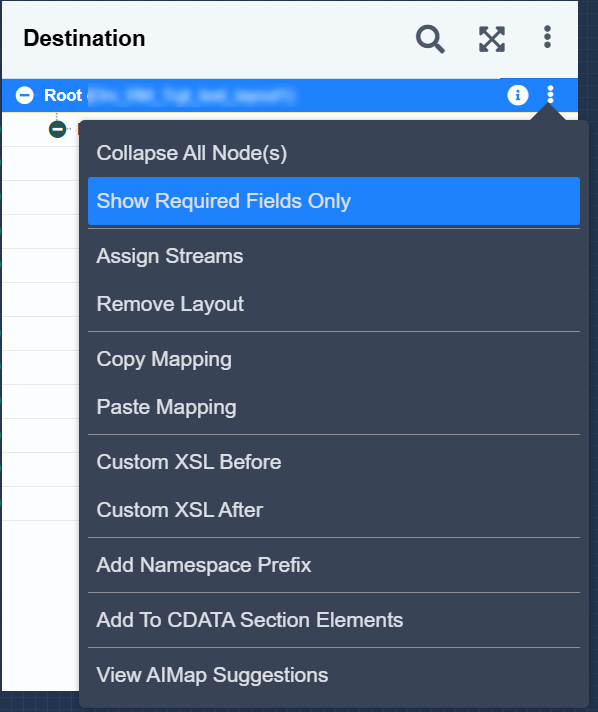

To view all the fields in the Layout again, click More against the root element and select Show All Fields.