Value Map
You can create a Value Map if you want to replace a source field's value with some other value. For example, if you have a source field Priority, you can create a Value Map as shown in the table below.
| Value (Source field value) | Map (Target field value) |
|---|---|
| High | H |
| Medium | M |
| Low | L |
You can now use this Value Map in the mapping to replace the value of the target field with H, M, or L based on the value in the corresponding source field. For instance, if the source field's value is High, the target field's value will be H.
In Adeptia Connect you can also create a Multi Valued Map to map a source value to multiple values. It is useful in scenarios that involve one-to-many associations. By leveraging Multi Valued Maps, data mapping processes become more efficient, organized, and easier to manage.
This page contains the following information:
Creating a Value Map
Follow the steps given below to create a Value Map.
 | Before you start creating a Value Map, ensure that the source and target layouts are loaded, and all their fields are listed under their respective nodes. |
-
On the mapping screen, in the Parameters panel, click the Add Parameters
 and then select Value Map option.
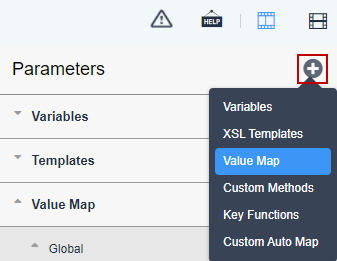
Alternatively, click Configure > DATA TRANSFORMATION > Value Map > Create Value Map. -
In the Parameters panel, click the Add Parameters and then select the Value Map option.
-
Select the scope of the Value Map.
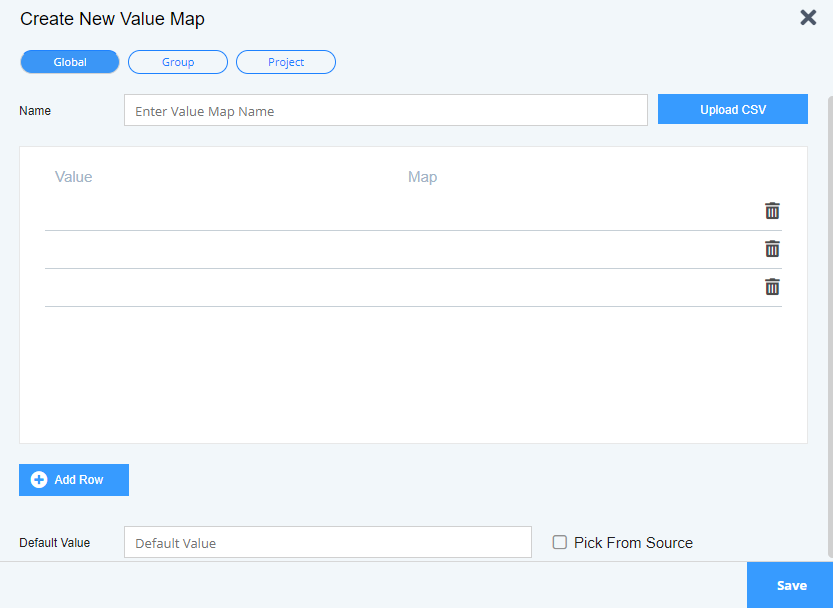

Scope of a Value Map is the context within which it is defined and can be accessible within or across the user groups. Scope Description Global The Value Maps defined within Global scope are available within all the mappings. By default, Global is selected and a Value Map is saved in the Global scope. Group The Value Maps defined within Group scope are available only within the specific user group. Project The Value Maps can be defined to be a part of a project. A user can access the Value Map only if the user has got access to that project. -
In the Name field, enter the name of Value Map.
-
Enter the values in the Value and the Map cells in the table on the Create New Value Map screen.

The following special characters are not allowed in a Map cell:
- “ (double quote)
- ‘ (single quote)
You can also provide these values by uploading a CSV file containing the value-map pairs. In a value-map pair, the value and its corresponding mapped value should be separated by a comma, and each pair should be written in a new line as shown below:
- CSV format for Value Map
High, H
Medium, M
Low, L
-
Click Add Row to add another row (if required).
If you want to delete any row, select the respective row and click the Delete icon. -
Consider to use the Default Value field and Pick from Source option in case a value is not mapped in the value-map set.
-
In the Default Value field, provide a default value to be used for the target field. Also, if there is no value provided for the source field, this default value will be used for the target field.
For example, assume that at source, the Priority field has High, Medium, Low, and Trivial as values. You may want to map High, Medium, and Low with H, M, and L respectively as the values in the corresponding field at the destination. For the other value, Trivial, you can either provide a default value or use the Pick from Source option.If you provide a default value, the same value will be used for all the unmapped values. For instance, if you provide Common as the default value, then Common will be used for Trivial at the destination. -
Select the Pick from Source checkbox if you want to use the source field value or do not want to use the default value as the Map value for the target field.
-
The newly created Value Map is added and displayed in the Parameters panel at the following locations based on the selected scope:
| Scope | Location in the Parameters panel |
|---|---|
| Global | Value Map/Global |
| Group | Value Map/Group |
| Project | Value Map/Project |
|
|
Creating a Multi Valued Map
A Multi Valued Map can change a value coming from a source field into multiple different values that can be sent to the corresponding destination field. You can have one Multi Valued Map that can be used across mappings that need to have different values at the destination for a given source field value.
To create a Multi Valued Map in the Data Mapper:
| Before you start creating a Multi Valued Map, ensure that the source and target layouts are loaded, and all their fields are listed under their respective nodes. |
-
In the Parameters panel on the data mapping screen, click
and select Multi Valued Map.
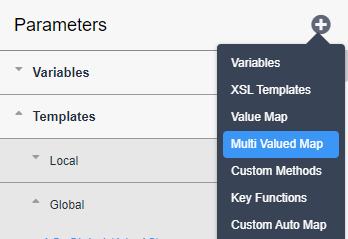
Alternatively, click Configure > DATA TRANSFORMATION > Multi Valued Map > Create Multi Valued Map. -
On the Create New Multi Valued Map screen, select the scope of the Multi Valued Map.
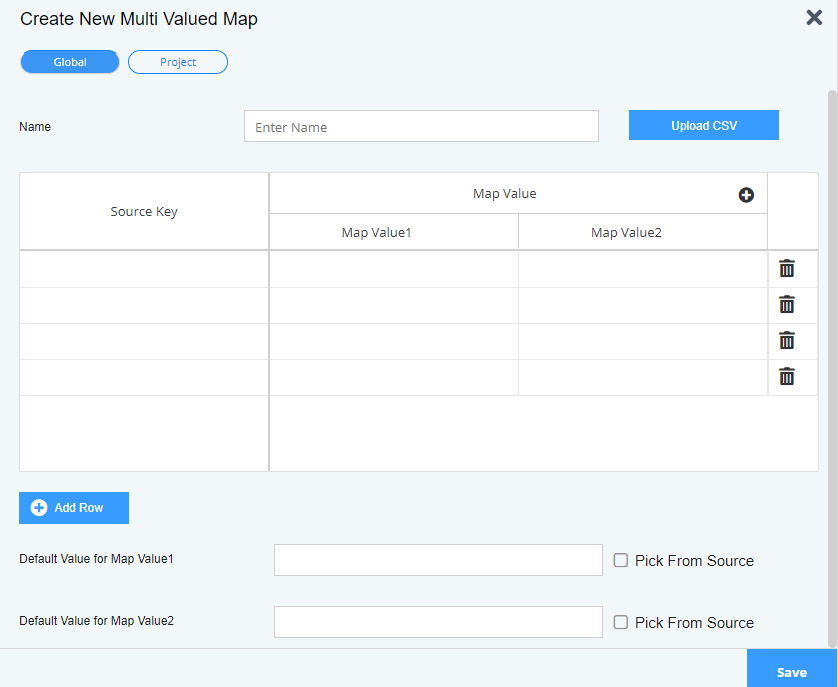
The scope of a Multi Valued Map is the context within which it is defined and can be accessible within or across the user groups. Scope Description Global The Multi Valued Maps defined within the Global scope are available within all the mappings.
This is the default setting for Multi Valued Maps. Project Multi Valued Maps can be associated with a specific project. The Users can access these maps only if they have access to the particular project. -
In the Name field, enter the name of the Multi Valued Map.
-
Enter the source field's value in the SOURCE KEY column and the corresponding value to be mapped in the MAP VALUE column of the table respectively.
The following special characters are not allowed in a MAP VALUE column:
- “ (double quote)
- ‘ (single quote)
- Click
 next to the MAP VALUE column to add a map value column. You can add a maximum of ten map values against a source field value.
 - You can enter the map values manually, through a CSV file, or using both methods.
To create a Multi Valued Map by uploading a CSV file, you need to ensure that the CSV file adheres to the following guidelines:
- The Source Key is placed in the first column, and the map values are in the subsequent columns.
Each Source Key value and its mapped values are comma separated.
- Any data containing commas (,) is put in double quotes to ensure correct parsing.
- Headers is not included in the uploaded file, as shown in the example below:
<ch:codesample>
</ch:codesample>
- If the dataset file contains more than ten map value columns, only the first ten map value columns will be displayed.
- To rename a column in the table, double-click on its current name and enter a new name, with a maximum length of 64 characters.
- Click
 to add a new row if required.
 - Click
 next to the respective column or row that you want to delete.
-
If you have not provided value in the map value column, you may do either of the following:
-
In the Default Value field, provide a default value to be mapped in the target field.
For example, assume that at the source, the Priority field has High, Medium, Low, and Trivial as values. You may want to map High, Medium, and Low with H, M, and L respectively as the values in the corresponding field at the destination. For the other value, Trivial, you can provide a default value to be mapped at the target.If you provide a default value, the same value will be used for all the unmapped values of the column. For instance, if you provide Common as the default value, then Common will be used for Trivial at the destination. -
Select the Pick from Source checkbox if you want to use the source field value as the Map value for the target field.
-
-
Click Save.
The newly created Multi Valued Map is added and displayed in the Parameters panel at the following locations based on the selected scope:
Scope Location in the Parameters panel Global Multi Valued Map > Global Project Multi Valued Map > Project - You can edit or remove a Multi Valued map from the Parameters Panel by clicking
 next to the Multi Valued Map and selecting either Edit or Remove.
 - To view the list of mappings that use the Multi Valued map, click and select View Dependencies.
- You can edit or remove a Multi Valued map from the Parameters Panel by clicking
Using Value Map in a mapping
Follow the steps given below to use a Value Map in a Mapping.
-
While creating the mapping, select the target field. The selected target field is shown in Mapping Expression area.
-
In the Parameter panel, click Value Map to expand it.
-
Click Global, Group, or Project to expand the scope in which the required Value Map lies.
-
Double-click the Value Map you want to use.
-
Double-click the source field corresponding to the selected target field.
-
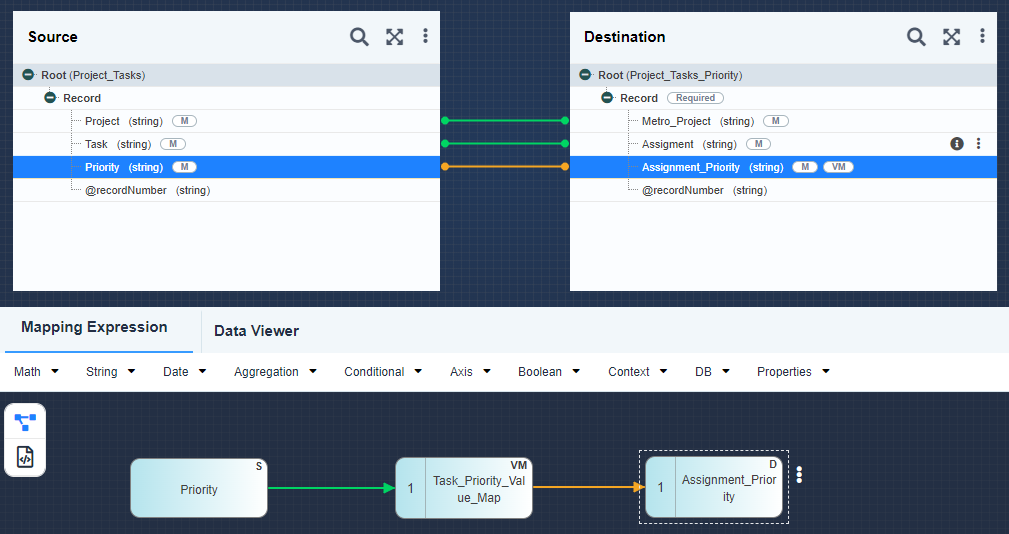
Connect the output of the source field to the input of the Value Map, and then connect the output of Value Map to the input of the target field.
-
Click
 (Save) to save the mapping.
 You can also achieve this by using the Textual Rule. Given below is the syntax for using a Value Map through Textual Rule:
Value-Map-Task_Priority_Value_Map($Input_Project_Tasks/Root/Record/Priority)
where,
Task_Priority_Value_Map is the name of the Value Map.
Project_Tasks/Root/Record/Priority is the xPath of the Source field.
Using Multi Valued Map in a mapping
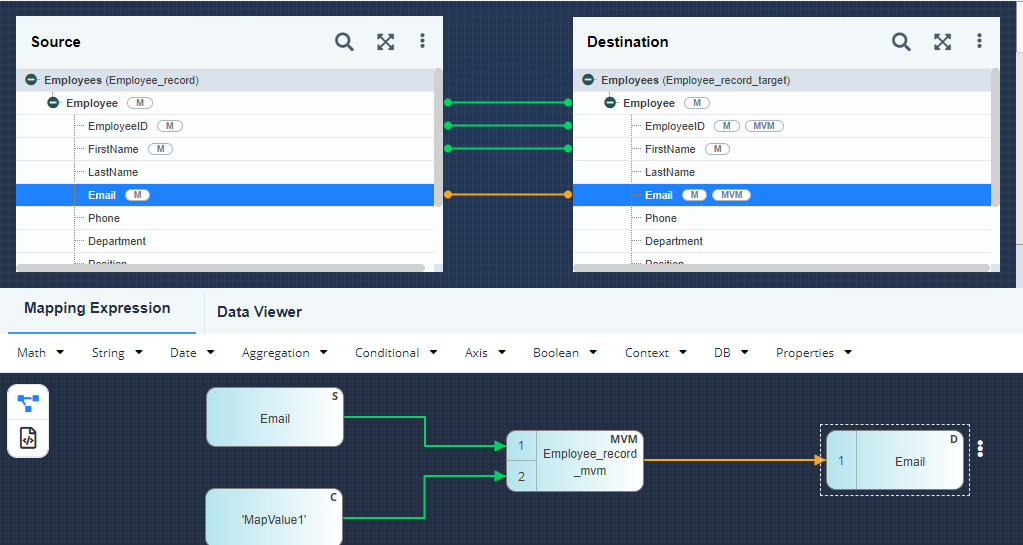
Follow the steps given below to use a Multi Valued Map in a Mapping:
-
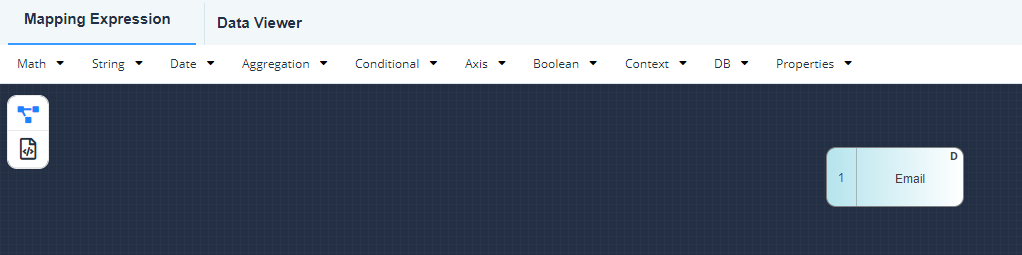
Select the target field.
The selected target field is shown in the Mapping Expression area.
-
In the Parameter panel, double-click the Multi Valued Map you want to use.
-
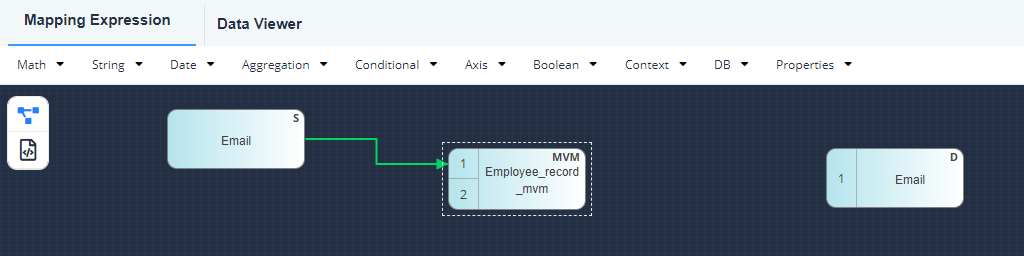
Double-click the source field from the Layout.
The selected source field is shown in the Mapping Expression area. -
Connect the output of the source field to input 1 of the Multi Valued Map.
-
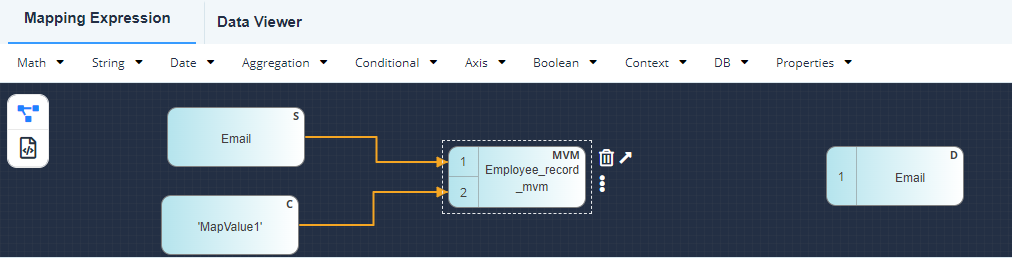
Click **Add Constant.
**This adds a constant element to the Mapping Expression area. -
Double-click the Constant element.
-
On the Add Constant screen, in the Constant Value field, enter the name of the map value column whose values you want to use at the destination.

-
Select Add Quotes.
-
Click Ok.
-
On the Mapping Expression screen, connect the output of the Constant to the input 2 of the Multi Valued map.
-
Connect the output of Multi Valued Map to the input of the target field.
-
Click
to save the mapping. You can also achieve this by using the Textual Rule. Given below is the syntax for using a Multi Valued Map through Textual Rule:
Multi-Valued-Map-Employee_record_mvm( $Input_Employee_record/Employees/Employee/Email,'MapValue1')
Where,
Employee_record_mvm is the name of the Multi Valued Map.Employee_record/Employees/Employee/Email is the xPath of the source field.
MapValue1 is the name of the map value column.