Configuring an OAuth Client in Azure for accessing Graph API
Adeptia Connect supports the use of Microsoft Graph API in mail activities, including Mail Source, Mail Target, Mail Event, Mail Account, and Mail Notification. To enable access to the Graph API, you must configure an OAuth client in the Azure Portal. This involves registering an application in Azure Active Directory, generating client credentials, and assigning the necessary API permissions.
This guide provides a step-by-step process to help you configure the OAuth client in Azure, ensuring secure and authorized access to Microsoft Graph API for Adeptia Connect.
Registering the application (client)
-
Log in to the Azure Portal with an account that has administrative privileges.
-
From the dashboard, select Azure Active Directory.
-
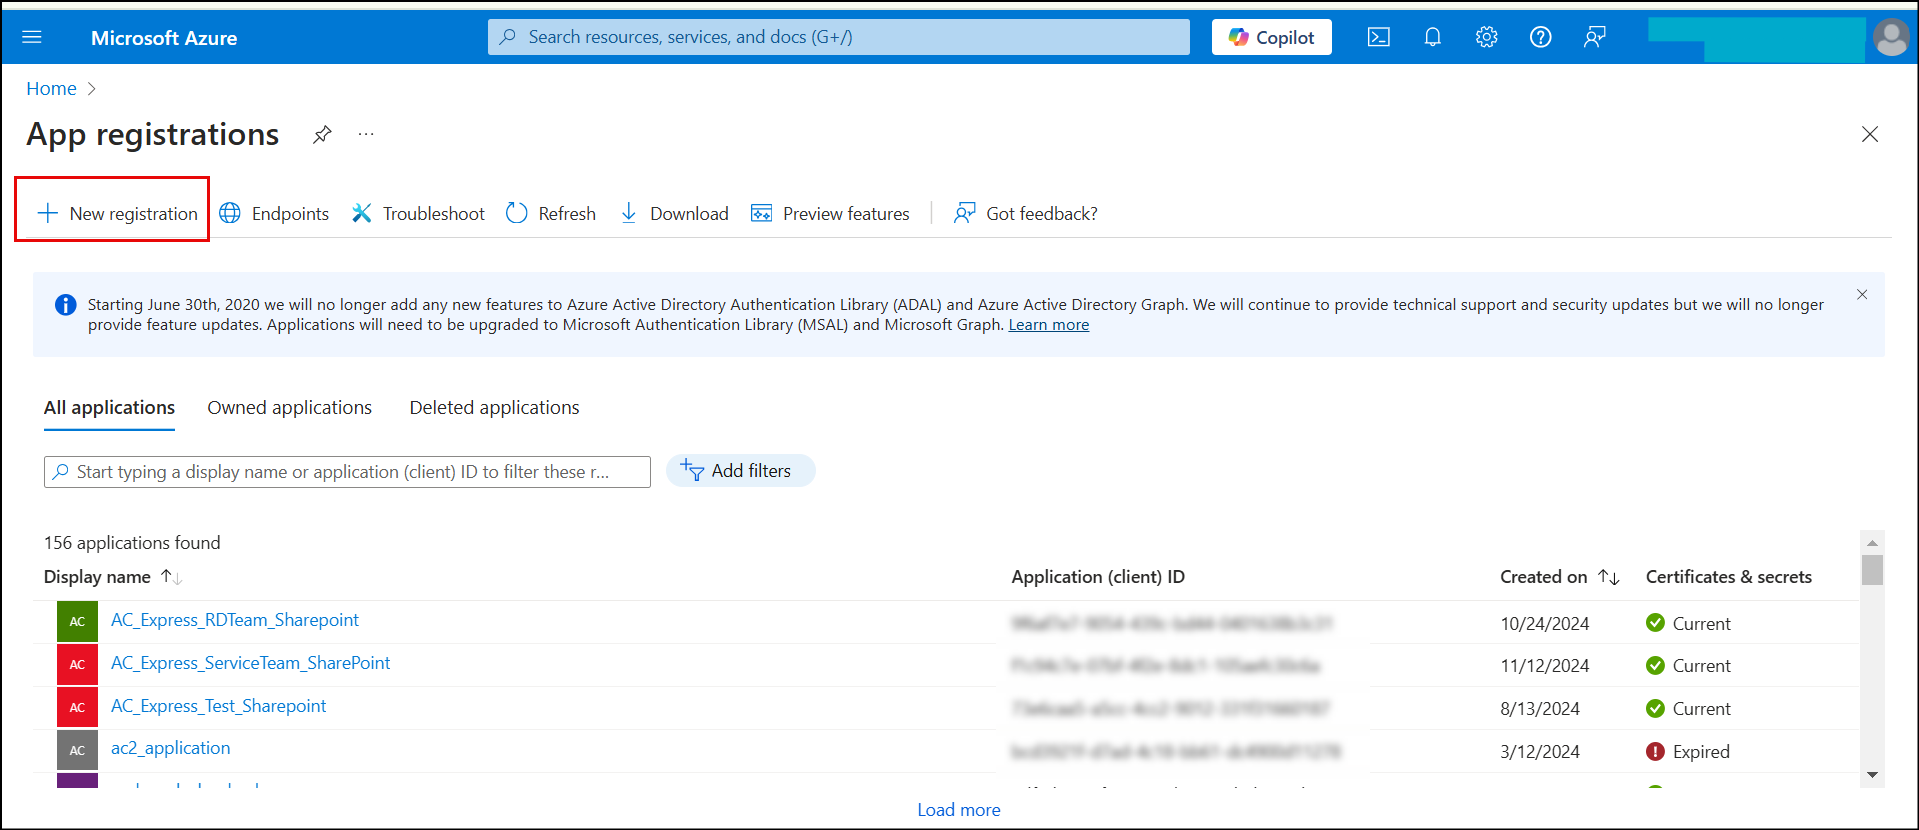
In the Azure Active Directory menu, click App Registrations and then click + New registration.
-
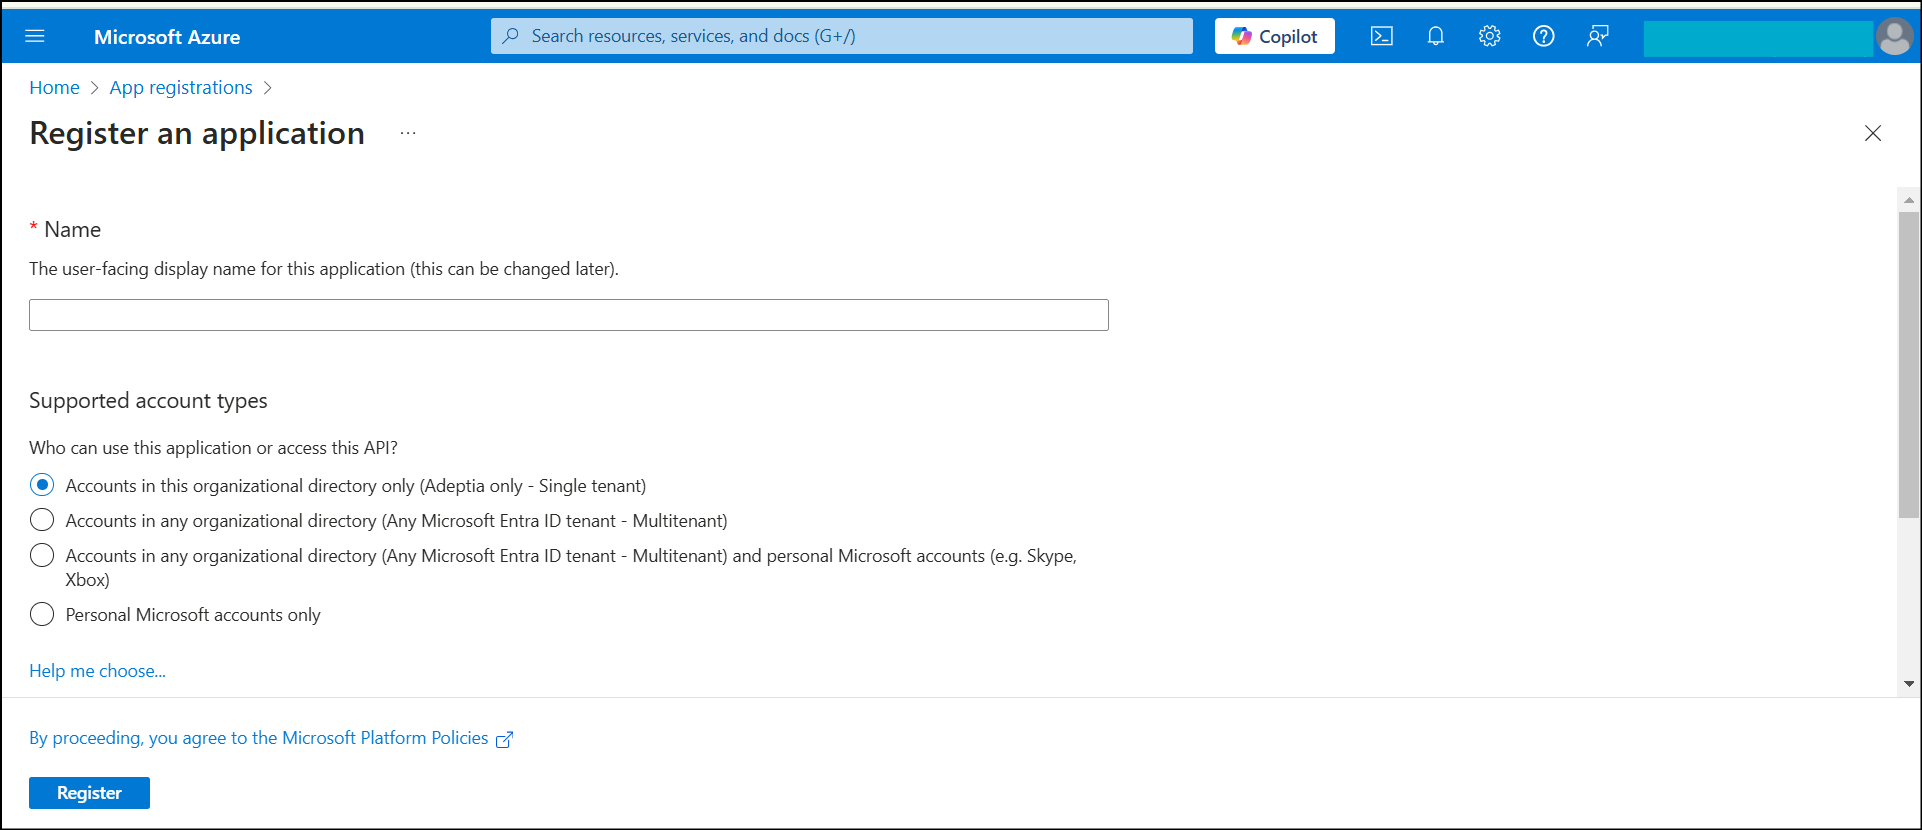
On the Register an application screen, do the following:
-
In the Name field**,** enter a name for the application you register, for example, SharePoint_Integration.
-
Under the Supported account types section, select the appropriate option based on the intended audience for your application.
-
Under the Redirect URI section select Web as the platform and enter the Redirect URI in the following format:
https://<domain>/rest/oauth/account
-
-
Click Register to register the application.
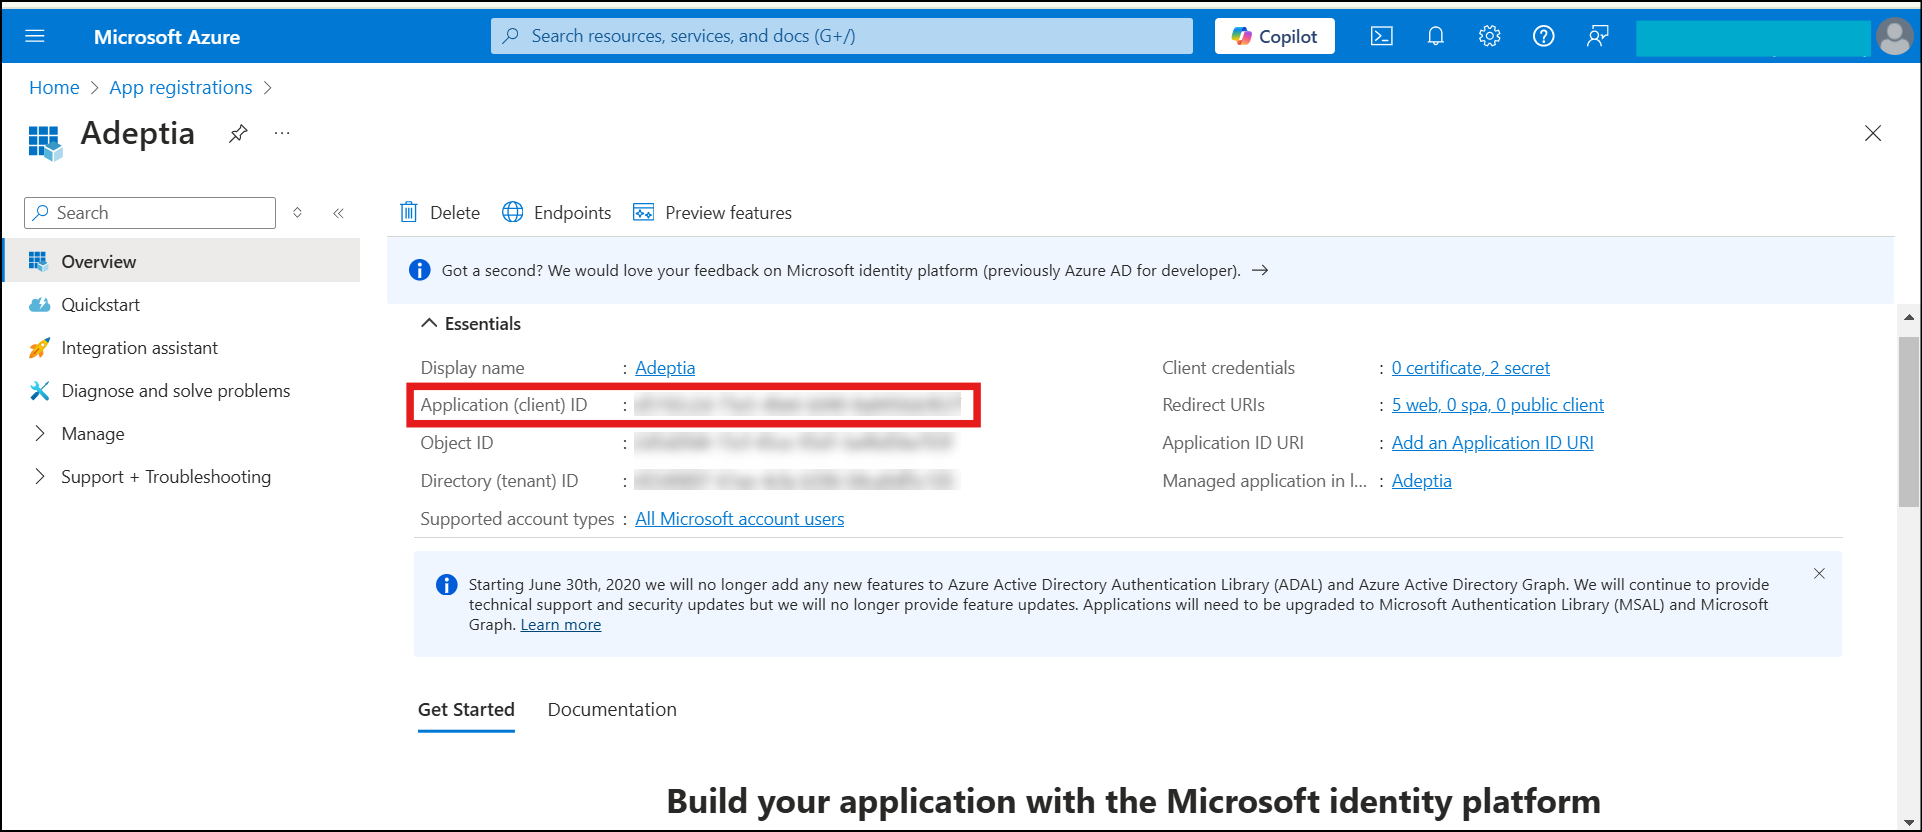
A page containing the details of the newly registered application opens. -
Note the Application (client) ID. This serves as the Client ID.
-
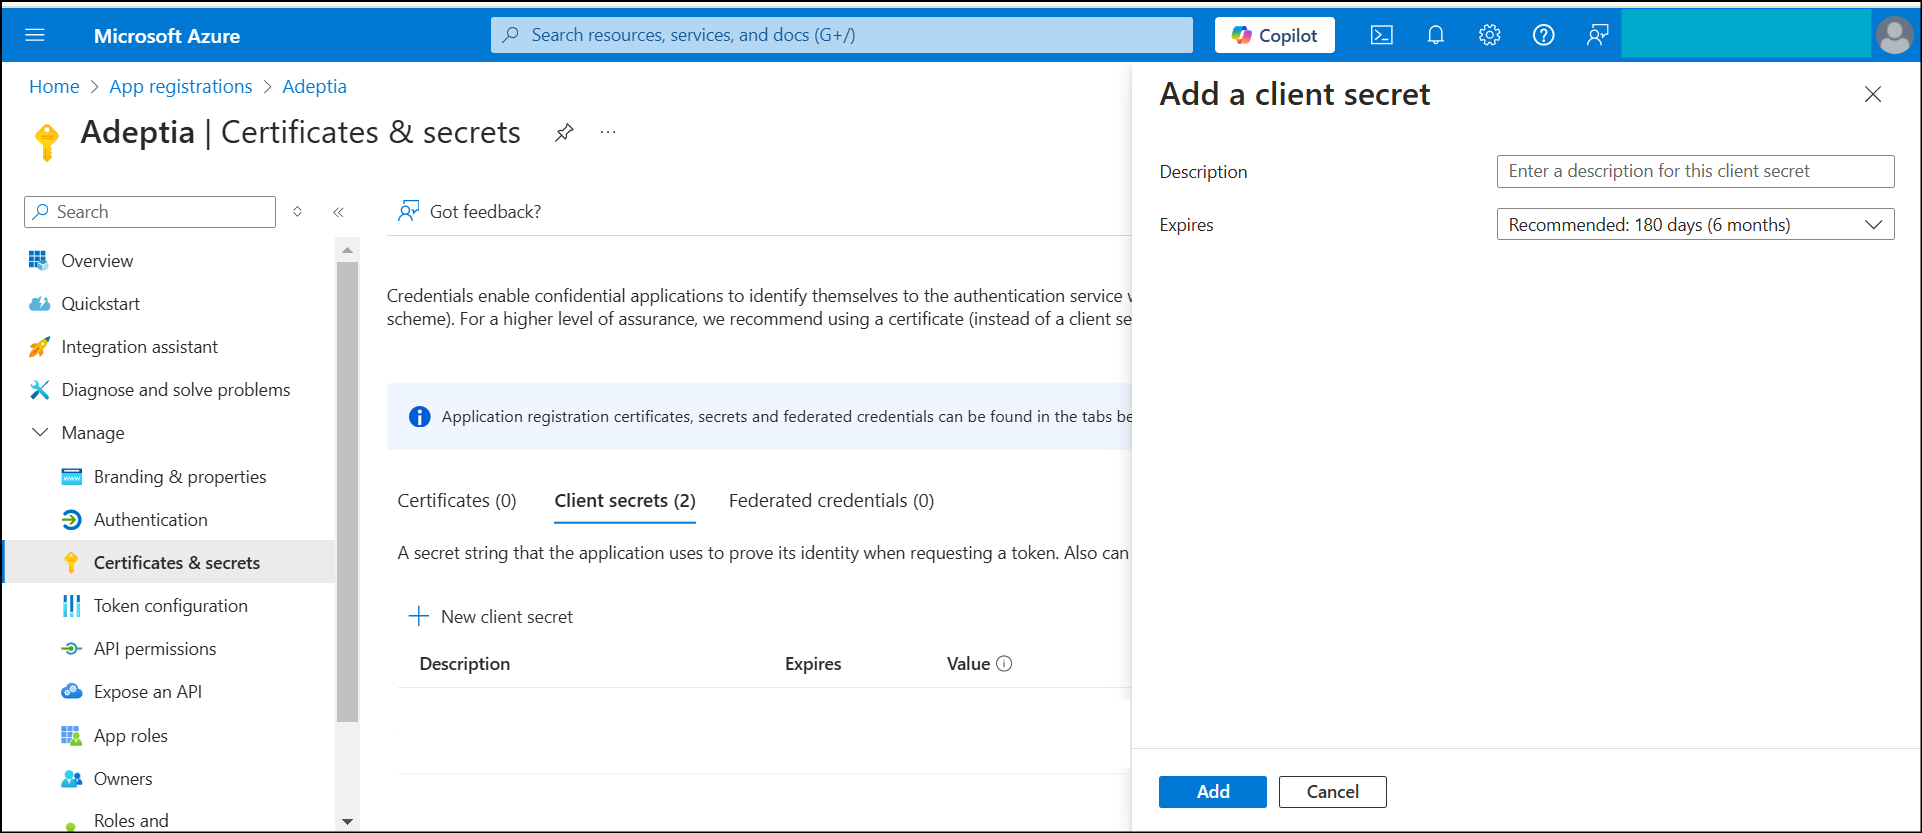
In the left menu, navigate to Certificates & secrets and do the following:
-
Click + New client secret.
-
Provide a description and set an expiration period.
-
Click Add, and copy the Client Secret displayed.

Ensure you save it securely, as it won’t be displayed again.
-
Assigning permissions to the application (client)
- Go to API Permissions in the left menu to configure the API permissions.
- Under Configured permissions, click Add a permission**.
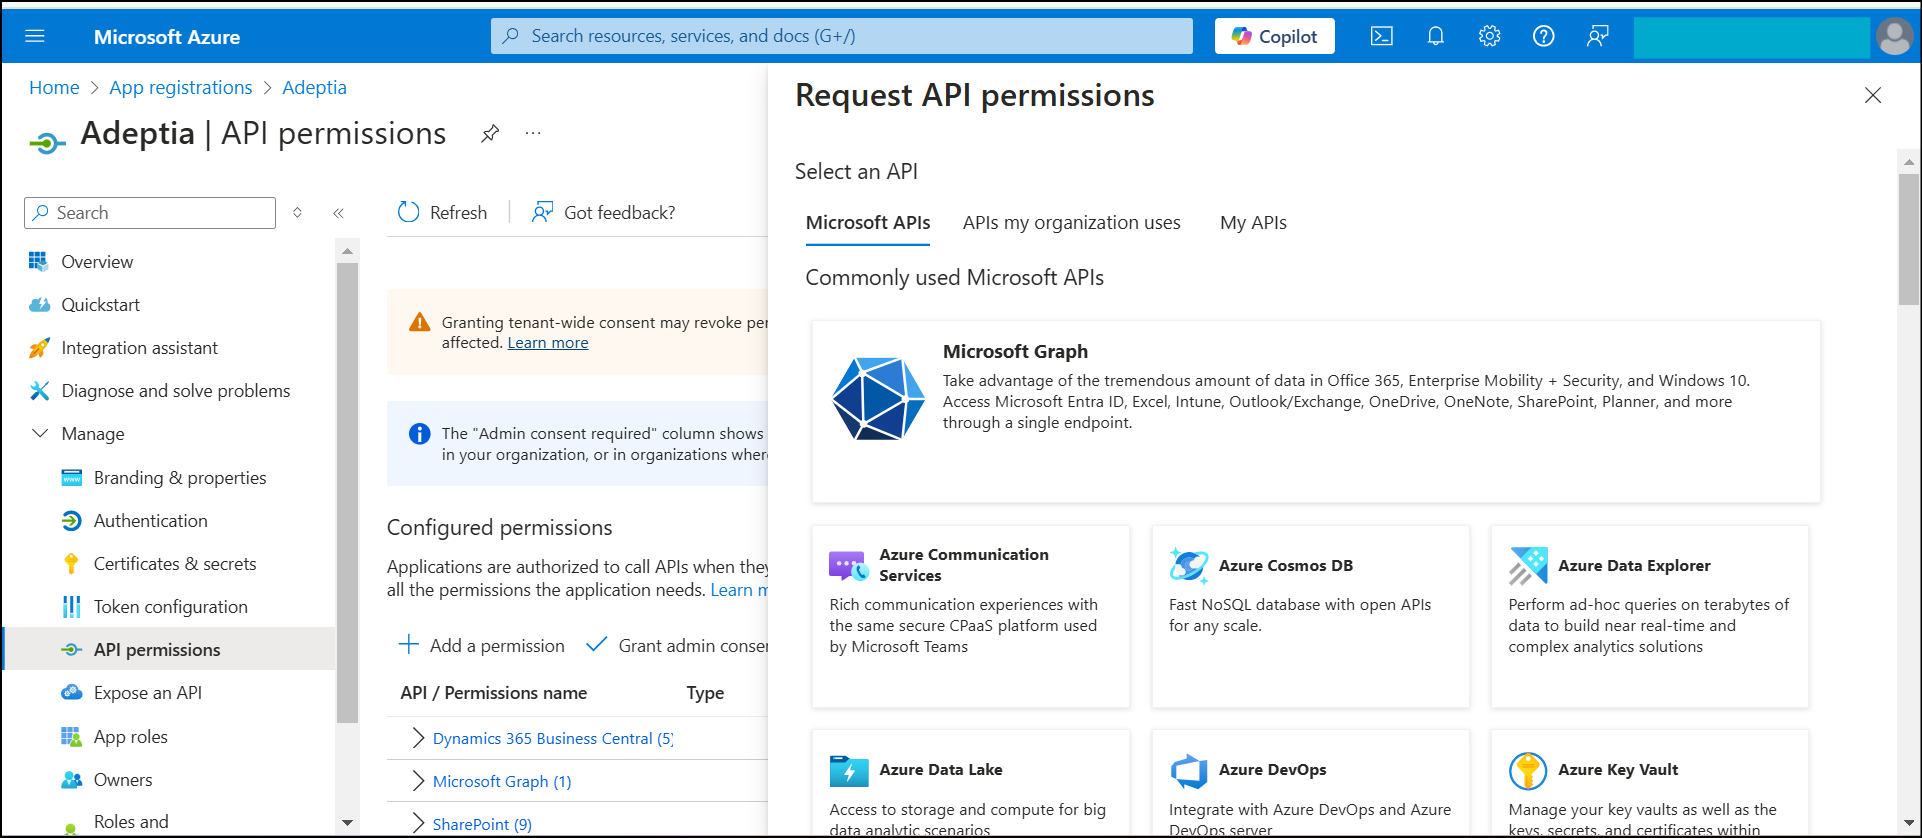
** - On the Request API permissions screen, in the Microsoft APIs tab, do the following:
-
Select Microsoft Graph.
-
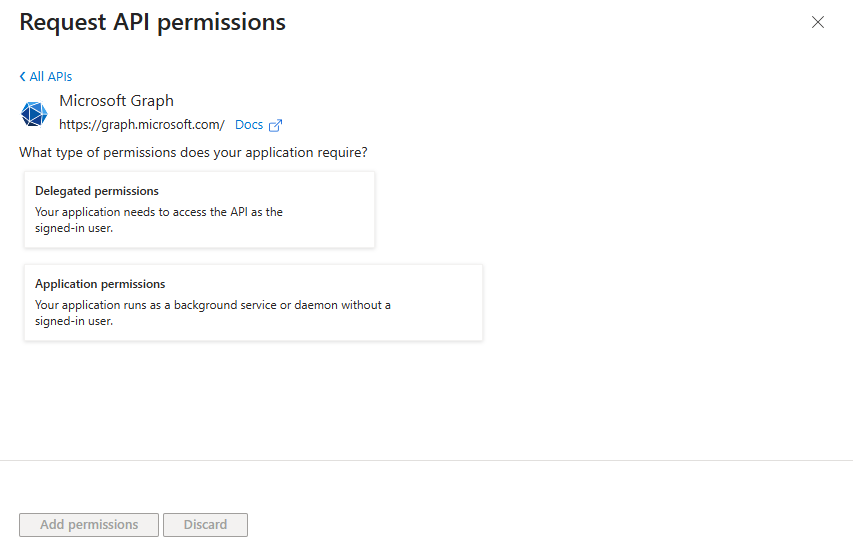
Under What type of permissions does your application require? field, select Delegated Permissions if you want to use Authorization Code Grant as the OAuth Grant Type. Else skip to step e.
-
Add the following permissions:
-
Mail.ReadWrite
-
Mail.Send
-
-
Click Add permissions.
-
Under What type of permissions does your application require? field, select Application Permissions if you want to use Client Credentials Grant as the OAuth Grant Type.
-
Add the following permissions:
-
Mail.ReadWrite
-
Mail.Send
-
-
Click Add permissions.
-
- On the page that opens next, click Grant admin consent to apply these permissions.