Creating Process Flow
The first step while creating a process flow is to design the process flow using Process Designer. To create a process flow:
-
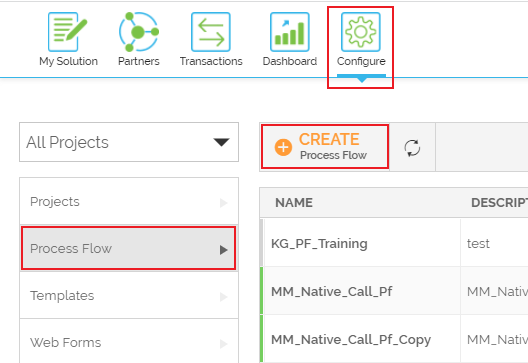
Click Configure > Process Flow > Create Process Flow.
-
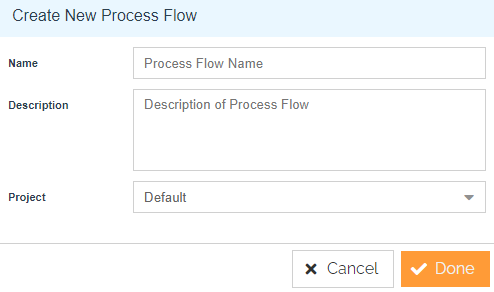
On the Create New Process Flow screen, provide the values corresponding to the fields.
-
Enter the details in the Name and Description fields.

In the description field, alphanumeric and few special characters (_ - . : , @ $ ? \ { } [ ] ( ) and space) are allowed. The description, however, must start with an alphabet, underscore, or number. -
Select the Project from the Project field.
-
Click Done.
Process Designer window will display. You can design a process flow using two methods.
[+] Using Activity
[-] Hide
Steps to design a process flow using blank activity:
-
Select the activity from the Palette and drag it to the Canvas area. The dragged activity element is displayed in the Canvas area.

-
By default, all the elements, except event objects, are blank. You can add a label to the element, once you drag it to the Canvas area.
You can do this by double-clicking the element. This displays the properties associated with the element in the Activity Properties Panel. Alternatively, you can click the element and select the View Properties option. -
The Activity Properties is displayed. In the GENERAL section, you can type the name of the element in the Label text box.

-
Click outside of the Activity Properties window to display the name in the element.
-
Repeat the steps to add more activities in the Canvas area. All the elements can be labeled in the same way.
Once the required elements are dragged to the Canvas area and proper labeling is done, it is necessary to connect them in order to design a business flow.
- Click the required flow from the Palette.

- Connect the elements using the context pad.

- Connect all the elements with appropriate control flow.
Once the required elements are connected with the appropriate control flow, the next step is to attach the activities with elements.
To attach Connect Server activities with elements:
-
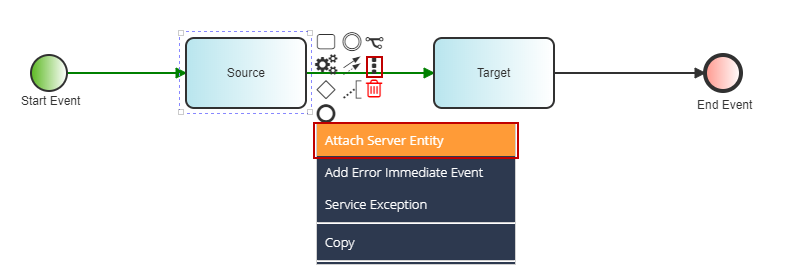
Click the element in which you want to attach the activity and click the Option icon and then select Attach Server Entity.
-
Select the activity and click Attach.

If you attach an activity to a blank element then the activity name is displayed in the element. 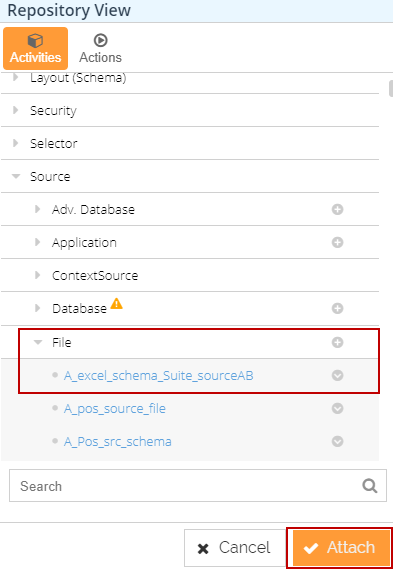
You can also create a new activity, refer to Creating Activity in Process Designer. -
Repeat the steps to attach activities to other elements.
-
To view or edit the properties of the Connect Server activity attached with elements, double-click the activity to view the properties of the attached activity in the Properties Panel.
If the mapping is used in a process flow, the following things must be checked:
-
Double-click the source schema activity to open the Activity Properties panel. Check the value of the Transformer property. It must be Stream 2XMLStream.
-
Double-click the target schema activity to open the Activity Properties panel. Check the value of the Transformer property. It must be XMLStream2Stream.
If you want to save the process flow on your local hard disk then click the Save Process Flow Locally button on the Toolbar. Else, the Autosave feature will save the process flow at a defined time interval.
-
[+] Using Pre-configured Activity
[-] Hide
Steps to design a process flow using pre-configured activity:
- In Web Process Designer, click the Repository View icon. All the items in the Activities list are displayed.
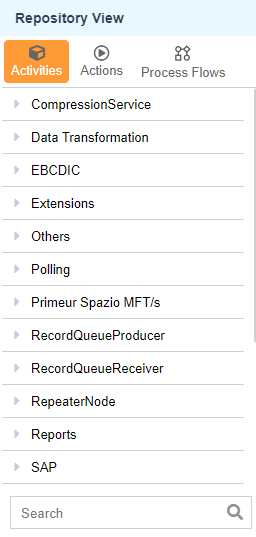
- Select the activity from the Activities list. For example, selecting a FTP Source activity.
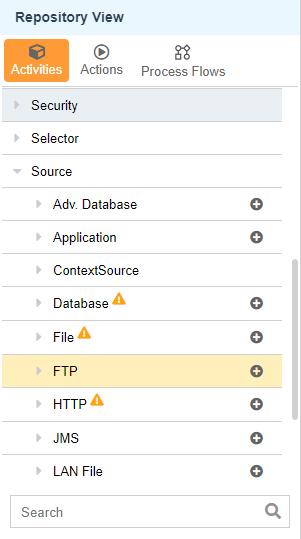
- FTP Source activity is added to the Canvas area.

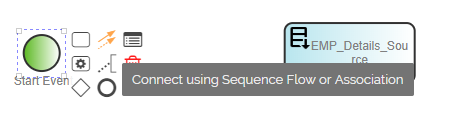
- Click Start Event and select Connect Using Sequence Flow from the Context pad to connect the Start Event with the source activity.
- Click the source activity and select the Append Preconfigured Activity option from the Context pad to add another activity on the Canvas area.
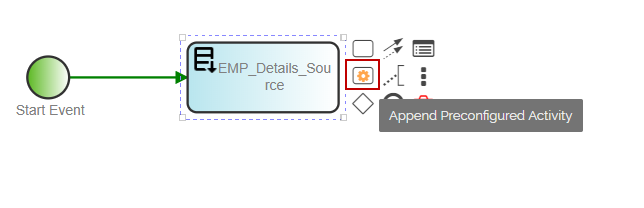
- Select the layout from the Activities tab and click Attach.
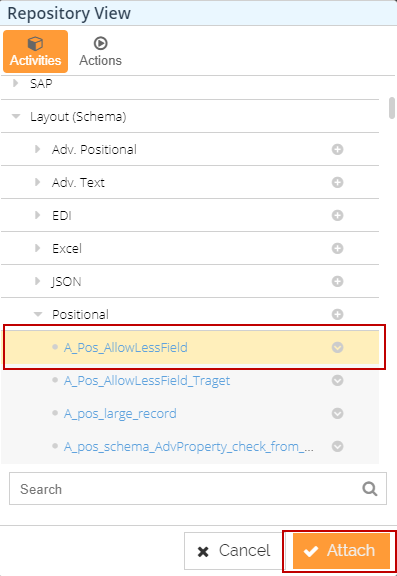
- Layout activity is added on the Canvas area.
- Repeat the steps to add other activities to complete the process flow.
You can update the defined activity of a process flow. Follow the below steps to update the activities:
- Click the activity and select the View Properties option from the Context pad to display the Activity Properties panel.
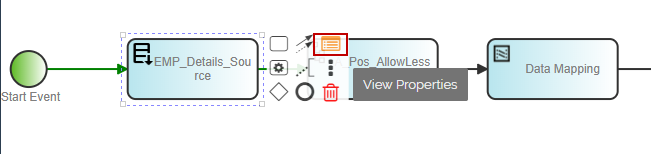
- Select the Activity from the Activity drop-down list. You can also create a new activity, refer to Creating Activity in Process Designer.
If you want to save the process flow on your local hard disk then click the Save Process Flow Locally button on the Toolbar. Else, the Autosave feature will save the process flow at a defined time interval.