Provisioning the database server for cloud deployment
To deploy the application you must provision either of the databases discussed in the document:
Provisioning the Azure MYSQL Database
Follow the steps outlined below to provision Azure MySQL Database:
-
Sign in to the Azure Portal.
-
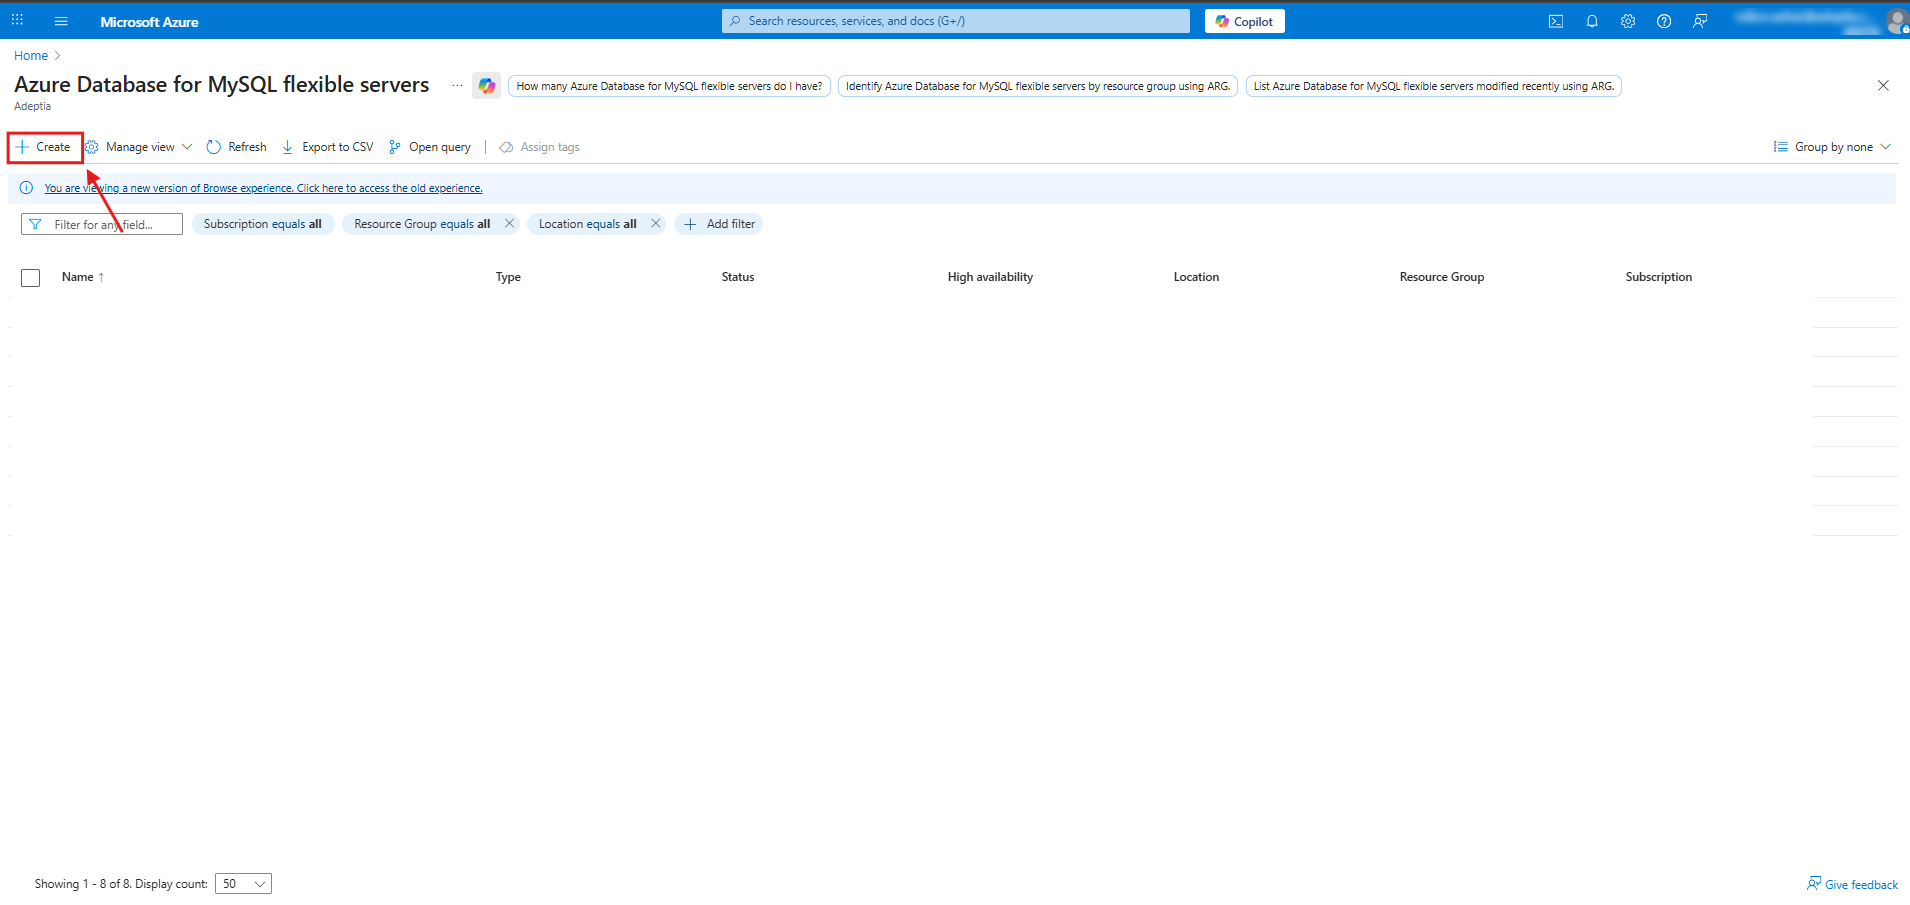
In the left-hand menu, select Azure Database for MySQL flexible servers.
-
Click Create.
-
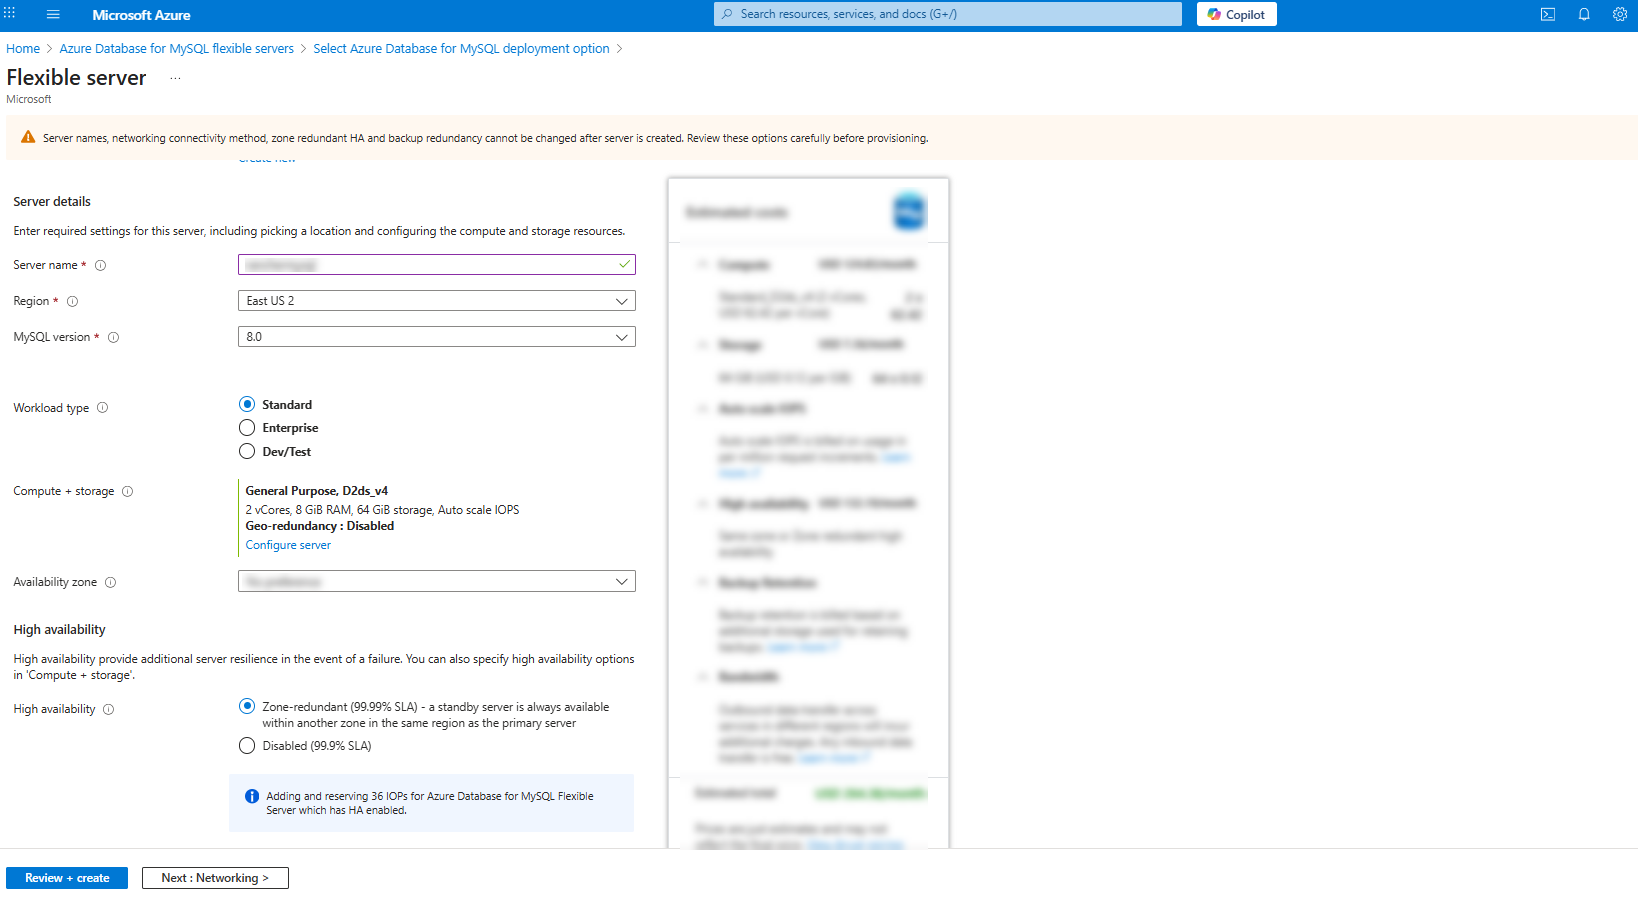
In the Basics Configuration section, provide the following details:
-
Resource Group: Select
rg-mysql-flex(create it if it doesn’t exist). -
Server Name: Enter
mysql-flex-rancher. -
Region: Choose the same region as your VM.
-
Availability Zone: Select Zone 3.
-
MySQL Version: Choose MySQL 8.0.
-
Admin Username: Enter a username, for example, dbadmin, using which the database server can be accessed.
-
Password: Provide a strong password (≥16 characters), avoiding special characters that may cause escape issues.
-
-
In the Compute + Storage section, provide the following details:
-
Compute Tier: Select General Purpose.
-
Compute Size: Choose Standard_D2ads_v5 (2 vCores, 8 GB RAM).
-
Storage: Set to 64 GB.
-
IOPS: Set to 492.
-
Enable Auto-scale storage.
-
-
In the Backup section, provide the following details:
-
Backup Redundancy: Select Locally redundant.
-
Retention Period: Set to 7 days.
-
-
In the Networking section, provide the following details:
-
Connectivity Method: Select Public access.
-
Firewall Rules: Choose Allow only selected IP ranges and click Add client IP.
-
Enforce SSL: Set to Enabled.
-
Virtual Network (VNet Integration): Leave blank.
-
-
Click Review + Create to validate all settings.
-
After validation, click Create to deploy the server.
Provisioning the Azure SQL Database
Follow the steps below to provision SQL database server on Azure.
Navigate to Create SQL Database Server
-
Sign in to the Azure Portal.
-
Go to Azure SQL → SQL logical servers.
-
Click Create to start the SQL Database Server creation wizard.
Configure the following
Basics
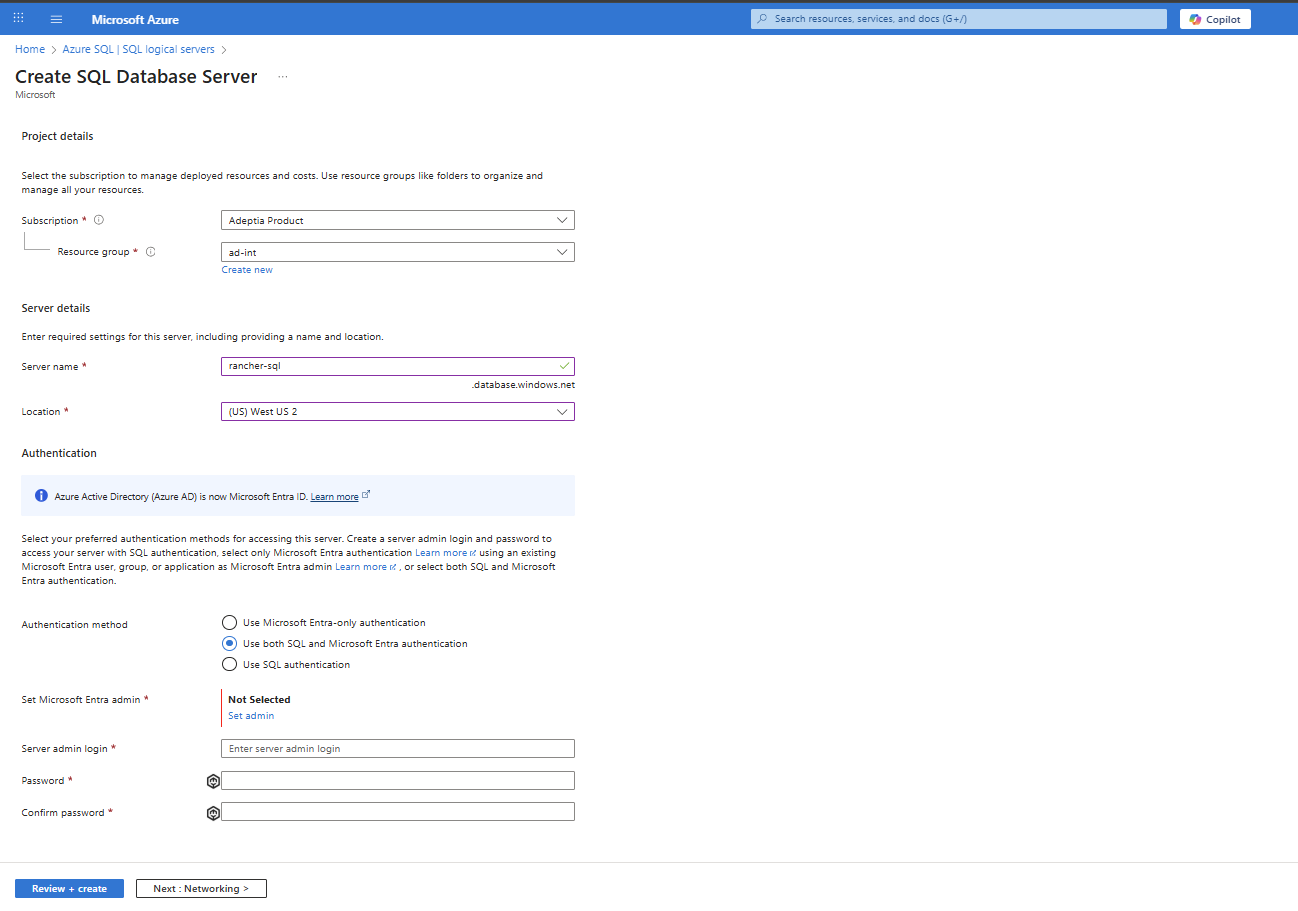
Project Details
-
Subscription
- Select the appropriate subscription
Example:Adeptia Product Development
- Select the appropriate subscription
-
Resource group
- Select an existing resource group or click Create new
Example:ad-int-eus-dev-rg-010
- Select an existing resource group or click Create new
Server Details
-
Server name
-
Enter a unique server name
Example:rancher-sql -
Azure automatically appends:
.database.windows.net
-
-
Location
- Select the region closest to your application
Example:West US 2
- Select the region closest to your application
Authentication
- Authentication method
- Select Use both SQL and Microsoft Entra authentication
- Microsoft Entra admin
- Click Set admin
- Choose the appropriate Entra user or group
- Server admin login
- Enter SQL admin username
- Password / Confirm password
- Enter and confirm a strong password
Networking
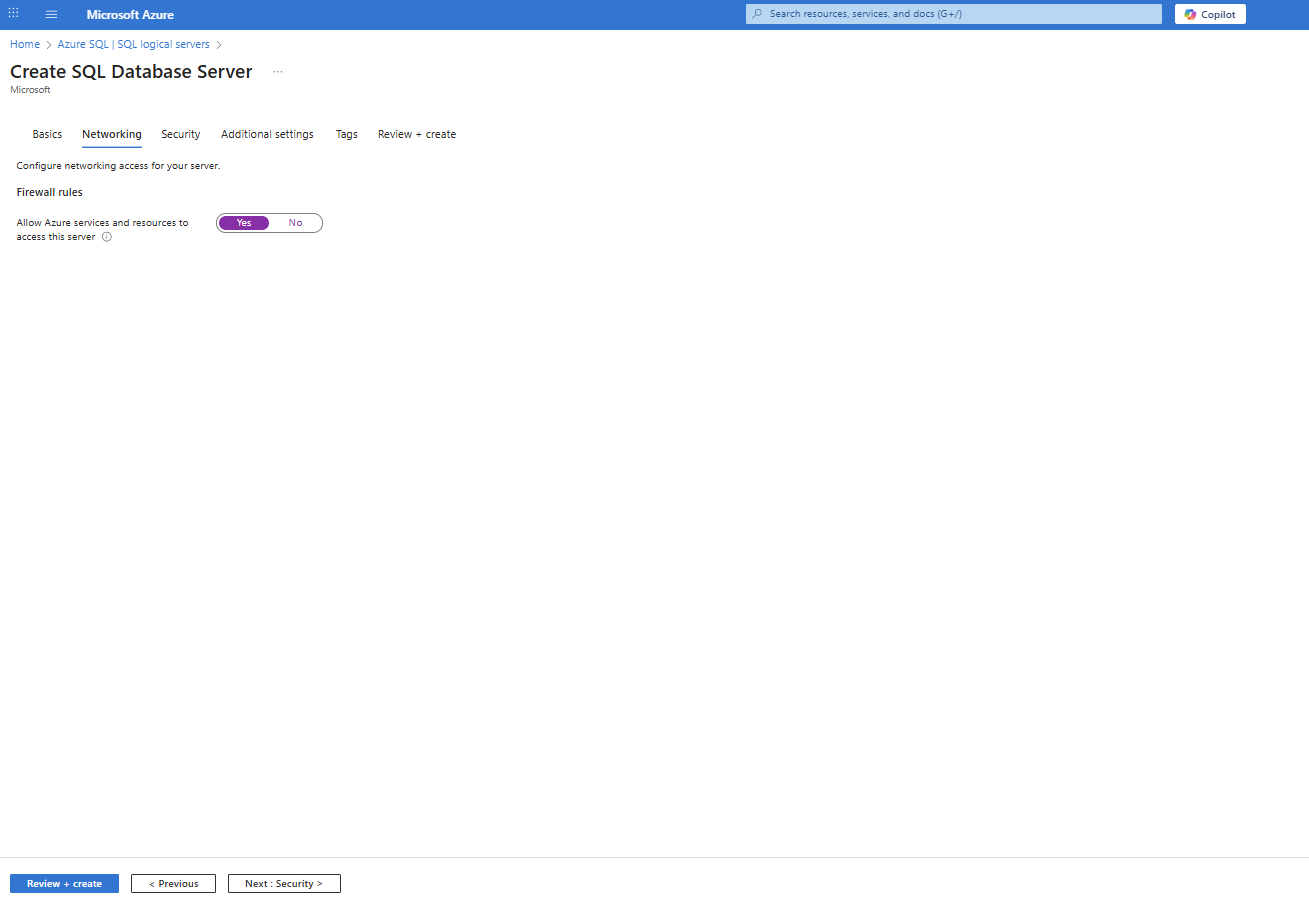
Firewall Rules
-
Allow Azure services and resources to access this server
- Select Yes
This allows Azure-hosted services (such as App Services, Azure Functions, AKS, etc.) to connect to the SQL server.
Security
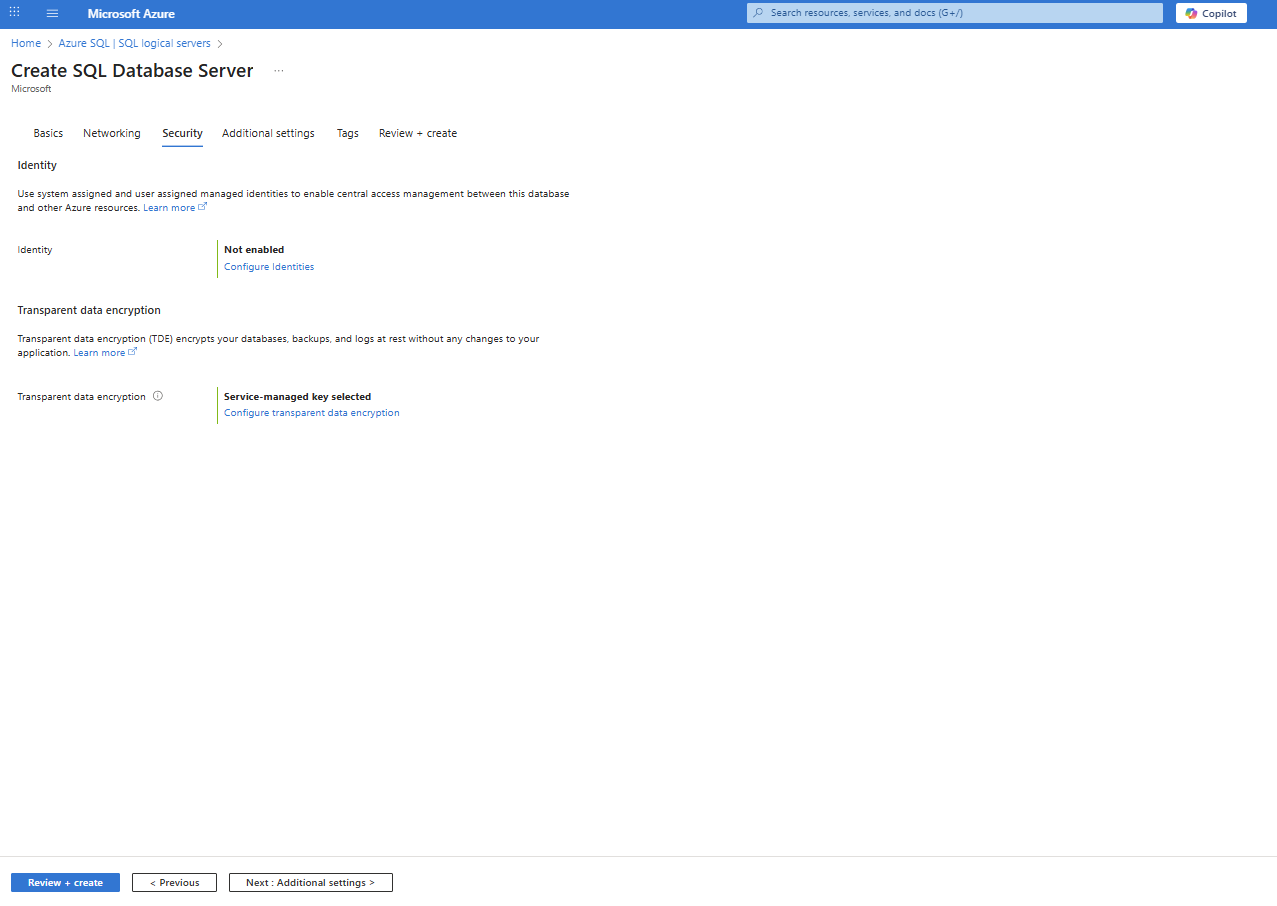
Identity
-
Managed Identity
-
Leave as Not enabled (default)
-
Optional: Can be enabled later if required
-
- Transparent Data Encryption (TDE)
-
Transparent data encryption
- Leave default: Service-managed key selected
This ensures encryption at rest for databases, backups, and logs.
Additional Settings
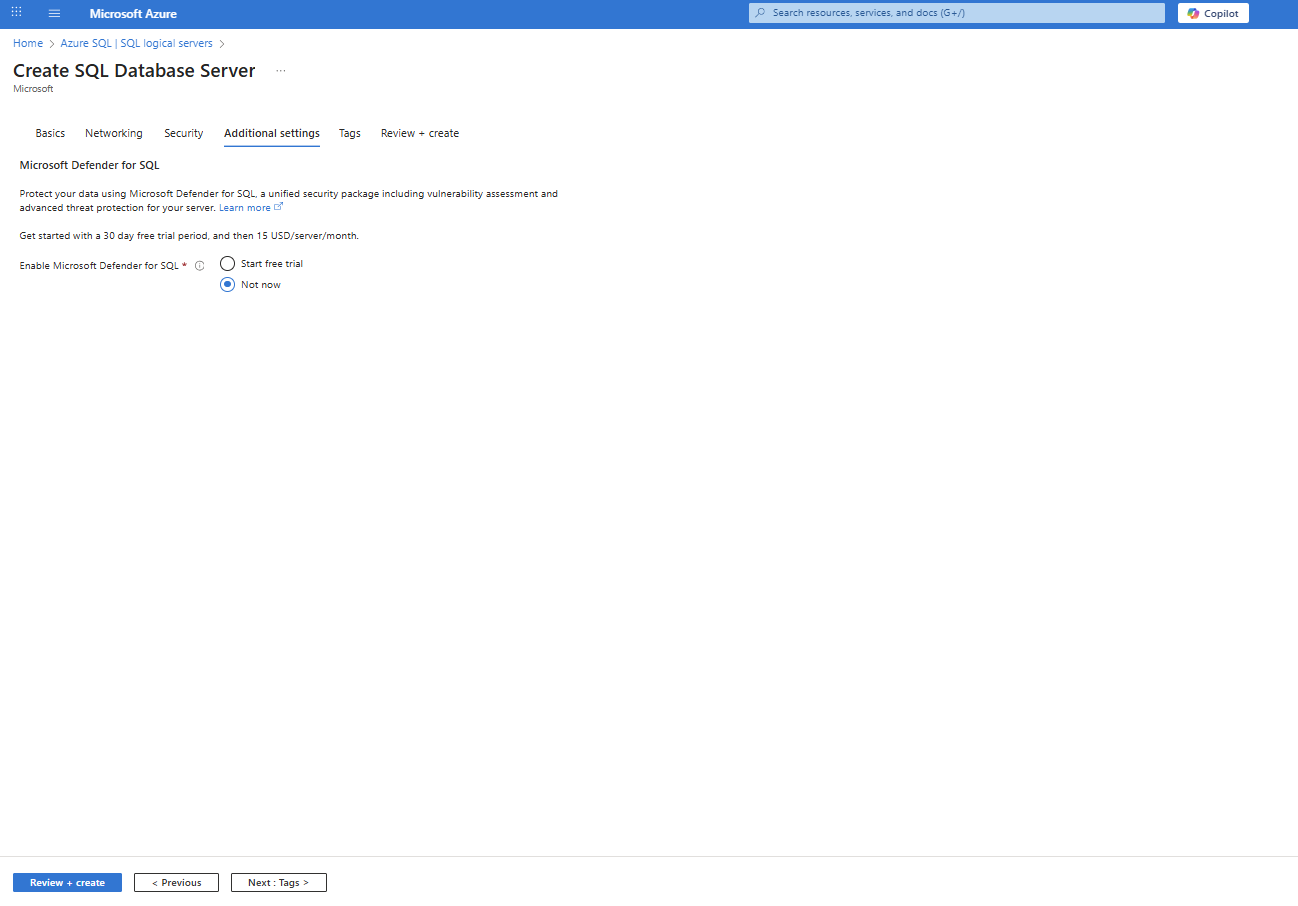
Microsoft Defender for SQL
-
Enable Microsoft Defender for SQL
- Select Not now
Defender can be enabled later if advanced threat protection is required.
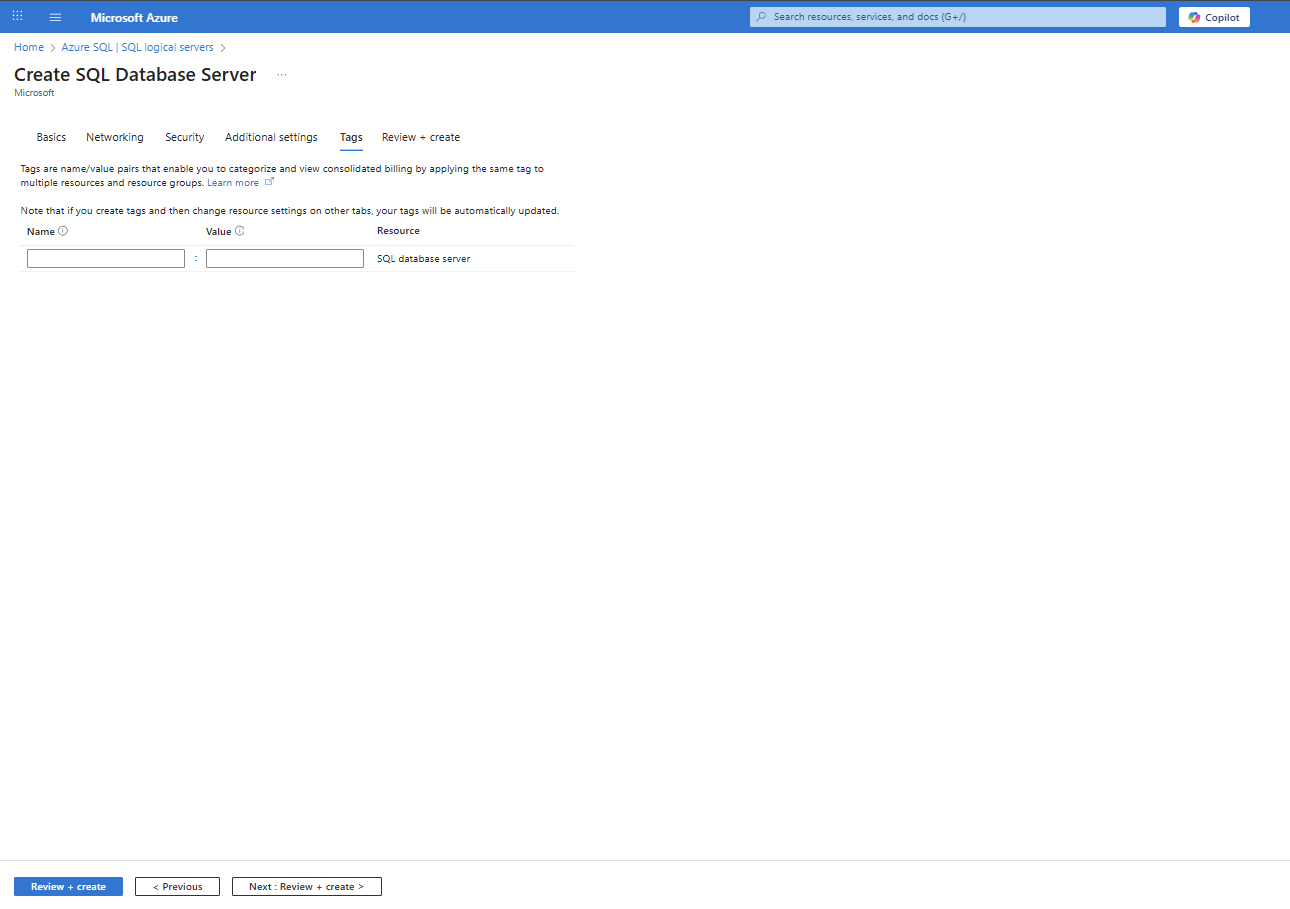
Tags (Optional)
-
Add tags if required for cost management or governance
Examples:-
Environment : Dev -
Project : Rancher
-
-
If not required, leave empty.
Review + create
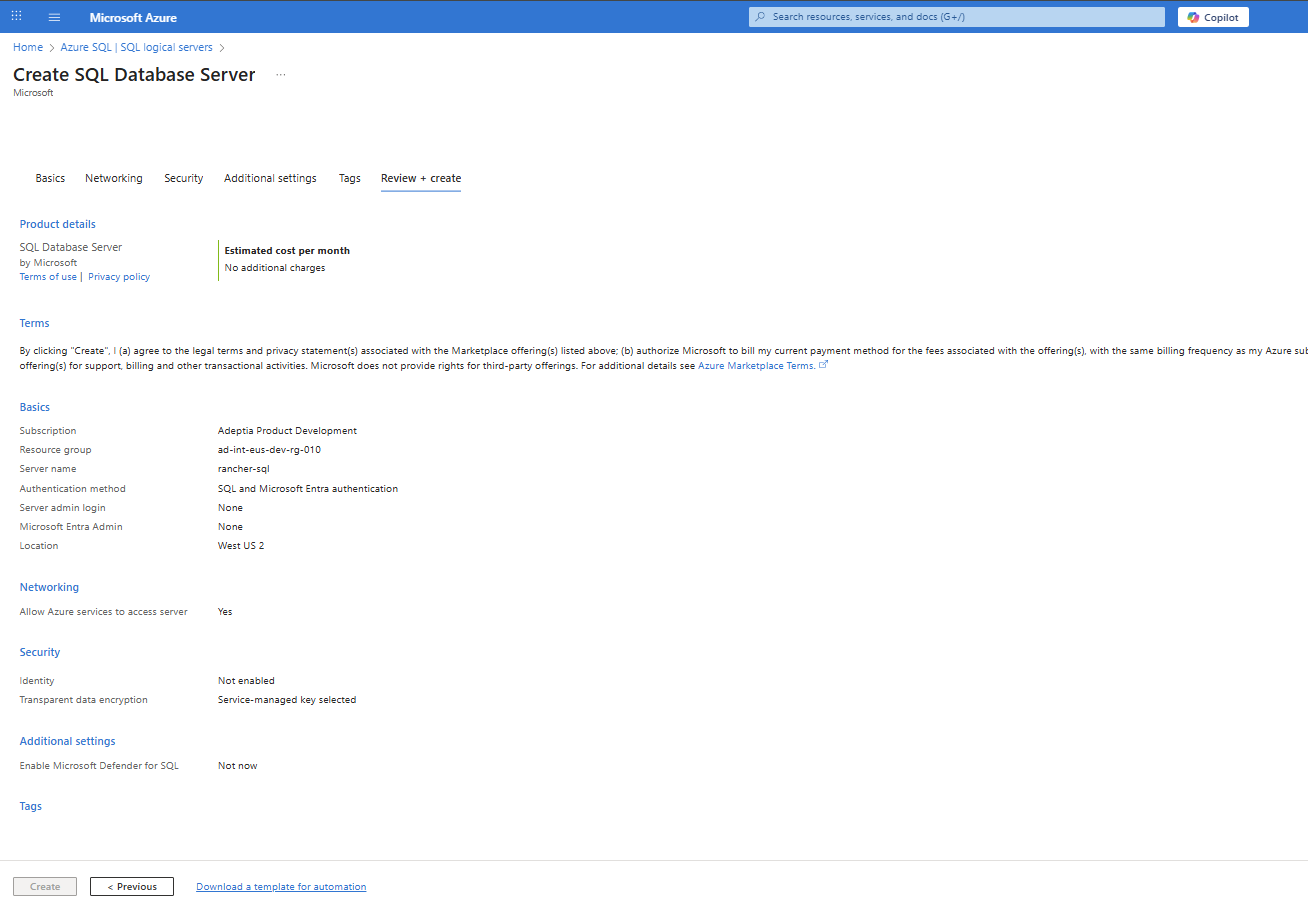
Review Configuration
Verify all selected settings:
-
Subscription: Adeptia Product Development
-
Resource group: ad-int-eus-dev-rg-010
-
Server name: rancher-sql
-
Authentication: SQL and Microsoft Entra authentication
-
Location: West US 2
-
Networking: Azure services allowed
-
Security: TDE enabled (service-managed key)
-
Defender: Not enabled
-
Estimated cost: No additional charges
Create the SQL Server
- Click Create to complete provisioning the SQL database server.