Configure an OAuth Client for Azure Blob in Azure
Azure Active Directory (Azure AD) provides a robust authentication mechanism that enables secure access to Azure resources. When using Azure AD as the authentication type for Azure Blob, specific configurations are required in the Azure Portal to establish a seamless and secure connection between the app and Azure services. This document outlines the essential steps to configure Azure AD authentication, including registering a connected app in Azure AD and granting the necessary permissions to ensure the app can authenticate and access the required resources. By following this guide, you can enhance the security and manageability of your application’s authentication process.
The document consists of the following sections:
Register the application (client)
-
Log in to the Azure Portal with an account that has administrative privileges.
-
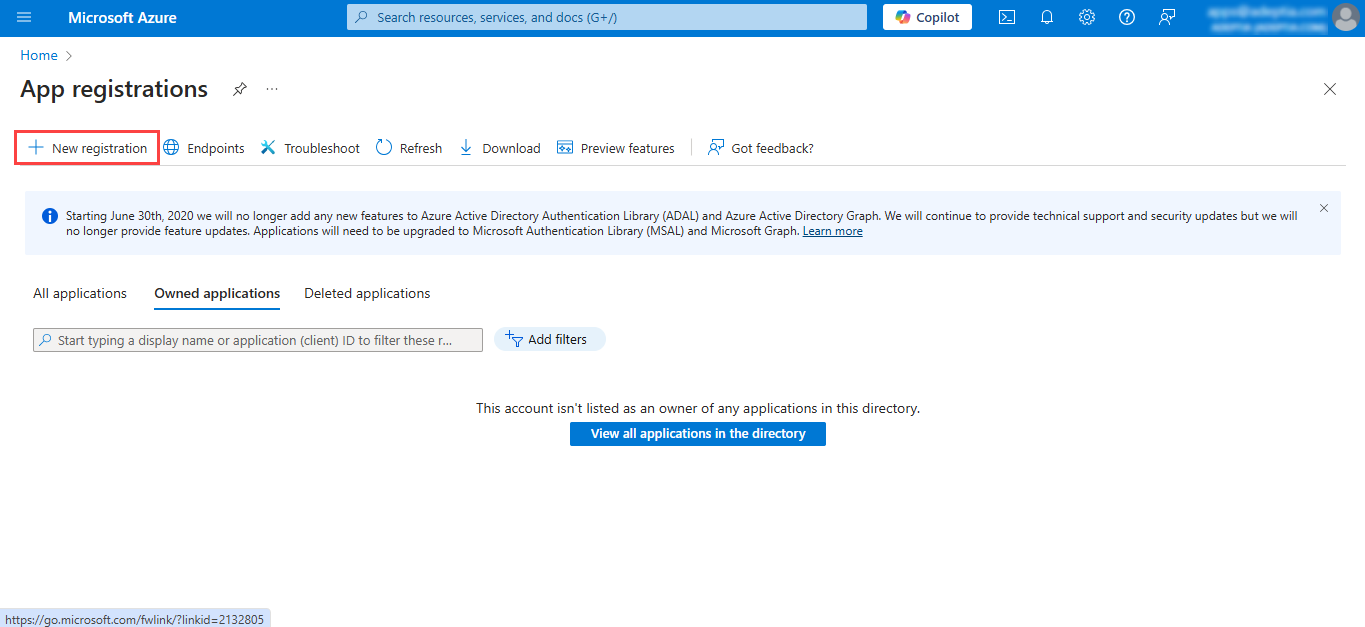
From the dashboard, search for and select App Registrations.
-
Click + New registration.
-
On the Register an application screen, provide the following details in the respective fields:
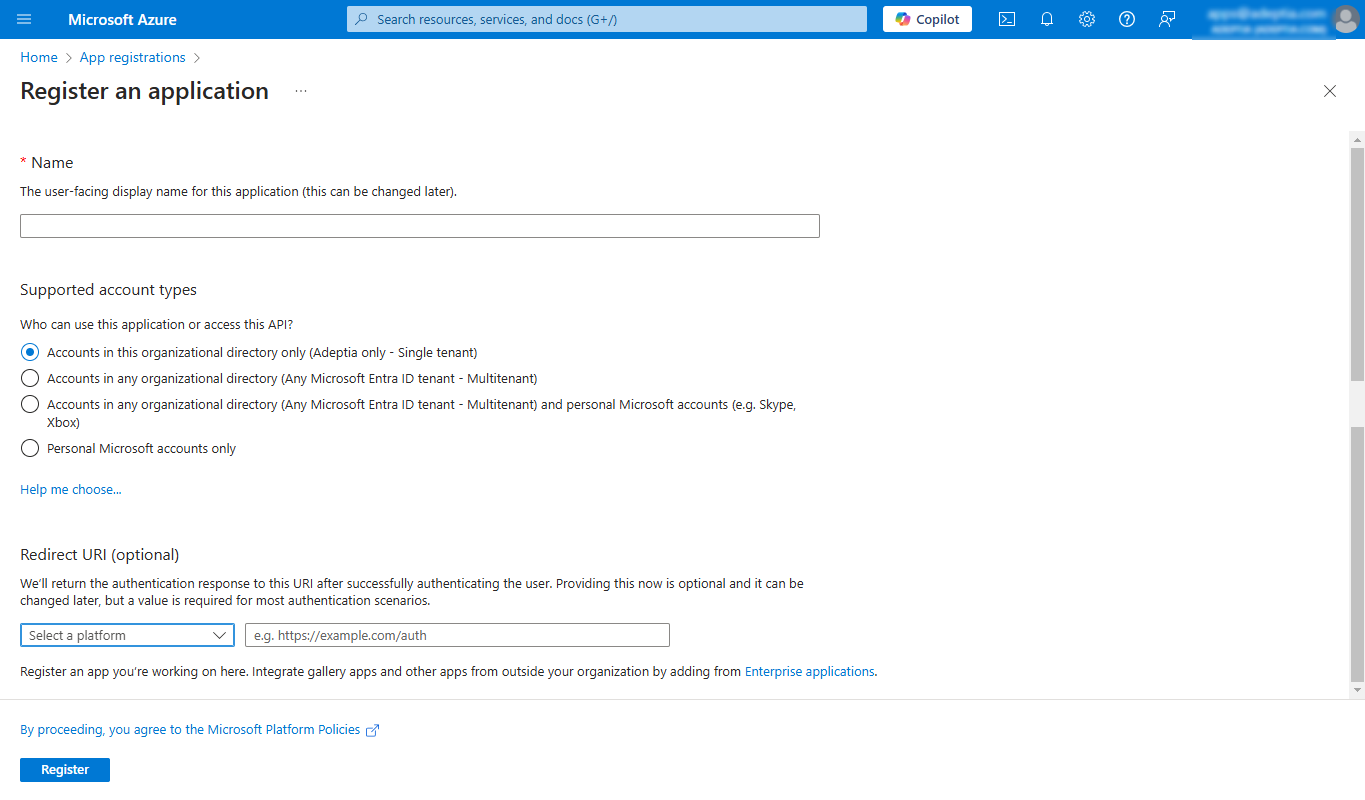
- Name: Enter a name for the application (e.g., AzureBlobApp).
- Supported Account Types: Select Accounts in this organizational directory only (single tenant) as the supported account type.
- Redirect URI (optional): Select Web from the Select a platform dropdown and enter the redirect URL in the following format:
https://<domainName>/rest/applications/microsoftazure/account
-
Click Register.
A page containing the details of the newly registered application opens. -
Note the Application (client) ID.
-
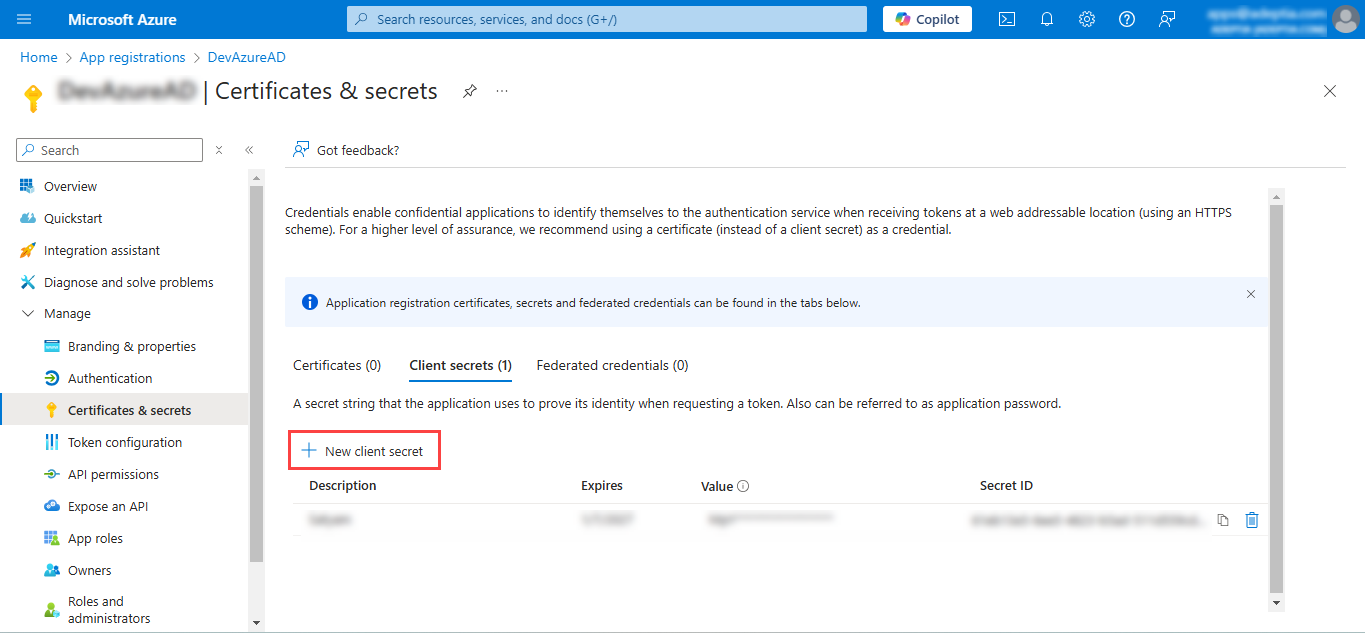
In the left panel, navigate to Certificates & secrets and do the following:
-
Click + New client secret.
-
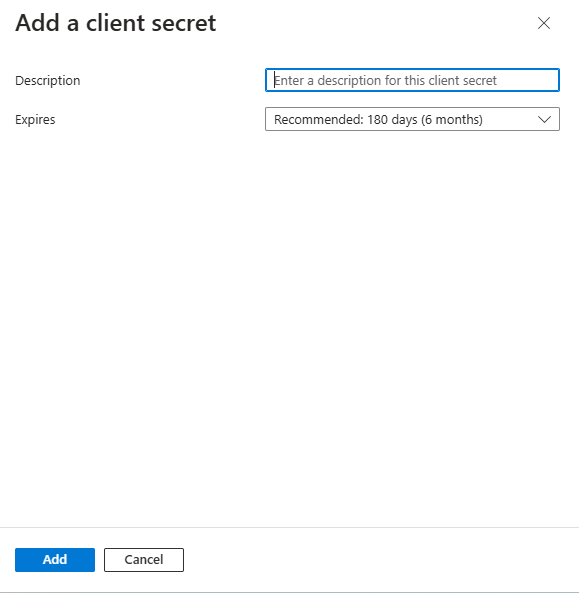
Provide a description and set an expiration period.
-
Click Add, and copy the Client Secret displayed.

Ensure you save it securely, as it won’t be displayed again.
-
Assigning permissions to the application (client)
- In the left panel, navigate to API permissions.
- On the API Permissions page do the following:
-
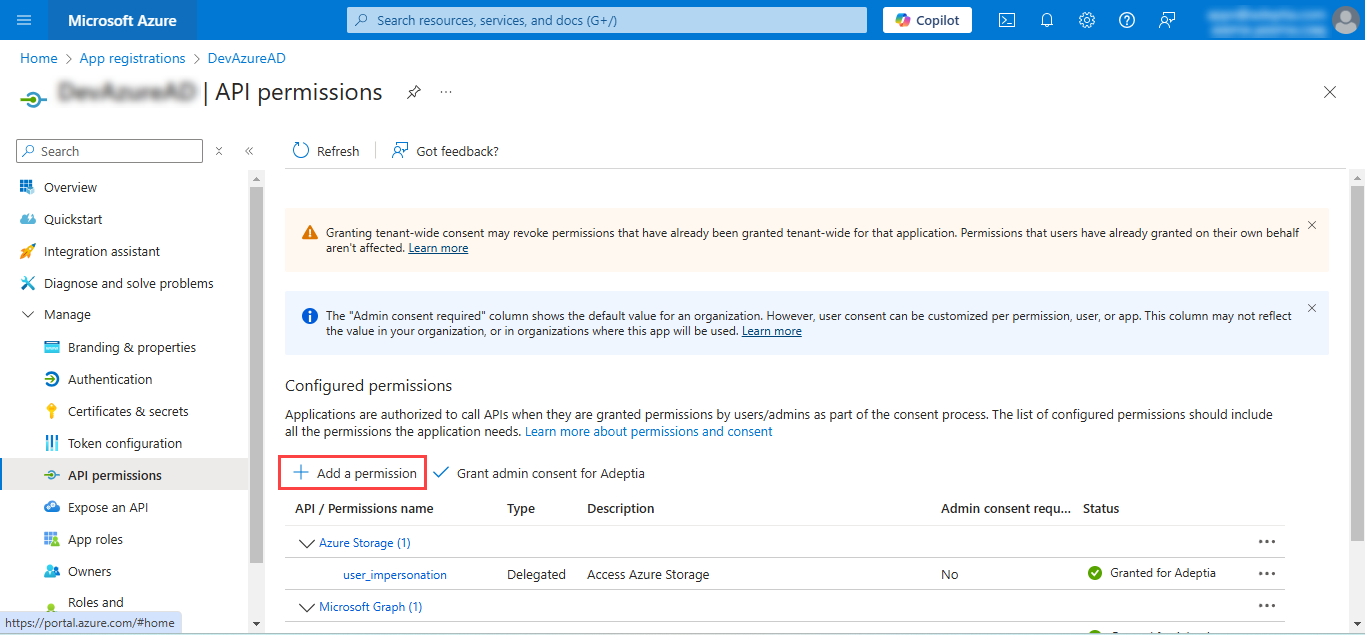
Add a permission: To enable your application to access Azure resources, you need to configure API permissions by following the steps below:
-
Under Configured permissions, click Add a permission**.**
-
On the Request API Permissions screen, in the Microsoft APIs tab, select Azure Storage.
-
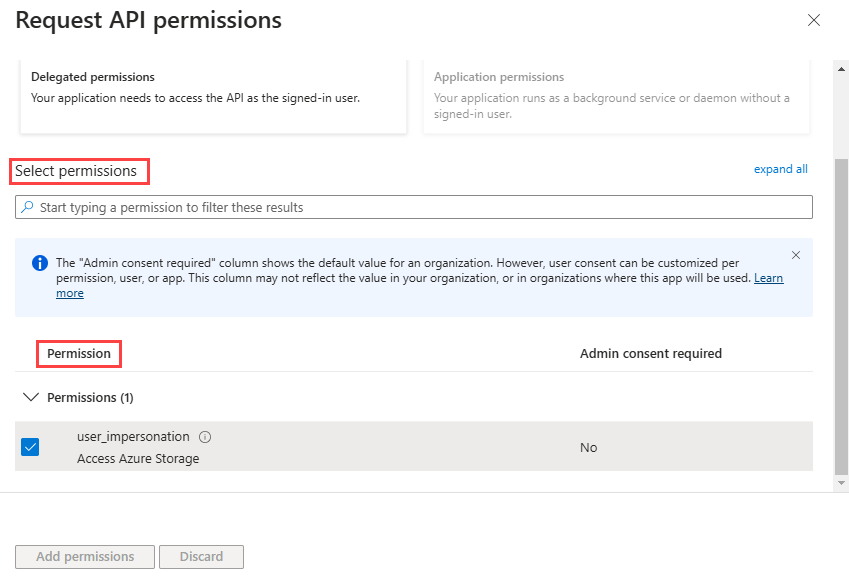
On the screen that follows, select Delegated Permissions and search user_impersonation (Delegated).
-
In the Permission field, select user_impersonation.
-
Click Add permissions.
-
-
Grant admin consent: In the API Permissions screen, select Grant admin consent to apply these permissions.
-
Verify the assigned roles and permissions
This section outlines the steps to confirm that your application has the appropriate role-based access to interact with Azure resources, ensuring secure and seamless authentication and data access.
-
In the Microsoft Azure Portal, search for and select Storage accounts.
-
Select the required storage account and navigate to Access Control (IAM).
-
In the Check access tab, select View my access.
-
In the Current role assignments tab, ensure that the Storage Blob Data Owner role is assigned to the user. Assigning Storage Blob Data Owner role is mandatory for the Set Blob Tag action to work for the user.
To assign the role,- Navigate to the Access Control (IAM) section and select Add > Add Role Assignment.
- Assign the Storage Blob Data Owner role to the appropriate user or service principal.
 | If you do not want to assign the Storage Blob Data Owner role to the user, ensure that the following roles have appropriate permissions:
|
 | After completing the app registration and granting the necessary permissions, you can use the Client Id and Client Secret to set the value for the following Azure Blob properties in Adeptia Connect. These will serve as the globally defined values for connecting to an Azure Blob in case you do not provide the values for Client ID and Client Secret while creating an account for Azure Blob. To do so,
|