Creating an Application Trigger
An Application Trigger is an activity wherein you can:
- Select the required App Connector using which you want to fetch the required data from a third-party application.
- Define a Trigger that initiates the data fetching operation.
- Set the polling frequency at which the data is fetched.
It is required when you want to fetch event driven data from a third-party application based on a polling frequency, or use a file-based Connector, for example, Dropbox. It can be used only as a source in a Process Flow.
 | To use an Application Trigger, you need to bind it to the required Process Flow. |
Here are the steps to create an Application Trigger.
 | The steps in this section are documented considering the QuickBooks app connector as an example. |
Steps to create an Application Trigger
- Go to Configure > APP CONNECTORS > Triggers.
- Click Create Application Trigger.
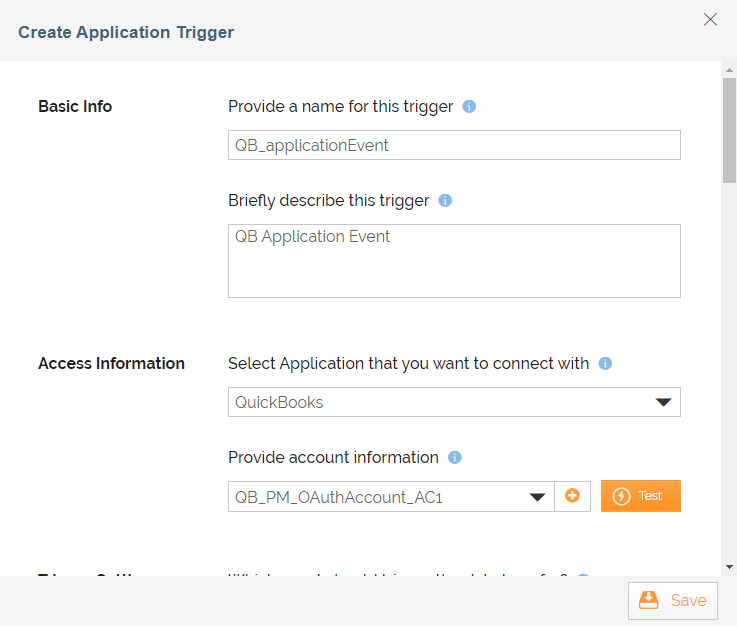
- On the Create Application Trigger screen, do the following:
-
Enter a name and description for the Application Trigger.
-
In the Access Information section, do the following:
- Select the App Connector to connect to the respective third-party application that you want to use as the source.
- Provide the Account associated with the App Connector you have selected. You can also create new Account by clicking
 .
.
-
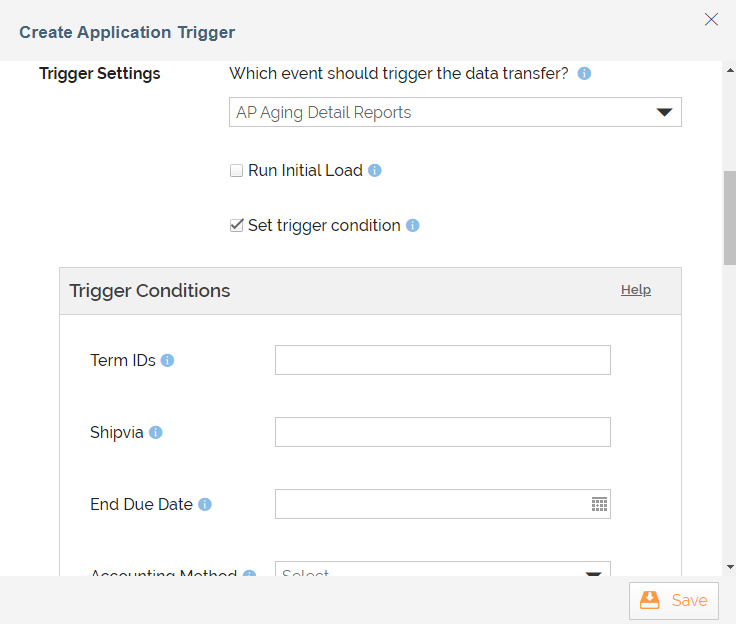
In the Trigger Settings section, do the following:
-
Select a Trigger based on which you want to fetch the data*.*
-
Select the Run Initial Load if you want to process all the existing records or files on the first activation of this connection.
-
Select the Define Trigger Conditions field if you want to fetch the data based on the filter conditions associated with the Trigger you have selected.
-
In the Trigger Conditions section, define the conditions.
For example, if you have used QuickBooks as the application you want to connect to, and selected AP Aging Summary Reports as the Trigger, you can define the date range in the Date Macro field as the Trigger Condition to fetch the report that includes the information for the defined date range.
-
-
In the Filter Criteria section, do the following:
-
Provide a criteria based on which you want to apply filters on the fetched records. You can set multiple filter conditions by using the AND and OR operators and the Add Rule button.
-
Click Add Filter to add more filters.
-
-
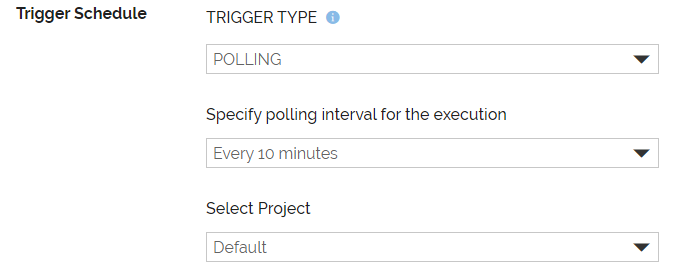
In the Trigger Schedule section, do the following:
-
Select a Trigger type -- POLLING or CRON EXPRESSION.
POLLING: You can set up the interval time for each execution.
CRON EXPRESSION: Select this option to configure the specific time of the execution.
-
Specify the polling interval for execution of the Trigger.
-
In the Select Project field, select the project.
-
-
Click Save.
-