Creating an OAuth Client
To authenticate to the third-party application, you need to have an OAuth Client created in Adeptia Connect.
This section discusses how you can create an OAuth Client.
Creating an OAuth Client
Follow the steps given below to create an OAuth Client.
-
Click Configure > APP CONNECTORS > OAuth Clients.
-
On the Create OAuth Client screen, enter or select the values for the fields described in the following table.
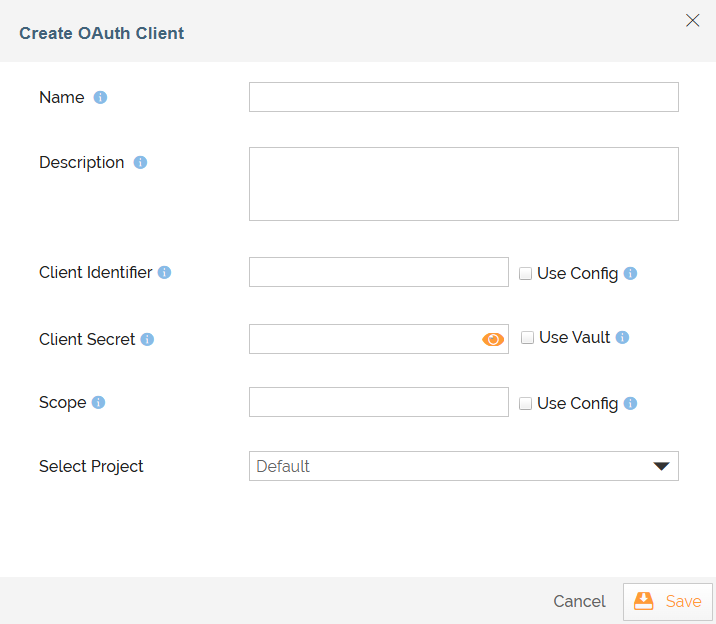
Field Description Name Provide a short name for this OAuth Client. Description Provide a short description for the OAuth Client. Select App Connector Select the App Connector. Client Identifier Enter the client identifier provided by the respective third-party application when you register Adeptia Connect with it.
To dynamically fetch the Client Identifier from a Git repository at runtime using a variable, select the Use Config checkbox next to this field.
Client Secret Enter the client secret provided by the respective third-party application when you register Adeptia Connect with it. Scope Enter the scope of the access request. The access token issued to the application will be limited to the scopes granted.
To dynamically fetch the Scope from a Git repository at runtime using a variable, select the Use Config checkbox next to this field.
Select Project Select a Project. -
Click Save.

You can also create the OAuth Client while creating the Account for the Connector. On the Create New Account screen, expand the Advanced properties section, and then click  next to Select OAuth Client.