Creating an account for Salesforce connector
In Adeptia Connect, you can create an account that contains the details for connecting to Salesforce and exchanging data with it. Below are the steps for creating an account in the following scenarios:
While defining the Source or Destination in a Template/Transaction
When creating a Template or Transaction with Salesforce defined as either the Source or Destination, you must first create an Account. This Account enables Adeptia Connect to authenticate and authorize access for data exchange with Salesforce. The following steps outline how to create this Account within Adeptia Connect during the Template or Transaction setup process.
-
At the Select Account step, click
 .
. -
On the Create New Account screen, enter a name for the account, and then provide values for the fields described in the following table:
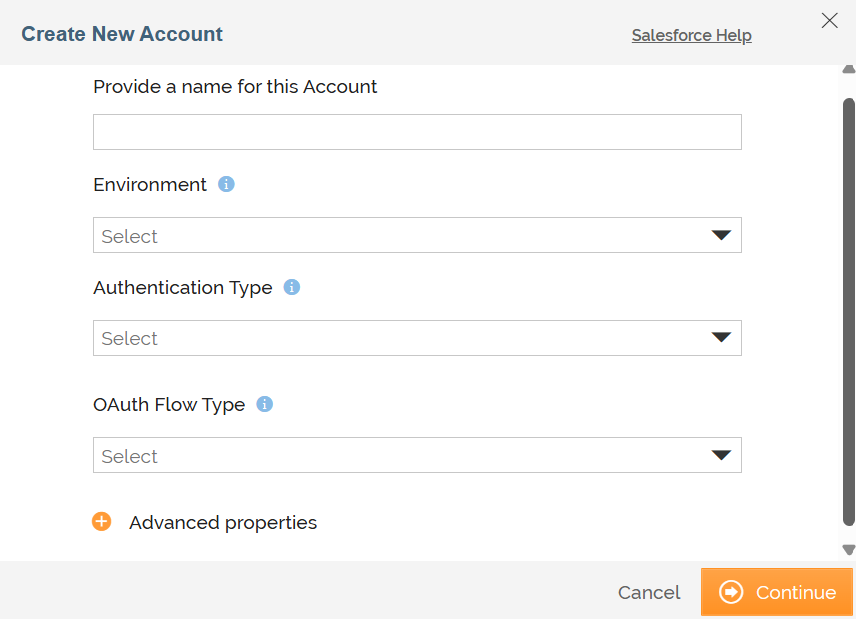
Field Description Environment The type of environment with which you want to exchange data.
The possible values are:
- SandBox
- Production
Authentication Type The type fo authentication you want to use to authenticate to Salesforce.
The possible values are:
- Bearer
- OAuth
-
If you have selected Bearer as the Authentication Type, provide the following details, else, skip this step.
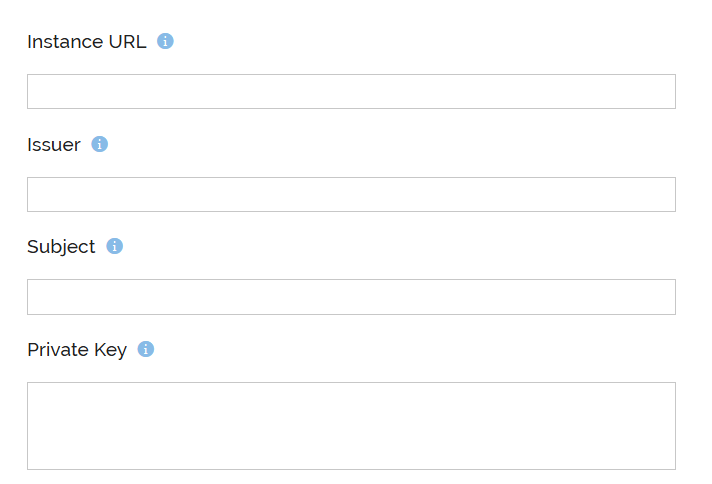
Field Description Instance URL A URL indicating the instance of the user’s org. For example: https://yourInstance.salesforce.com/. Issuer The issuer must contain the OAuth client_id or the connected app for which you registered the certificate. Subject The subject must contain the user’s username. Private Key The private key of the certificate you registered for your application. -
If you have selected OAuth as the Authentication Type, provide the following details:
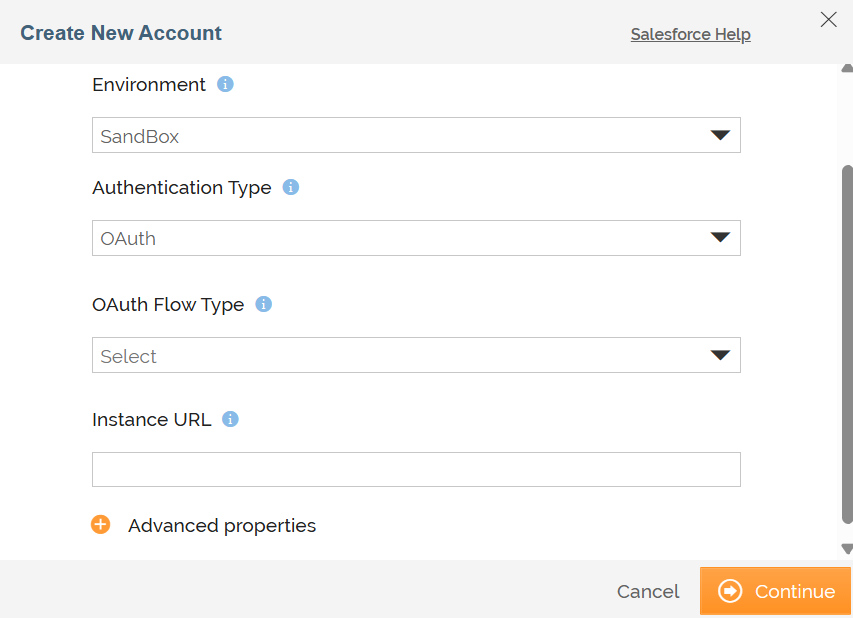
Field Description OAuth Flow Type Select either of the following OAuth flow types: - Authorization Code: Redirects the users to the application’s login page to authorize the application to access the resources.
- Password: No user redirection is involved; users need to provide the username and password in the respective fields while creating Salesforce account to authorize the application to access the resources.
- Client Credentials: No user redirection is involved; authentication occurs directly between the client and the authorization server.
User Name If Password is the selected OAuth Flow Type, provide the username to authorize the application to access the resources. 
This field is available only when you select Password as the OAuth Flow Type. Password If Password is the selected OAuth Flow Type, provide the password to authorize the application to access the resources. This field is available only when you select Password as the OAuth Flow Type. Instance URL
A URL indicating the instance of the user’s org. For example: https://yourInstance.salesforce.com/.
This field is available only when you select Client Credentials as the OAuth Flow Type. <ch:anchor>Select OAuth Client
</ch:anchor>Select an OAuth Client you may have created for the Salesforce app connector you are using in the Template/Transaction or create a new one by clicking  .
. - This field is available only when you select Password or Client Credentials as the OAuth Flow Type.
- For the OAuth Client to work, you must enter the Redirect URI (Callback URL) in the following format while registering Adeptia Connect with the app.
https://<domainName>/rest/connectors/oauth/account.
To configure the Redirect URI (Callback URL) for existing app registered with Salesforce, follow the steps given below:
- On the Salesforce portal Home page, select Setup.
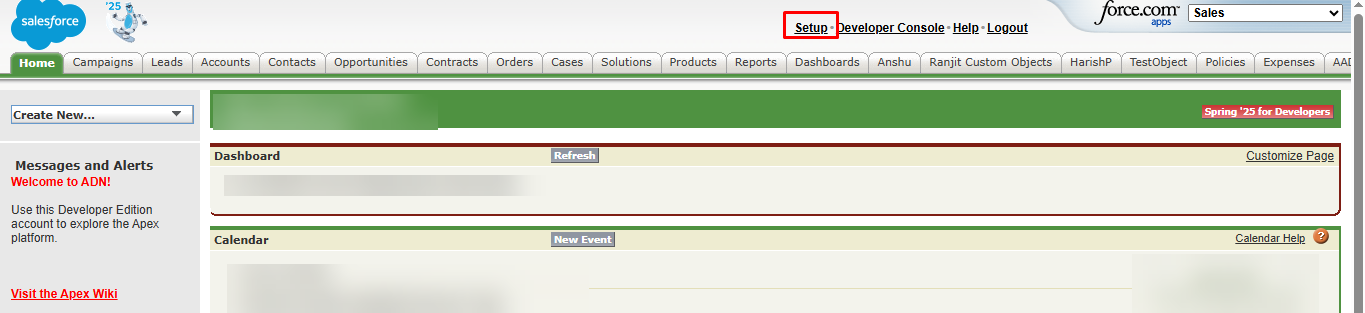
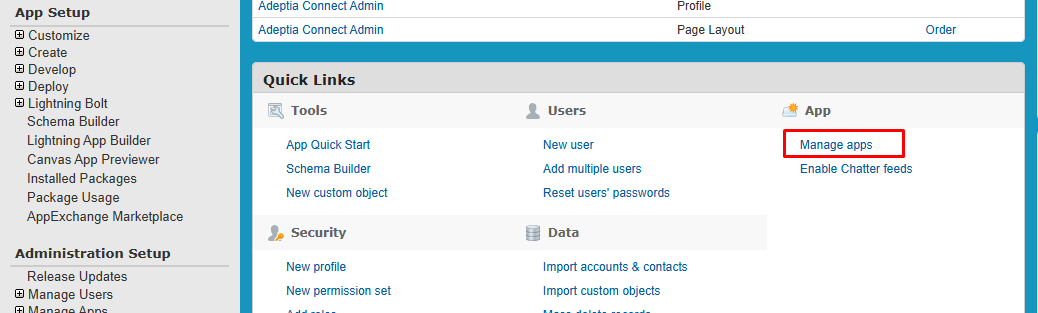
- Under the Quick Links section, click Manage apps.
- Select the registered app.
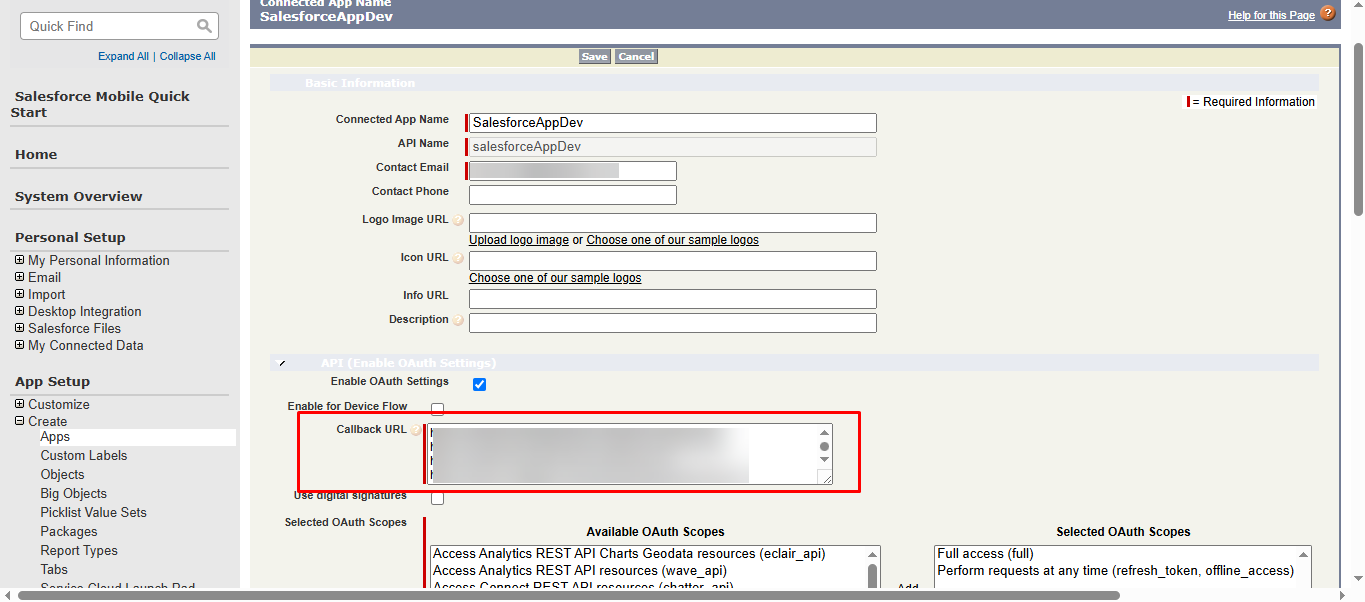
- In the Callback URL field, enter the Redirect URI, and then click Save.
To learn more about creating an OAuth Client, refer to this section.
-
Expand Advanced properties, and then provide values for the fields described in the following table:
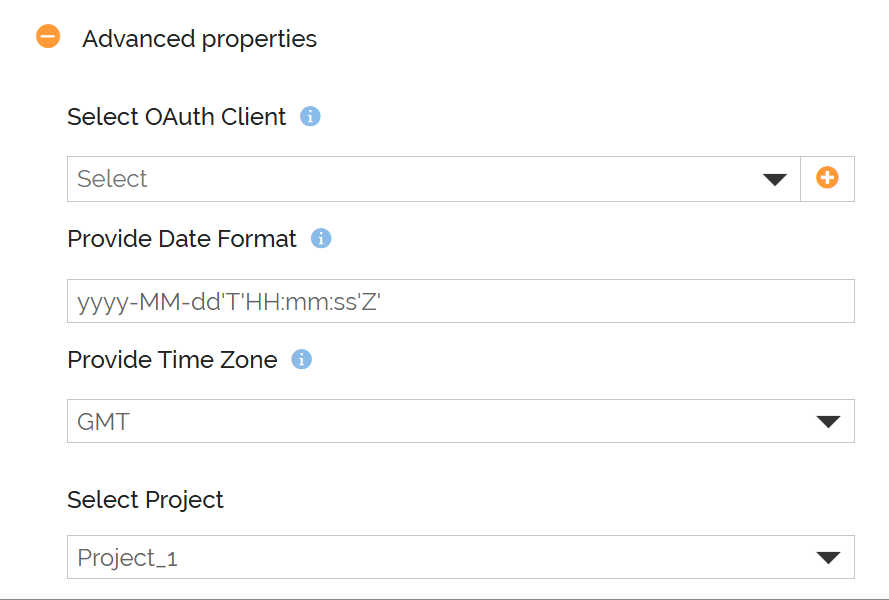
Field Description Select OAuth Client This field is available under Advanced properties only when Authorization Code as the OAuth Flow Type. It is an optional field. Provide Date Format The date format for your data.The supported date format is yyyy-MM-dd'T'HH:mm:ss'Z'.Provide Time Zone Select a time zone. Select Project Select a Project. -
Click Continue.
If you have selected Authorization Code Grant as the OAuth flow type, you will be redirected to the Salesforce login page.
While defining the Application Trigger for a Process Flow
You can create an account for the Salesforce connector from within an Application Trigger (having Salesforce as the Source).
For more details on how to create an Application Trigger, refer to this page.
Follow the steps given below to create an account.
- At the Provide account information step on the Create Application Trigger screen, click .
- Follow the steps given here (step 2 through 6).
While defining the Application Action for a Process Flow
An Application Action enables you to use an App Connector as a Source, or Destination, or both in a Process Flow. An Application Action is an activity wherein you can select Salesforce connector and define what data you want to fetch from or send to Salesforce.
While defining the Application Action, you can create an account that you can use for exchanging data with Salesforce.
Follow the steps given below to create an account.
- At the Provide account information step on the Create Application Action screen, click .
- Follow the steps given here (step 2 through 6).