In a microservice environment, there can be numerous activities from different channels (tenants) – Partners, Projects, individual Process Flows, Transactions, etc. You can queue up these activities belonging to the Partners, Projects, or the Company itself by creating dedicated Queues. To create a dedicated Queue, follow the instructions given below.
-
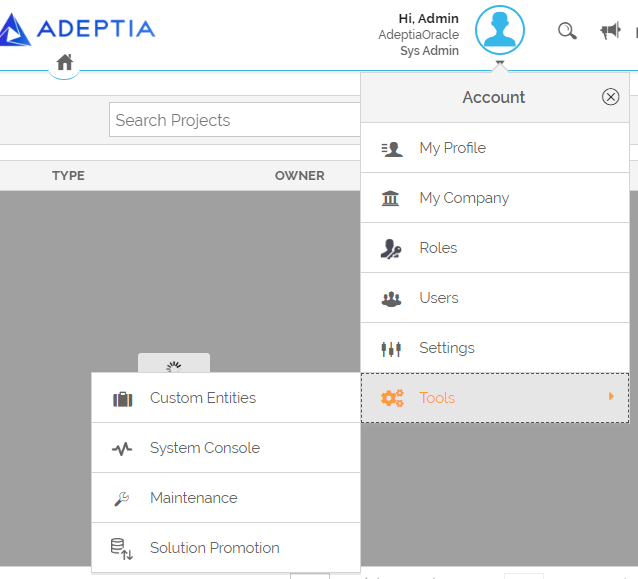
On the Account menu, click Tools > Maintenance.
-
In the left panel, select Queues.
-
On the Queues screen, click Create Queue.
-
In the Add Queue window, enter the details in the following fields.
-
In the Name and Description fields, enter the name and description respectively for the queue.
-
In the Category field, select Partner, Project, or Company.

- Select Partner if you want the transactions associated with this Partner to be executed on a dedicated Runtime instance.
- Select Project if you want all the Transactions, Templates, and Process Flows belonging to a project to be executed on a dedicated Runtime instance.
- Select Company if you want a specific set of Transactions, Templates, or Process Flows to be executed on a dedicated Runtime instance.
If you select Partner as a category, do the following.
-
In the Partner field, select one or more partners.
You also have the option to select the resource intensive Transactions to be processed through a separate queue on a dedicated runtime instance. To do this, -
Select the Resource Intensive checkbox.
Select the Resource Intensive checkbox if you have transactions in which a large amount of data is going to be processed. You can skip this step if you don't have any resource intensive Transaction. -
Select the Transaction that you know is resource intensive.
If you select Project as a category, enter the following details.
- In the Project field, select one or more projects.
*If you select Company as a category, enter the following details.
*-
In the Transactions field, select the Transactions.
-
In the Template field, select the Templates.
-
In the Process Flow field, select the Process Flows.
-
-
Click Save.
After you have created the queue, you can activate it by turning it ON on the Queues page as shown below.

Viewing a queue
You can view an existing queue by following the steps given below.
-
Select the queue that you want to view.
-
Click the
 icon under Actions column.
 -
Click View.
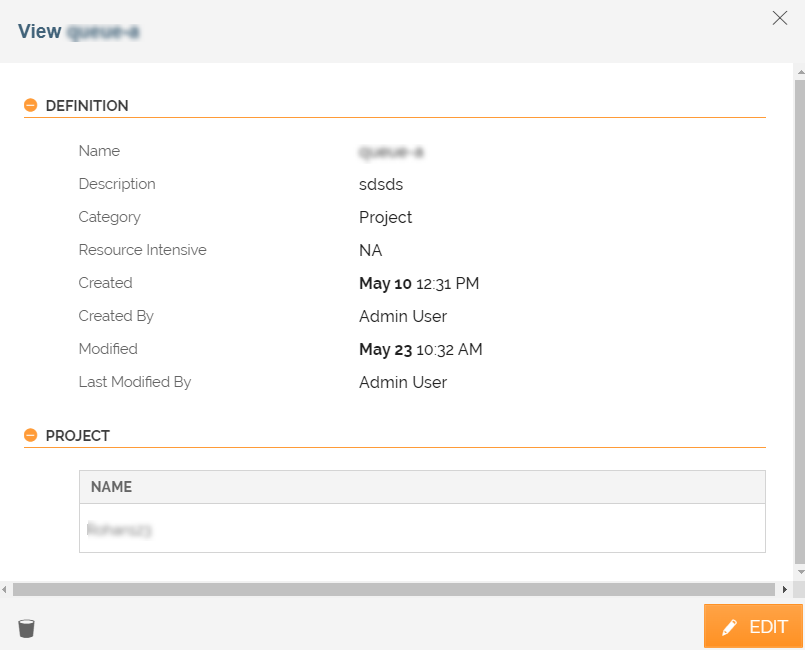
You'll be able to view all the details of the queue. Refer to the screenshot below.
You can also edit (  ) or delete (
 ) a Queue from the View window.
Editing a queue
You can edit an existing queue by following the steps given below.
-
Select the queue that you want to edit.
-
Click the
icon under Actions column. -
Click Edit.
You can't edit the name of a queue. -
Edit the required fields.
-
Click Save.
Deleting a queue
You can delete an existing queue by following the steps given below.
-
Select the queue that you want to delete.
-
Click the
icon under Actions column. -
Click Delete.
The system asks you for confirmation. -
In the Confirm dialog box, click Yes, delete it.
You cannot delete a queue that is subscribed by a deployment. To delete a queue, you first need to unsubscribe it from the deployment.