Creating a Deployment
After you have created a dedicated queue for the prioritized execution of Transactions, Templates, or Process Flows, you need to create a corresponding runtime deployment that can subscribe to and process the messages of that Queue.
To create a runtime deployment, follow the instructions given below.
-
On the Account menu, click Maintenance.
-
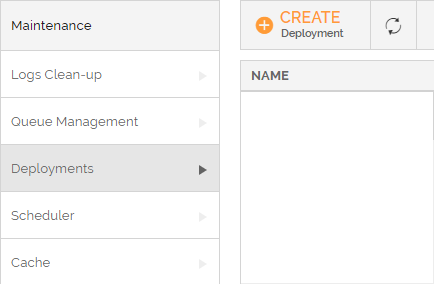
In the left panel, select Deployments.
-
On the Deployments manage page, click Create Deployment.
-
In the Add Deployment window, do the following,
-
In the Deployment definition section, enter the details in the following fields.
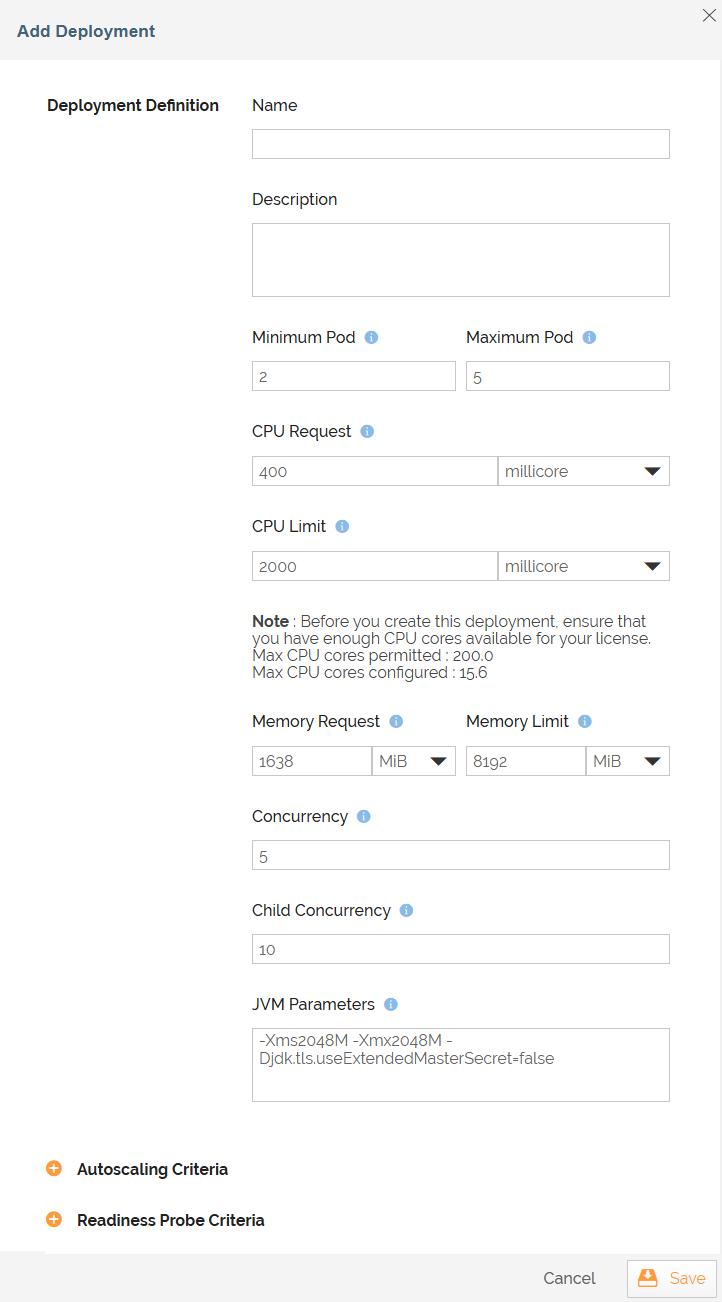
Field Description Name A name for the deployment. Description A description for the deployment. Minimum Pod The minimum number of pods you want to start with. Maximum Pod The maximum number of pods you want to have in the deployment. CPU Request The minimum CPU cores you want to allocate to a pod in the deployment. CPU Limit The maximum CPU cores a pod in the deployment can use. Memory Request The minimum memory you want to allocate to a pod in the deployment. Memory Limit The maximum memory a pod in the deployment can use. Field Description Name A name for the deployment. Description A description for the deployment. Minimum Pod The minimum number of pods you want to start with. Maximum Pod The maximum number of pods you want to have in the deployment. CPU Request The minimum CPU cores you want to allocate to a pod in the deployment. CPU Limit The maximum CPU cores a pod in the deployment can use. Memory Request The minimum memory you want to allocate to a pod in the deployment. Memory Limit The maximum memory a pod in the deployment can use. Concurrency The maximum number of RabbitMQ messages that a dedicated deployment pod can process at a time. 
If required, you can update the concurrency for the shared runtime deployment by following the steps given below:
- Open the values.yaml file.
- In the runtimedeploymentmanager section, set the value for the environment variable CONCURRENCY based on your requirement.
- On the Helm CLI, run the command in the following format:
<ch:codesample>Where,
</ch:codesample>- my-adeptia-connect is the name of the release.
- adeptia-connect/adeptia-connect is path of the application helm repository.
- Version is the version of Adeptia Connect that you want to install.

Use a specific version number for the version argument, else the latest version of Adeptia Connect will be installed. - -f denotes file.
- adeptia/values.yaml is the location of the values.yaml file.
- -n denotes namespace.
- Namespace is the namespace in the Kubernetes Cluster to which you have deployed the Adeptia Connect application.
Child Concurrency The maximum number of child Process Flows that a dedicated runtime pod can process at a time.
You can update the child concurrency for the shared runtime deployment by setting the value for RABBITMQ_CHILD_CONCURRENCY variable in deploymentmanager > env section in values.yaml.You can configure this setting through values.yaml or the UI only if you have enabled Redis in Adeptia Connect.JVM Parameters The JVM parameters you want to specify for a pod. -
In the Autoscaling Criteria section, enter the details in the following fields.
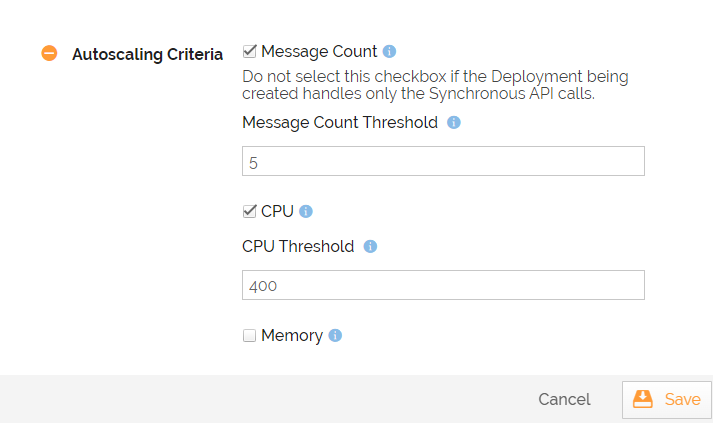
Field Description Message Count The option to enable autoscaling based on the number of messages in the Ready state in the queue This field is enabled only if you configure and deploy the application to use KEDA for autoscaling. Message Count Threshold The threshold value of the messages (in Ready state in the queue) at which you want the system to scale up/down a pod. This field appears only when you select the Message Count checkbox. CPU The option to enable autoscaling based on the CPU utilization. CPU Threshold The threshold value (in percentage of CPU Request defined for the pods) at which you want the system to scale up/down a pod. This field appears only when you select the CPU checkbox. Memory The option to enable autoscaling based on memory utilization. Memory Threshold The threshold value (in the percentage of Memory Request defined for the pods) at which you want the system to scale up/down a pod. This field appears only when you select the Memory checkbox. -
In the Readiness Probe Criteria section, enter the details in the following fields.

Field Description CPU Select this checkbox if you want to configure a check for CPU utilization.
CPU Threshold Threshold value (in percentage of allocated CPU request) for CPU utilization. If the pod CPU utilization goes beyond this value, the pod will not accept any more requests to process.
Ensure that this threshold value is always greater than the HPA target CPU utilization percentage value.
-
-
Click Save.
For default values for these fields, refer to the section Deployment Configuration on the page Microservice Settings - Runtime.
Activating a deployment
A deployment that you have created can process the messages of a queue only when the deployment is active. You can activate a deployment by turning it ON on the Deployments manage page.
Prerequisite
| Before you activate a deployment, you need to subscribe the deployment to a queue that is in an active state. |
It may take a while for the deployment to go into the active state.
Subscribing a deployment to a queue
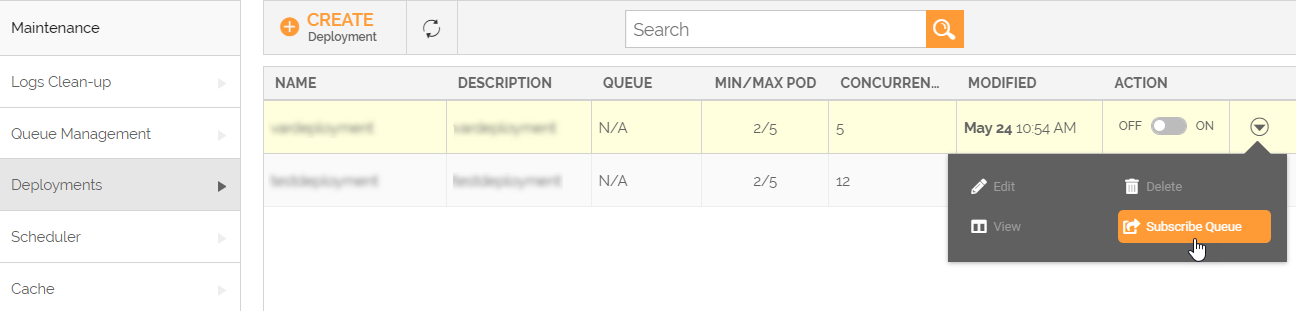
To subscribe the deployment to an active queue, follow the steps given below.
-
Select the deployment that you want to view.
-
Click the
 icon under Actions column.
-
Click Subscribe Queue.
-
On the Subscribe Queue window, select the Queue you want the deployment to subscribe to, and click Save.
|
|
 > Unsubscribe Queue).
Viewing a deployment
You can view an existing deployment by following the steps given below.
-
Select the deployment that you want to view.
-
Click the
icon under Actions column. -
Click View.
You'll be able to view all the details of the deployment.
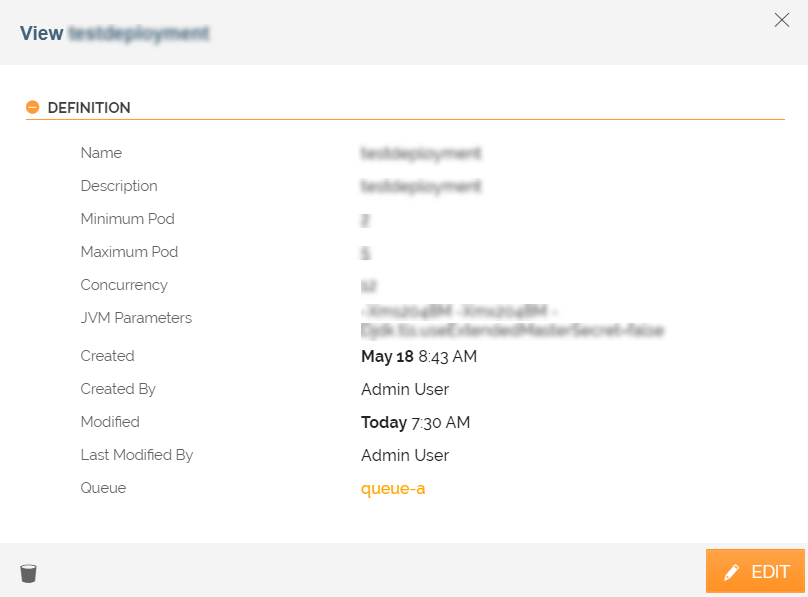
| You can also edit ( ) or delete ( ) or delete ( ) a Deployment from the View window. ) a Deployment from the View window. |
Editing a deployment
You can edit an existing deployment by following the steps given below.
-
Select the deployment that you want to edit.
-
Click the
icon under Actions column. -
Click Edit.
-
Edit the required fields.
-
Click Save.
Deleting a deployment
You can delete an existing deployment by following the steps given below.
- Select the deployment that you want to delete.
- Click the icon under Actions column.
- Click Delete.