Creating a Role
Adeptia Connect provides the user with a role-based access. You can create a role to define the access to the activity and user rights may vary depending upon their role defined.
While creating a role you have the flexibility to create a role specifically for a company or partner. There is a possibility that one user is managing more than one company/partner, and this user needs different roles and permission. For example, a user may have access to create a transaction for a specific partner, but for another partner, the same user can only view the transaction.
To understand it better, say there are two users, namely Andy and Michelle, who manage two Partners (e.g. Walmart, Target) transactions. Andy manages transactions for Walmart, and Michelle does that for Target. In this use case, the requirement is that Andy should not be able to see the Transactions that Michelle is creating or managing and vice versa. We can achieve this by creating users in GAC with the following rights:
User | Company/Partner | Role | Permission |
|---|---|---|---|
| Andy | Walmart | Account Administrator | L/R/W/E (Transaction) |
| Andy | Target | File Submitter | R/E (Transaction) |
| Michelle | Target | Account Administrator | L/R/W/E (Transaction) |
| Michelle | Kohls | File Submitter | R/E (Transaction) |
 | Users can be assigned multiple roles as per the requirement, and they can select a specific role when they log in. |
| Only a System Admin and an IT User can create a role. |
This page contains the following information:
Creating a Role
Follow the steps below to create a role:
-
Go to Account and click **Roles.
** -
Click Add Role.
-
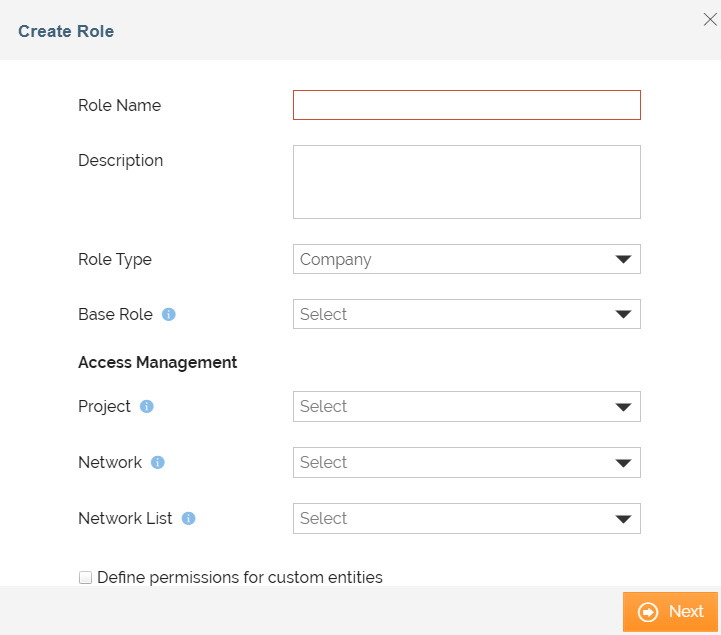
On the Create Role screen, enter the name and description of the new role in the text boxes of Role Name and Description respectively.
-
Select any of the following in the Role Type field based on your requirement.
Role Type Description Company A user with a Company role type can access the entities based on projects as well as the entities associated with the Network and the partners therein.
A Company user, however, cannot access a transaction (created for a partner) based on projects. Company Only A user with Company Only role type can access the entities including transactions based only on the project you select while creating this role. Partner User with Partner role type can access only their own entities. -
Select the Base Role from the drop-down list of Base Role to define the permission.
If you are creating a role for Partner then select the base role as 'Partner IT User' or 'Partner Business User' from the drop-down list. -
Select the project from the drop-down list of Project.
You can select the multiple projects from the drop-down list to which you want to have access. -
Select the Network for the role you are creating from the drop-down list of Network. To select multiple Networks from the drop-down list, click on the networks one by one. User(s) with this role will be able to manage only selected network(s) while working on the Networks page in Adeptia Connect.
-
Select the Networks for the role from the drop-down list of Network List. Selected network(s) will be shown in the list wherever the user needs to choose the network(s). Networks selected in the above step will automatically be added to Networks' list.
Company Only users have an implicit access to the list of all the Networks. -
Select the Define permissions for custom entities checkbox if you want to configure the permission set for this custom role on a custom entity.
Define permissions for custom entities checkbox is visible on the Create Role interface only when you have already created a custom entity. Selecting this checkbox enables you to configure the permission set for the custom role on that custom entity.
-
Select the Allow user ownership of migrated object check box if you want to assign the ownership of the objects to this custom role while importing the objects.
This field appears only when you are creating a custom role of type Company and the base role is not the Sys Admin. -
Click Next to define the permissions.
-
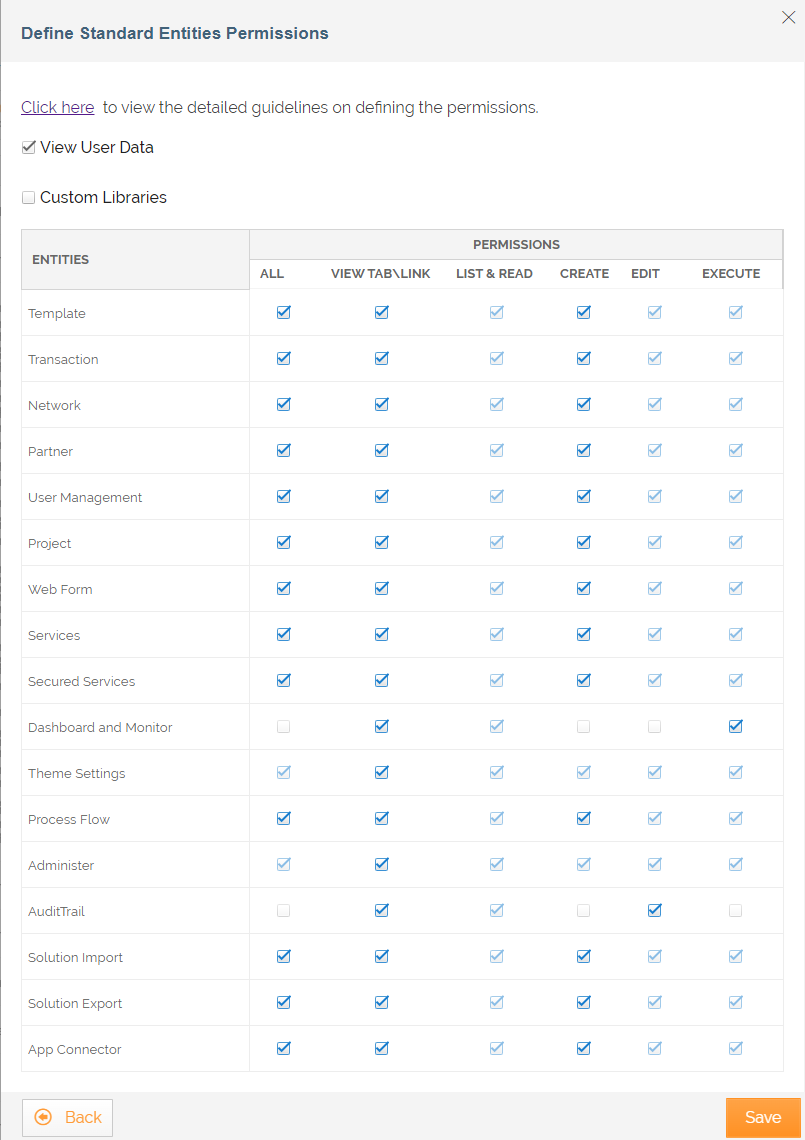
On the Define Standard Entities Permissions screen, you can do the following:
-
Click the text Click here to view the detailed guidelines on defining the permissions.
-
Deselect the View User Data checkbox (by default, selected) to prevent the users with this role from seeing the sensitive information that you may have masked. By default, this checkbox is selected. For more details on masking the sensitive information, click here.
-
Select the Custom Library checkbox (by default, deselected) to allow the users with this role to upload custom classes and jars using the application's UI.

This checkbox is available only when you select Sys Admin as the Base Role while creating the Role. -
Update the permission set for the role on an activity/entity by selecting or deselecting the PERMISSIONS checkboxes based on your requirement. By default, the PERMISSIONS checkboxes are selected based on the Base Role you have selected for the user. For example, selecting ALL against Template grants all the permissions (VIEW TAB\LINK, LIST & READ, CREATE, EDIT, EXECUTE) to the user role on the templates. For more details on defining the permissions for a user, click here.
-
-
If you have not selected the Define permissions for custom entities checkbox, the Save option is available. As you click Save, a message is displayed confirming that the role has been saved successfully and you exit the wizard.
-
If you have selected the Define permissions for custom entities checkbox, follow the steps from 15 through 17.
-
Click Next to define the permission for Custom Entities. By default, no permissions checkbox are selected.
-
On the Define Custom Entities Permissions, define the permission set for the custom role on the custom entities.
-
Click Save.
A message is displayed confirming that the role has been saved successfully and you exit the wizard.
Once the role is created, you can view its details.
Viewing Role details
Once a role is created, you can view role details.
Steps to view role details:
-
Go to Account and click **Roles.
** -
On the Role screen, do either of the following:
- Click
 > **View.
** - Click the name of the role to view details.
- Click
-
On the View Role window, view the details of the role.
Editing Role details
You can modify the details of a role specified while creating a role. This might be necessary for the following situations:
- Role details have been changed.
- Updating Access Management and Permissions of that role.
Only a System Admin and an IT User can edit role details.
To edit role details:
-
Go to Account and click **Roles.
** -
On the Role screen, click
> Edit.If you attempt to edit details of a role that is assigned to a user, an alert message is displayed. -
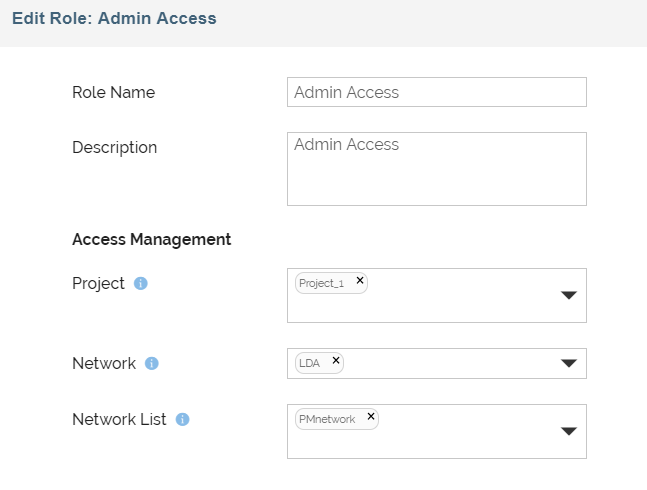
On the Edit Role window, edit the details.
-
Click Save. A message is displayed confirming that the role has been saved successfully.
Deleting a Role
You can delete a role if a role has no objects. Therefore, before deleting a role, ensure that no users are associated with the role.
To delete a role:
-
Go to Account and click **Roles.
** -
On the Role screen, click
> Delete.If you attempt to delete a role that is assigned to a user, an alert message is displayed. -
Click Yes, delete it, when prompted to confirm.
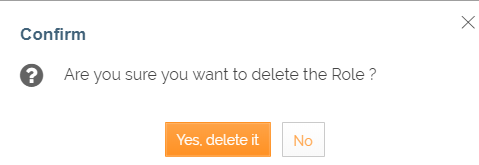 A message is displayed confirming that the role has been deleted successfully.