Installing on Linux
This section assists you in installation of Adeptia Connect on a Linux-based operating system. Refer to System requirements and Prerequisites before you install Adeptia Connect.
Downloading Adeptia Connect
You can download the Adeptia Connect Installer version 3.7 from Adeptia website.
 | If you are using Oracle pluggable database as the Backend and Log database then click here for detailed instructions. |
|---|
Installing Adeptia Connect
- Unzip the zip file. The format of the zip file is: AdeptiaConnect_<version>_<Date>_<OS>_<Architecture>.zip.
For example,AdeptiaConnect_3_5_10June2021_Linux_x64.zip file. 2. Go to the directory where you extracted the zip file. 3. Type the command chmod +x install.binto get the execution permission on installer file. 4. Type the command ./install.bin. 5. The installer starts installing Adeptia Connect and the Introduction screen appears with the installer introduction. 6. Press Enter to continue.
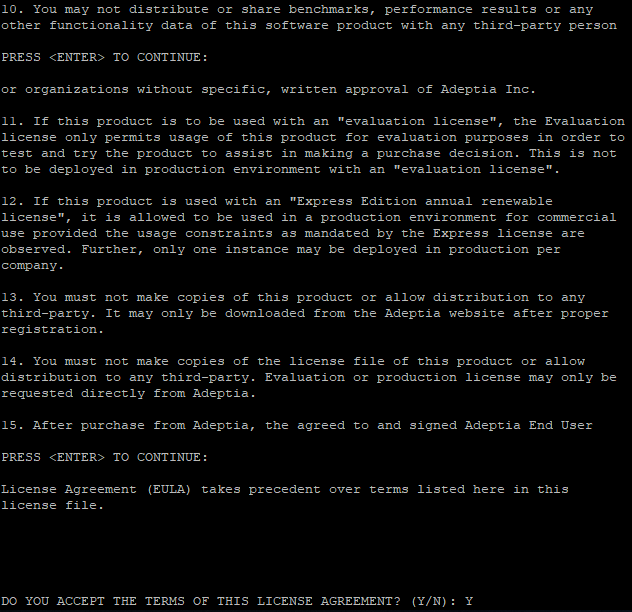
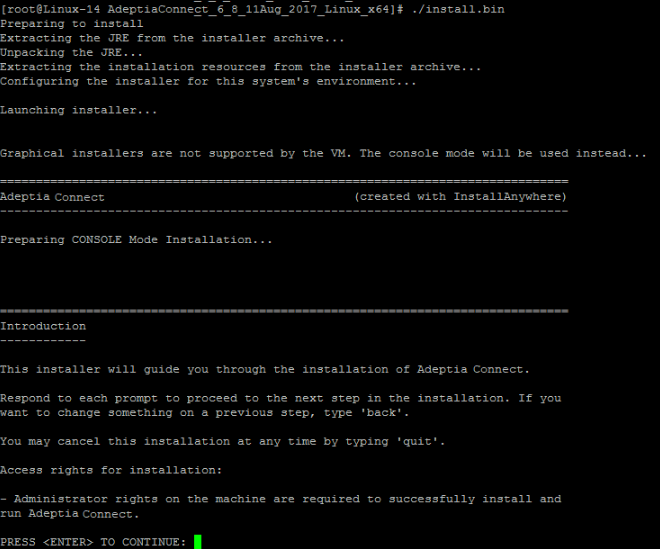 7. The installation requires accepting the terms in the license agreement. Read the agreement carefully and if agree to the terms, type Y.
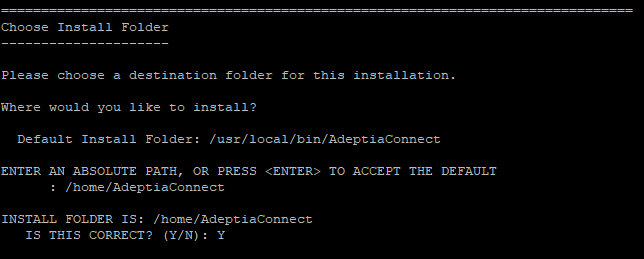
 8. On the Choose Install Folderscreen, type the destination directory where you want to install the Adeptia Connect or allow it at the default location.
 9. On the Choose Install Setscreen, select the type of installation.
 ***Connect Server:***Install only the Server on this machine while Portal part is installed separately on another machine. Install Connect Server before installing Portal.
***Connect Portal:***Install only the Portal on this machine while Server part is installed separately on another machine.
 | The system asks for the Connect Server details and checks for a successful connection to it during the installation of Connect Portal. If the connection fails, you receive the following alert message: Connection to the Connect Server (http://<Server name or IP>:<Port number>/) could not be established. Do you still want to continue? If you select Yes, you will be able to proceed to the next step, else you will remain on the same screen. |
|---|
Both for Single-Server Install: Install both Portal and Server on this machine. Recommended for Trials/Evaluations, Non-Production and simpler Production environments.
| If you are choosing Connect Portal, the installer will display Connect Portal Configuration screen (Step 13 below) to install Connect Portal. |
|---|
Following are the steps for Both option (Single-Server Install).
10. On the Configure Backend Database screen, select the database you want to use for the Backend. Configure the port and make sure that no other application uses this port.
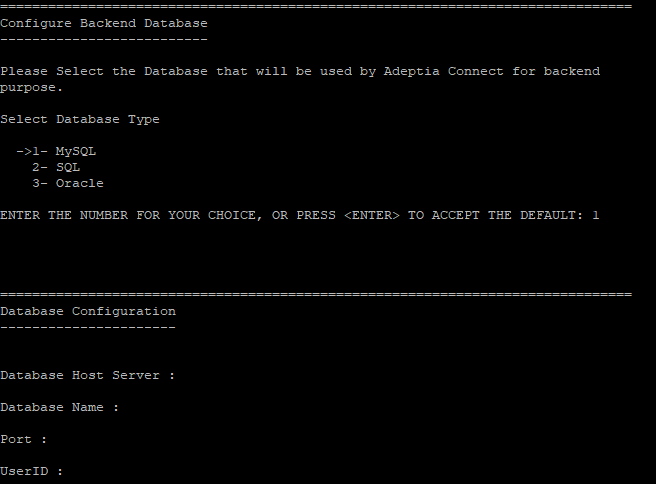
Select the database you need to use for Backend and Log, and provide the details of the selected database.
| Select Database Type | Name of the database that you want to set for logging. Adeptia Connect supports SQL Server, MySQL, and Oracle databases. |
| Database Server Name | Name/IP address of the database server. |
| Port | Port number of the database. |
| Database Name | Name of the database.
If you want to use a named instance of SQL Server for backend database, enter the database name in the following format:
<Database Name>;instance=<SQL instance name>
For example, if your Database Name is AdeptiaDB and instance name is development then the Database Name will be in the format:
AdeptiaDB;instanceName=development;
|
| User Name | Username to access the database. |
| Password | Password to access the database. |
| Confirm Password | Password to confirm. |
| Database Tables | Create New Tables: To create new tables in the defined Adeptia Connect database. Select this option if you are installing Adeptia Connect on a single computer.
Use Existing Tables: To use the existing tables of the Adeptia Connect database. Select this option if you are installing Adeptia Connect in a clustering mode. |
| Name | Description |
|---|
| MySQL | Ensure that you have permission to SELECT, CREATE, DROP, INDEX, ALTER, INSERT, UPDATE, DELETE, REFERENCES, CREATE ROUTINE, ALTER ROUTINE, and EXECUTE for MySQL Database. |
|---|---|
| Oracle | Ensure that you have permission to CREATE SESSION, CREATE TABLE, CREATE ANY TABLE, ALTER ANY TABLE, DROP ANY TABLE, DELETE ANY TABLE, SELECT ANY TABLE, UPDATE ANY TABLE, INSERT ANY TABLE, CREATE ANY INDEX, ALTER ANY INDEX, DROP ANY INDEX,CREATE PROCEDURE, CREATE ANY PROCEDURE, ALTER ANY PROCEDURE, DROP ANY PROCEDURE, and EXECUTE ANY PROCEDURE for Oracle Database. |
| SQL Server | Ensure that you have permission to CREATE TABLE, ADD COLUMN, CREATE INDEX, DROP COLUMN, DROP INDEX, DROP TABLE, CREATE PROCEDURE, ALTER PROCEDURE, EXECUTE, and DROP PROCEDURE for SQL Server Database. |
| If an error is displayed related to time zone while configuring the Backend and Log Database as MySQL then follow the steps below: • Go to the directory where you extracted the zip file. • Type the command ./install.bin -DConfigureDBviaURL=true. • The installer starts installing Adeptia Connect and the Introduction screen appears with the installer introduction. • Perform the steps from 6 through 9 and click Next to view Configure Backend Database screen. • Enter the JDBC URL as jdbc:mysql://<hostname>:<port no.>/<DB Name>?useSSL=false&serverTimezone=<time zone>. Here, Hostname: Name/IP address of the database server. Port No.: Port number of the database. Database name: Name of the database. Time zone: Time zone of your MySQL server • Provide the value of each fields as explained above in the first table of step 10. • Click Next. |
|---|
| If you are using Oracle pluggable database as the Backend and Log database then follow the steps below: • Go to the directory where you extracted the zip file. • Type the command ./install.bin -DConfigureDBviaURL=true. • The installer starts installing Adeptia Connect and the Introduction screen appears with the installer introduction. • Perform the steps from 6 through 9 and click Next to view Configure Backend Database screen. • Enter the JDBC URL as jdbc:oracle:thin:@<hostname>:<port no.>/<DB Name>. Here, Hostname: Name/IP address of the database server. Port No.: Port number of the database. Database name: Name of the database. • Provide the value of each fields as explained above in the first table of step 10. • Click Next. |
|---|
-
On the Configure Log Databasescreen, select the database you want to use for the Log. Configure the port and make sure that no other application uses this port.
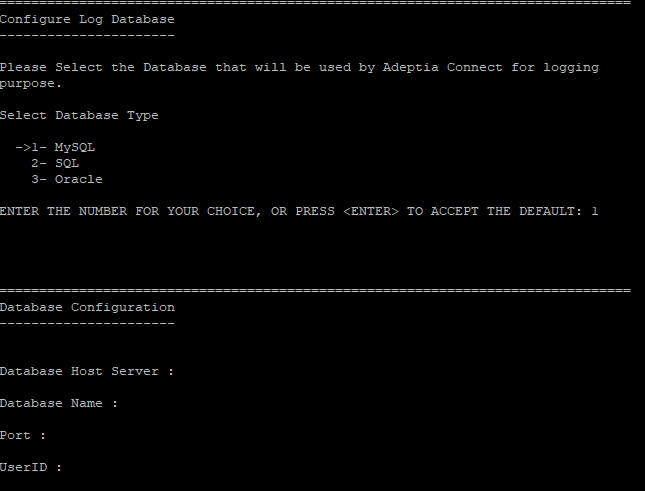
-
Select the Database you want to use for the Log. Follow the step as described in step 10.
-
On the Configure Connect Server screen, configure theKernel and Web Serverinformation**.For information on Kernel and WebRunner, refer to Components of Connect Server.**
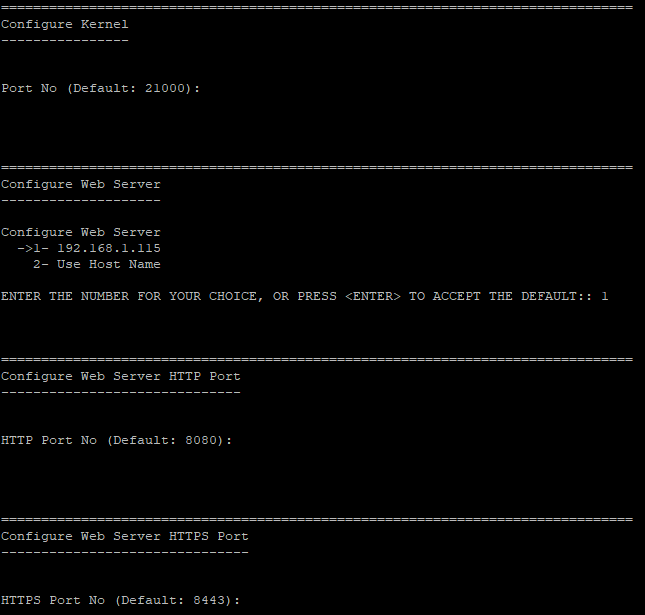

Name Description Configure Kernel Port No Port that the Kernel will use. Make sure that no other application uses this port. By default, the Kernel uses port 21000. Configure Web Server Configure Web Server IP address that Adeptia Connect will use. IP address is required for installing Adeptia Connect in clustering mode. Configure Web Server HTTP Port HTTP Port No HTTP port for Adeptia Connect. Make sure that no other application uses this port. By default, Adeptia Connect uses the 8080 HTTP port in the normal mode. Configure Web Server HTTPS Port HTTPS Port No Secure HTTP port that the machine will use to access Adeptia Connect in a secure mode. Make sure that no other application uses this port. By default, Adeptia Connect uses the 8443 HTTP port in the secured mode. Configure RMI Port RMI Port No Configure the port and make sure that no other application uses this port. By default, it uses port 1098. Configure AIMap Port AIMap Port No Configure the port and make sure that no other application uses this port. By default, it uses port 7570. -
On the Configure Connect Portal screen, configure the Portal Host, HTTP Port, and Server URL information.
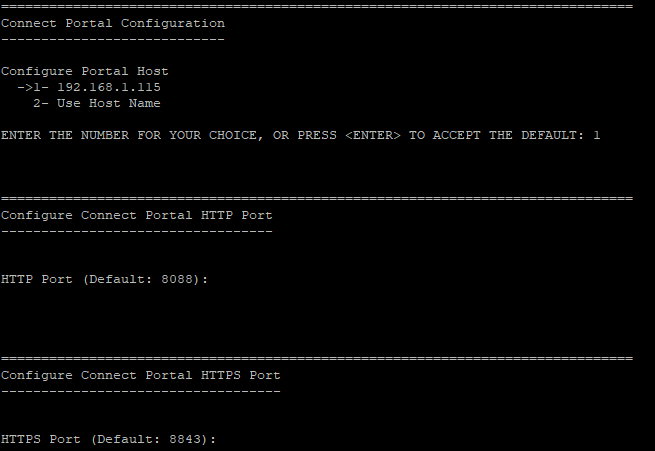

Name Description Configure Portal Host Portal Host IP address that Adeptia Connect will use. Configure Connect Portal HTTP Port HTTP Port HTTP port for Adeptia Connect. Make sure that no other application uses this port. By default, Adeptia Connect uses the 8088 HTTP port in the normal mode. Configure Connect Portal HTTPS Port HTTPS Port Secure HTTP port that the machine will use to access Adeptia Connect in a secure mode. Make sure that no other application uses this port. By default, Adeptia Connect uses the 8843 HTTP port in the secured mode. Configure Connect Server Host (Backend) Connect Server Host IP address/Host Name of the Connect Server. Configure Connect Server Port (Backend) Connect Server Port HTTP port number of Connect Server. By default, Adeptia Connect uses the 8080 HTTP port in the normal mode. -
On the Configure Mailscreen, configure the email to be used for sending email notifications.
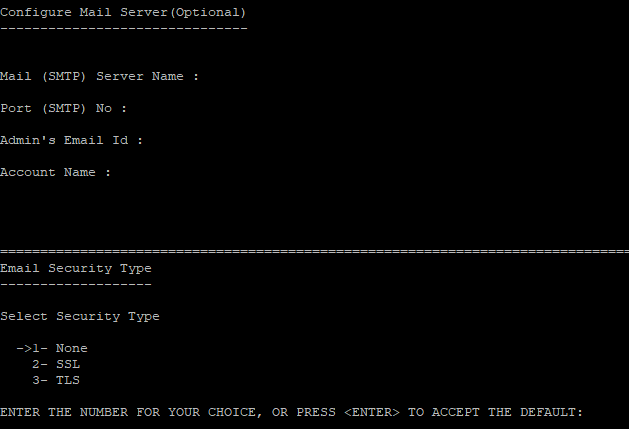
Name Description Mail (SMTP) Server Name Name or IP address of the outgoing mail (SMTP) server. Port (SMTP) No Port number of the outgoing mail (SMTP) server. Admin’s Email Id Email address of Adeptia Connect Administrator or System Administrator. Account Name Username for accessing the specified email account. Email Security Type Type of Security - SSL and TLS. SSL for email communication, if your email server uses SSL. -
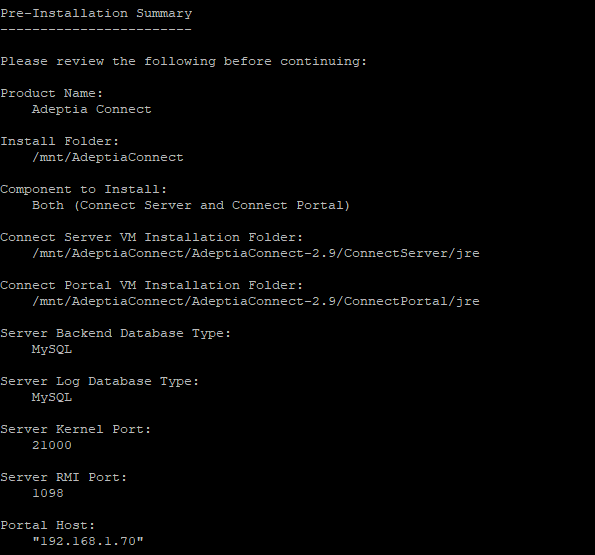
The Pre-Installation Summary displays the brief summary of all settings selected while installing Adeptia Connect. Review the summary and to begin installation, press Enter.
-
The installer starts installing the Adeptia Connect. After the successful installation, the Installation Complete appears.
-
Press Enter to exit from the installation wizard.
| The installer creates a log file (AdeptiaConnect_InstallLog.log) to the folder where you have installed. Refer to this file to know the errors occurred while installing Adeptia Connect. |
|---|