Using New Project Option
To design a web form in Sencha Architect using New Project option, follow the steps given below:
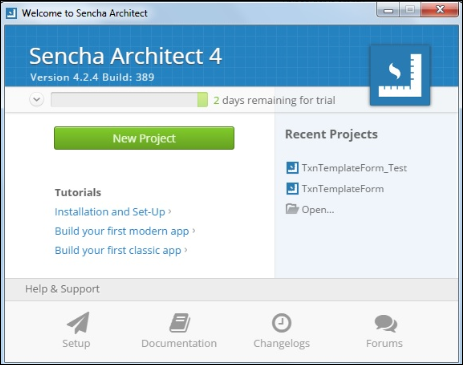
- Open the Sencha Architect and click New Project to create a Web Form. Click here for Sencha Architect Tutorial.
 2. Choose the framework Ext JS 6.6.x Classic at the top-right of the New Project screen.
3. Select the Blank Project and click Create.
2. Choose the framework Ext JS 6.6.x Classic at the top-right of the New Project screen.
3. Select the Blank Project and click Create.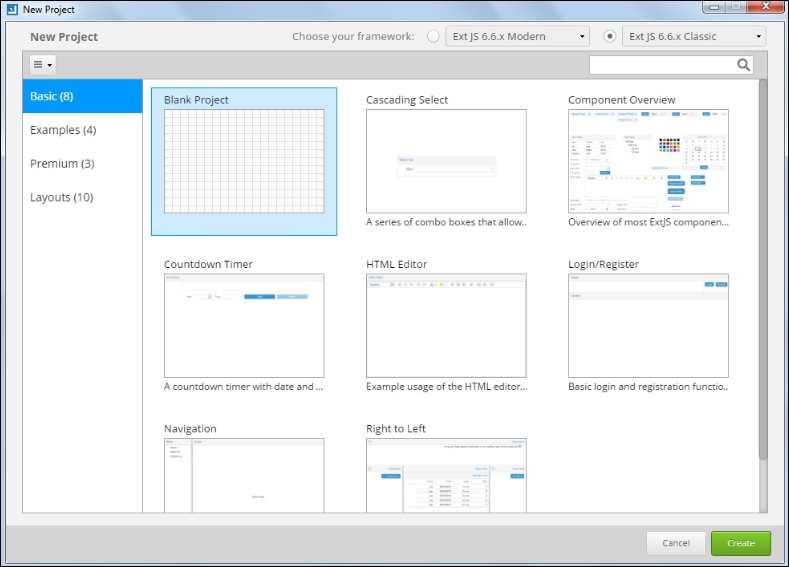 4. Select the Form Panel from right hand Toolbox Panel and Drag and Drop to the center canvas.
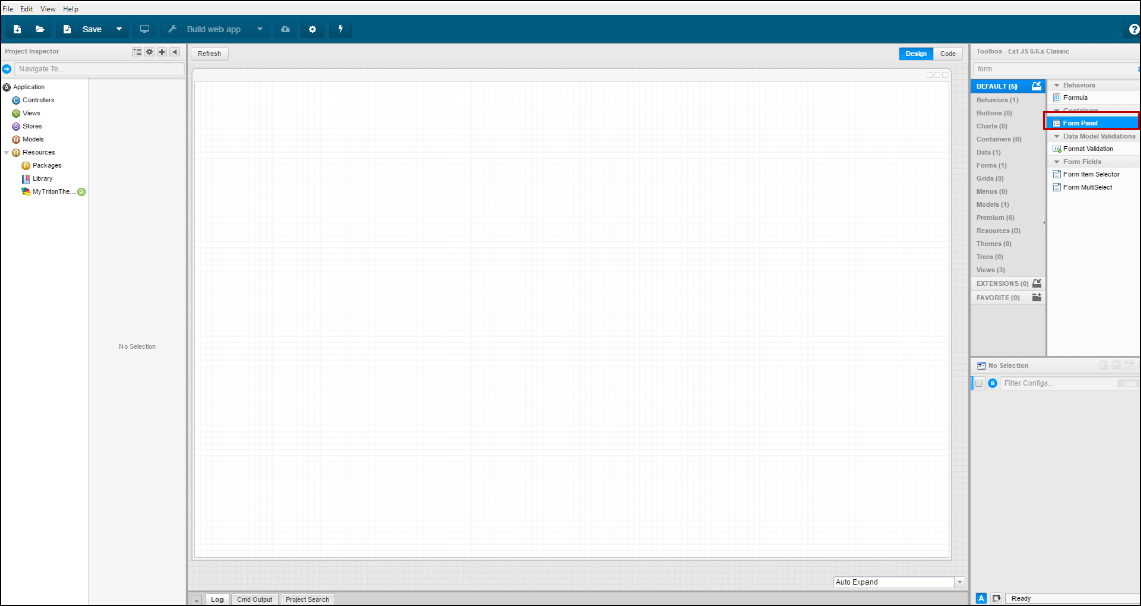 5. Design a form by using Sencha drag-and-drop feature. Choose components from the right hand panel and drop them on the center canvas.
 6. Select the field and search the Name attribute from the right hand attribute panel. Enter the Name which will appear in the JSON schema.
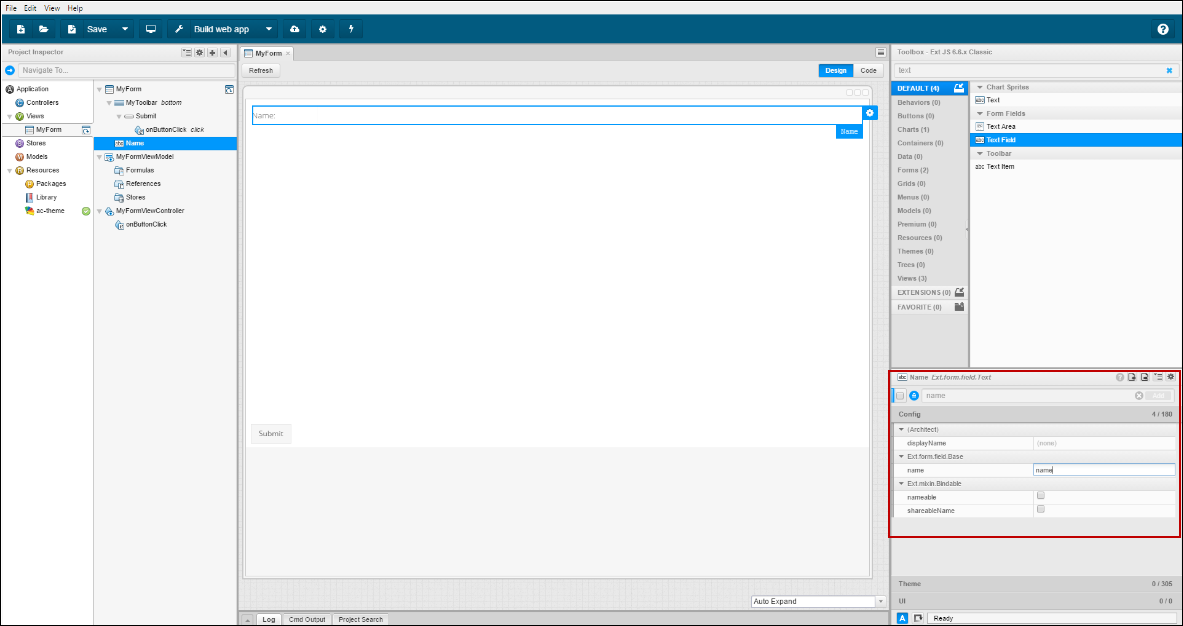 7. Create Submit button with the help of Project Inspector and Attribute Panel. To create Submit Button, follow these steps:
-
Drag and Drop the Button from right hand Toolbox Panel to the center canvas.
-
Rename the Button as required (e.g. Submit).
-
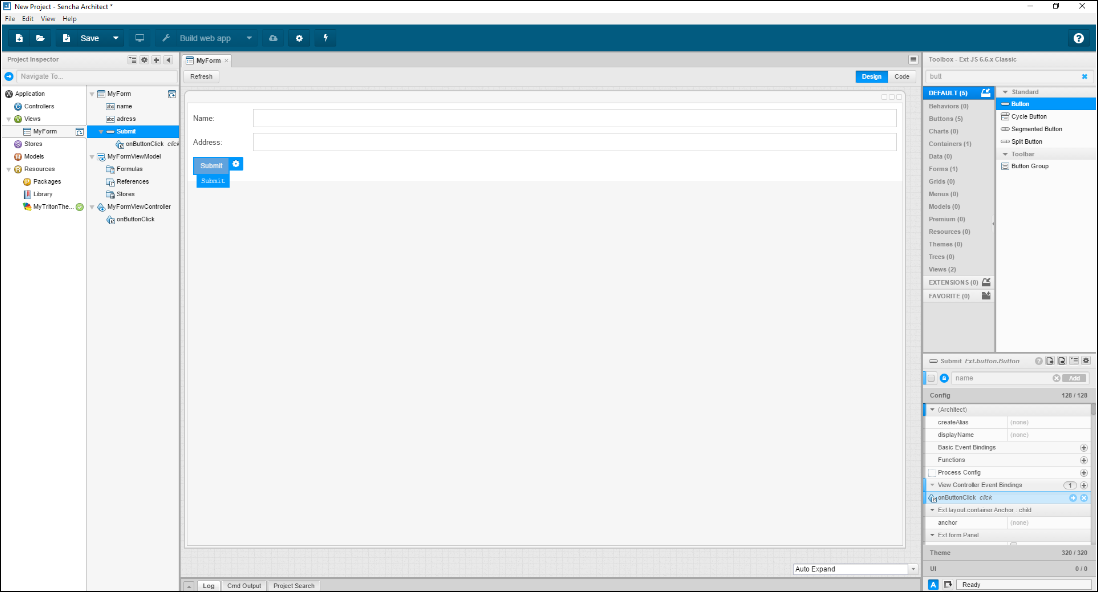
Right click the Submit Button in Project Inspector Panel.
-
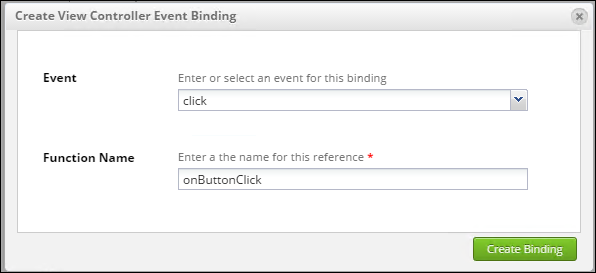
Select the Event 'Click' from the drop-down list and provide Function Name.
-
Click Create Binding.
-
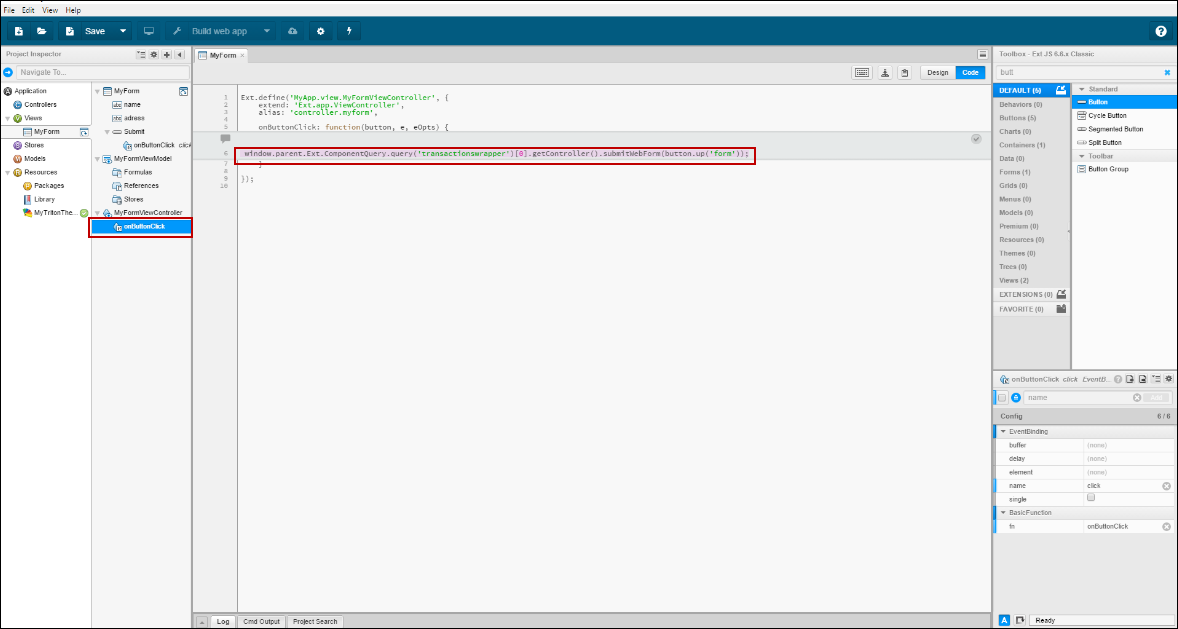
Click onButtonClick from Project Inspector Panel and add the code window.parent.Ext.ComponentQuery.query('transactionswrapper')[0].getController().submitWebForm(button.up('form')); in Code Tab.
-
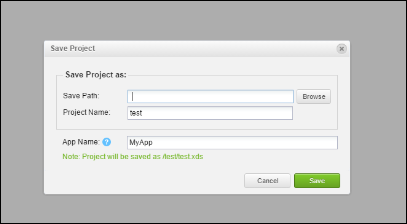
To save the project, provide the path and click Save.
-
Click
 and select Build Settings from the drop-down list.
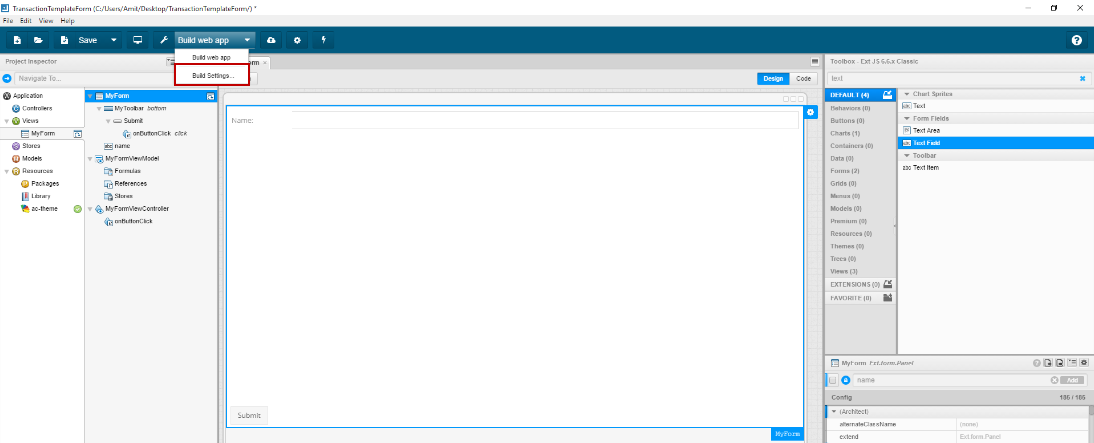 11. Select Production as Environment and provide the publish path. Click Saveand the application will appear with specified project name in the provided Publish Path.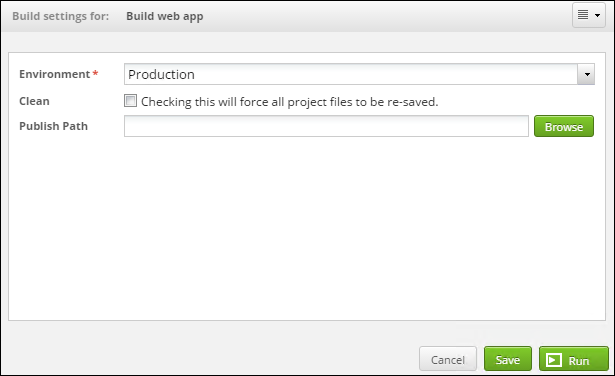
 | Choosing Production as Environment will process your Web Form quickly as it compress the files. |
|---|
| Click P review button to preview the Web Form. Your default browser will open a new tab showing the Web Form. |
|---|