Adding bulk users
Instead of adding users manually one at a time, a user (Sys Admin, IT User, and Partner IT User) can add multiple users in one go through bulk import. To do this, the user needs to use a CSV (comma separated values) file that contains the users' data.
 | This feature does not work if you have multi-mode authentication enabled. |
|---|
Importing bulk users
Steps to add bulk users:
-
Click Account > Users.
-
On the Users screen, click Import Users.
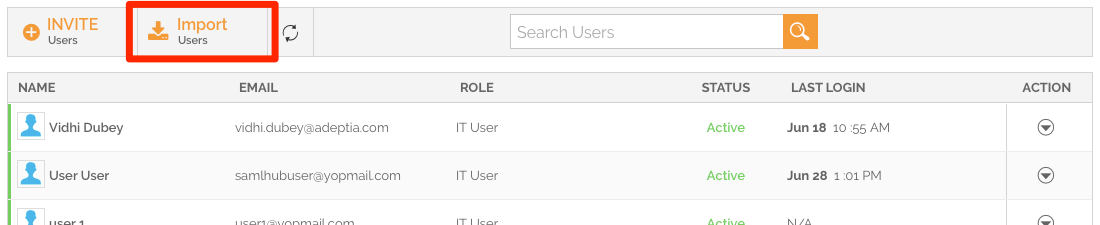
-
On the Import Users screen, follow the next set of instructions based on your role type.
-
If you are a Sys Admin or IT user,
-
Select either of the followings:
- For Company if you want to import Company users.
- For Partner if you want to import Partner users.
-
Click Browse, and upload the CSV file containing the users' details.
For more information on the CSV file format, refer to this section.
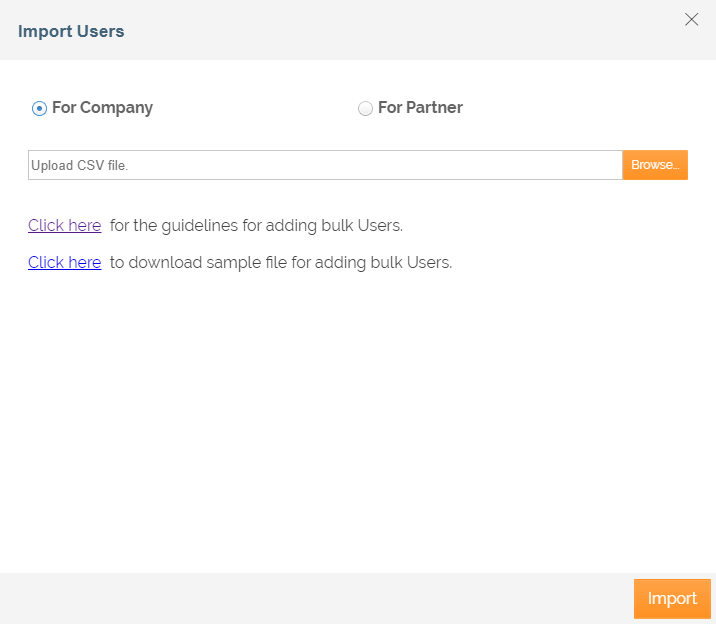
-
-
If you are a Partner IT User,
- Click Browse, and upload the CSV file containing the Partner users' details.
For more information on the CSV file format, refer to this section.
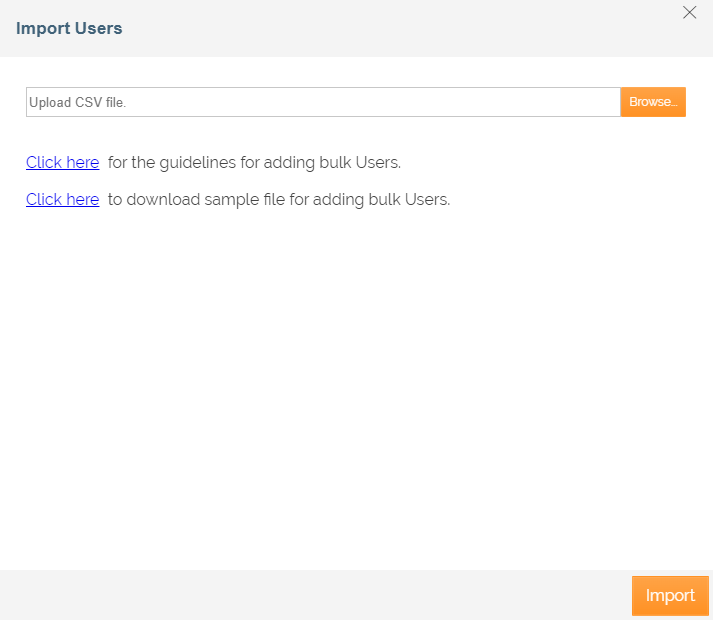
- Click Browse, and upload the CSV file containing the Partner users' details.
For more information on the CSV file format, refer to this section.
-
-
Click Import. On the Users screen, Processing notification shows that the users are being added. You can notice the increased count in the Users section on the left side of the screen. You can click
 (refresh) to see the users being added.
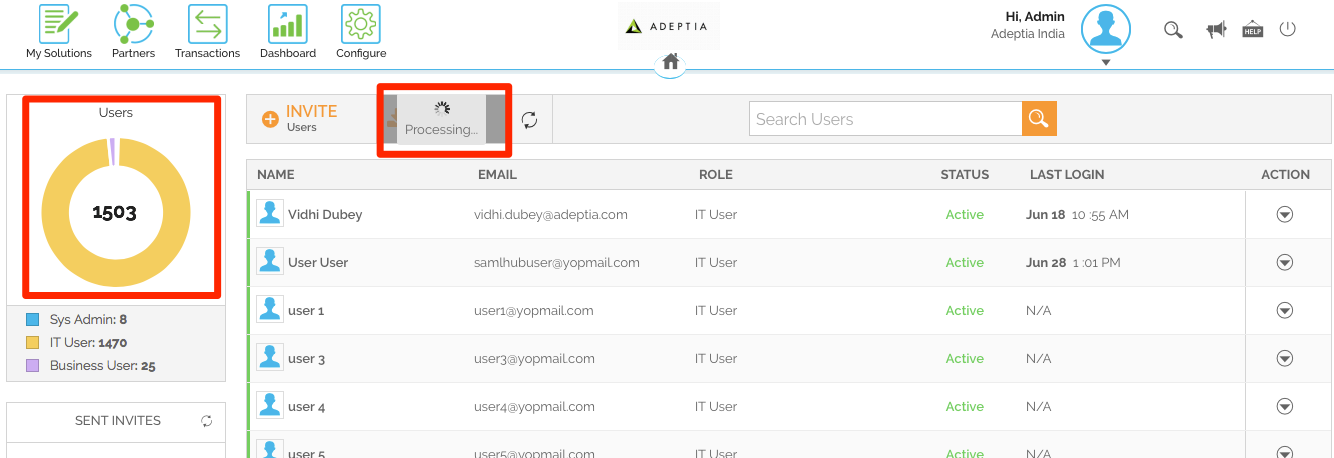 Added users can be seen in Active state on the Users screen.
The added users through bulk upload do not receive any email notification or invitation.
Using CSV file for bulk import
If you are a Sys Admin or an IT User, you can import Company users and the Partners users as well.
The following is a CSV file format with sample data to import Company users.
 | You can use this CSV file format to import Company users (IT User, Business User, Sys Admin, View Only User) only. |
|---|
| First Name | Last Name | User Id | Email Id | Role Name | Password |
|---|---|---|---|---|---|
| John | Doe | john_1 | john.doe@abc.com | IT User | J@hn1234 |
| Jane | Roe | jane1 | jan.roe@abc.com | Business User | J@ne1234 |
| Jean | Soe | jean_1 | jean.soe@abc.com | Sys Admin | J@an1234 |
| James | Paul | james1 | james.paul@abc.com | View Only User | J@mes1234 |
The following is a CSV file format with sample data to import Partner users.
| You can use this CSV file format to import Partner users (Partner IT User, Partner Business User, Partner View Only User) only. |
|---|
| First Name | Last Name | User Id | Email Id | Role Name | Password | Partner's Name |
|---|---|---|---|---|---|---|
| Sharon | Ellis | Sharon_1 | sharon.ellis@xyz.com | Partner IT User | J@mes1234 | xyz |
| Robert | Dimick | Robert_1 | robert.dimick@xyz.com | Partner Business User | J@mes1234 | xyz |
| Dwayne | Felch | Dwayne_1 | dwayne.felch@xyz.com | partner View Only User | J@mes1234 | xyz |
If you are a Partner IT User, you can import only the Partners users.
| A Partner IT User cannot import Partner View Only type of users. |
|---|
The following is a CSV file format with sample data to import Partner users.
| You can use this CSV file format to import Partner users (Partner IT User and Partner Business User) only. |
|---|
| First Name | Last Name | User Id | Email Id | Role Name | Password | Partner's Name* |
|---|---|---|---|---|---|---|
| Sharon | Ellis | Sharon_1 | sharon.ellis@xyz.com | Partner IT User | J@mes1234 | xyz |
| Robert | Dimick | Robert_1 | robert.dimick@xyz.com | Partner Business User | J@mes1234 | xyz |
The fields of the CSV file are described in the following table.
| First Name | Enter the first name of the user. Allowed texts: Alphabet and Alphanumeric. |
|---|---|
| Last Name | Enter the last name of the user. Allowed texts: Alphabet and Alphanumeric. |
| --- | --- |
| User Id | Enter the User Id of the user. Alphanumeric, Underscore are allowed and must use only lowercase, e.g. jane1. |
| --- | --- |
| Role Name | Mention the user type, for example, IT User, Business User, Sys Admin, etc. You can assign multiple custom roles, standard roles, or combination of both to a user. |
| --- | --- |
| Password | Enter a password for the user. Password length should be a minimum of 8 characters with the combination of one uppercase, one lowercase, one numeric, and one symbol (e.g.:J@hn1234) |
| --- | --- |
| Partner Name | Enter the name of the Partner to which the Partner user belongs. Only names of existing partners can be inserted in the CSV file. |
| --- | --- |
Assigning multiple roles to a user
You can assign multiple custom roles, standard roles, or combination of both to a user. However, you can assign multiple roles only when GACis enabled.
For example, for assigning multiple roles to a user, you would write **"IT User, ABC"**in the Role Name column of the CSV file. Multiple roles should be separated by a comma and in double quotes. The user who is assigned with multiple roles will see all roles in the drop down list while logging in for the first time. There, the user will have to choose one of the assigned roles.